Herein you’ll find articles on a very wide variety of topics about technology in the consumer space (mostly) and items of personal interest to me. I have also participated in and created several podcasts most notably Pragmatic and Causality and all of my podcasts can be found at The Engineered Network.
RaspiBlitz SSD Upgrade
I’ve been running my own node now for nearly 9 months and when it was built, the build documentation recommended a 512GB SSD. At the time I had one laying around so I used it, but honestly I knew this day was coming as I watched the free space get eaten up by the blockchain growth over time. I’m also not alone in this either with forums filled with comments about needing to upgrade their storage as well.
The blockchain will only get bigger, not smaller and fortunately the cost of storage is also dropping: the 500GB drive cost about $300 AUD six years ago, and the 1TB same brand similar model today cost only $184 AUD. In future upgrading to a 2TB SSD will probably cost $100 or less in another five years or so time.
This update is going to take a few hours, so during that time obviously your node will be offline. It can’t be helped.
My goals:
- If possible, use nothing but the RaspiBlitz hardware and Pi 4 USB ports (SPOILER: Not so good it seems…)
- Minimal Risk to the existing SSD to allow an easy rollback if I needed it
- Document the process to help others
ATTEMPT 1
- Shutdown all services currently running on the RaspiBlitz
Extracted from the XXshutdown.sh script in the Admin Root Folder:
sudo systemctl stop electrs 2>/dev/null
sudo systemctl stop lnd 2>/dev/null
sudo -u bitcoin bitcoin-cli stop 2>/dev/null
sleep 10
sudo systemctl stop bitcoind 2>/dev/null
sleep 3
[Only use this if you're using BTRFS]: sudo btrfs scrub start /mnt/hdd/
sync
- Connect and confirm your shiny new drive
sudo blkid
The following is a list of all of the mounted drives and partitions: (not in listed order)
- sda1: BLOCKCHAIN Is the existing in-use SSD for storing the configuration and blockchain data. That’s the one we want to clone.
- sdb1: BLITZBACKUP Is my trusty mini-USB channel backup drive. Some people won’t have this, but really should!
- sdc1: Samsung_T5 Is my new SSD with the default drive label.
- mmcblk0: mmc = Micro-Memory Card - aka the MicroSD card that the RaspiBlitz software image is installed on. It has two partitions, P1 and P2.
- mmcblk0p1: Partition 1 of the MicroSD card - used for the boot partition. Better leave this alone.
- mmcblk0p2: Partition 2 of the MicroSD card - used for the root filesystem. We’ll also leave this alone…
If you want more verbose information you can also try:
sudo fdisk --list
- Clone the existing drive to the new drive:
There’s a few ways to do this, but I think using the dd utility is the best option as it will copy absolutely everything from one drive to the other. Make sure you specify a bigger blocksize - the default of 512bytes is horrifically slow, so I used 64k for mine.
sudo dd if=/dev/sda1 of=/dev/sdc1 bs=64k status=progress
In my case, I had a nearly full 500GB SSD to clone, so even though USB3.0 is quick and SSDs are quick, this was always going to take a while. For me it took about three hours but I finally got this error:
dd: writing to '/dev/sdc': Input/output error
416398841+0 records in
416398840+0 records out
213196206080 bytes (213 GB, 199 GiB) copied, 10896.5 s, 19.6 MB/s
Thinking about it, the most likely cause was a dip in power on the Raspiblitz. The tiny little device was trying to drive three USB drives and most likely there was a momentary power dip driving them all, and that was all it took to fail.
ATTEMPT 2
Research online suggested it would be much more reliable to use a Linux distro to do this properly. I had no machines with a host-installed Linux OS on it, so instead I needed to spin up my Virtual Box Ubuntu 19.04 VM.
It was safe enough to power off the RaspiBlitz at this point, so I do that then disconnect both drives from the Pi, then connected them to the PC.
To get VirtualBox to identify the drives I needed to enable USB 3.0 and then add the two drives to the USB filter, reboot the VM and then ran the above but now under Virtual Box.
499975847936 bytes (500 GB, 466 GiB) copied, 4783 s, 105 MB/s
7630219+1 records in
7630219+1 records out
500054069760 bytes (500 GB, 466 GiB) copied, 4784.58 s, 105 MB/s
This time it completed with the above output after about 1 hour and 20 minutes. Much better!
If you want to confirm all went well:
sudo diff -rq sda1 sdc1
An FDISK check now yields this error:
GPT PMBR size mismatch (976773167 != 1953525167) will be corrected by write.
The backup GPT table is not on the end of the device. This problem will be corrected by write.
- Resizing the new drive Step 1
In my case I started with a 500GB drive and I moved to a 1TB drive. Obviously you can use whatever size drive you like (presumably bigger) but to utilise that additional space, you’ll need to resize it after you clone it.
sudo gdisk /dev/sdb
x (Expert Menus)
e (Move GPT Table to end of the disk)
m (Main Menus)
w (Write and Exit)
Y (Yes - do this)
All this does is shift the GPT table away from the current position in the middle of the disk to the end - without doing this you can’t resize it.
- Resizing the new drive Step 2
There’s a few ways to do this step, but in Ubuntu there’s a nice GUI tool that makes it really simple. Starting from the Ubuntu desktop install GParted from the Ubuntu Software library, then open it.
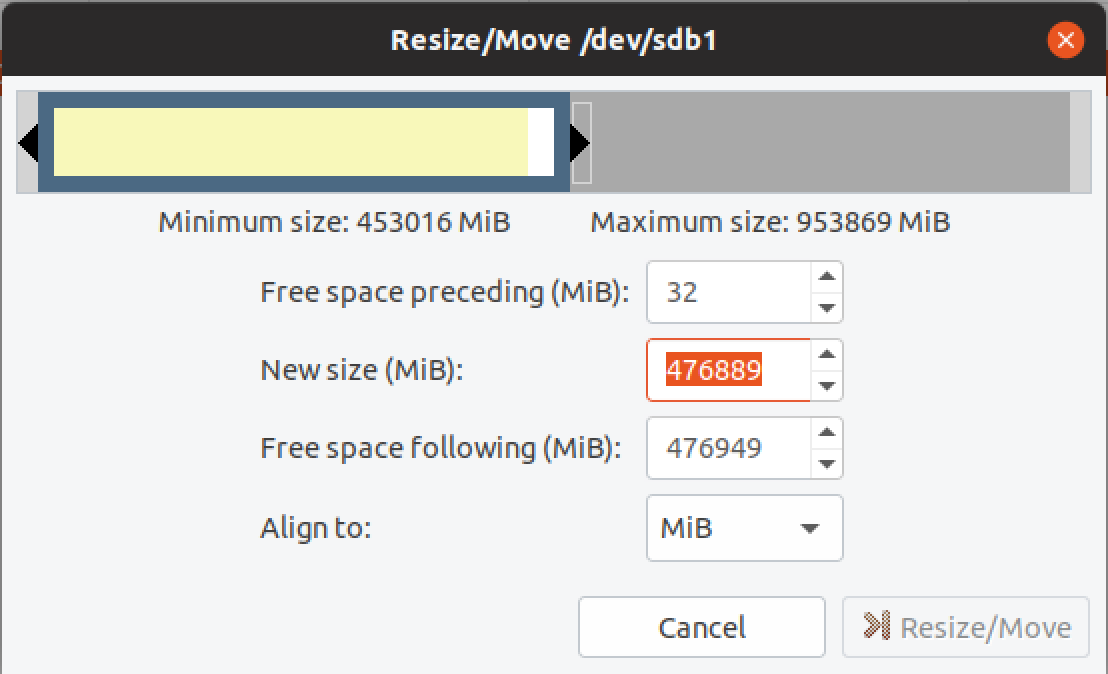
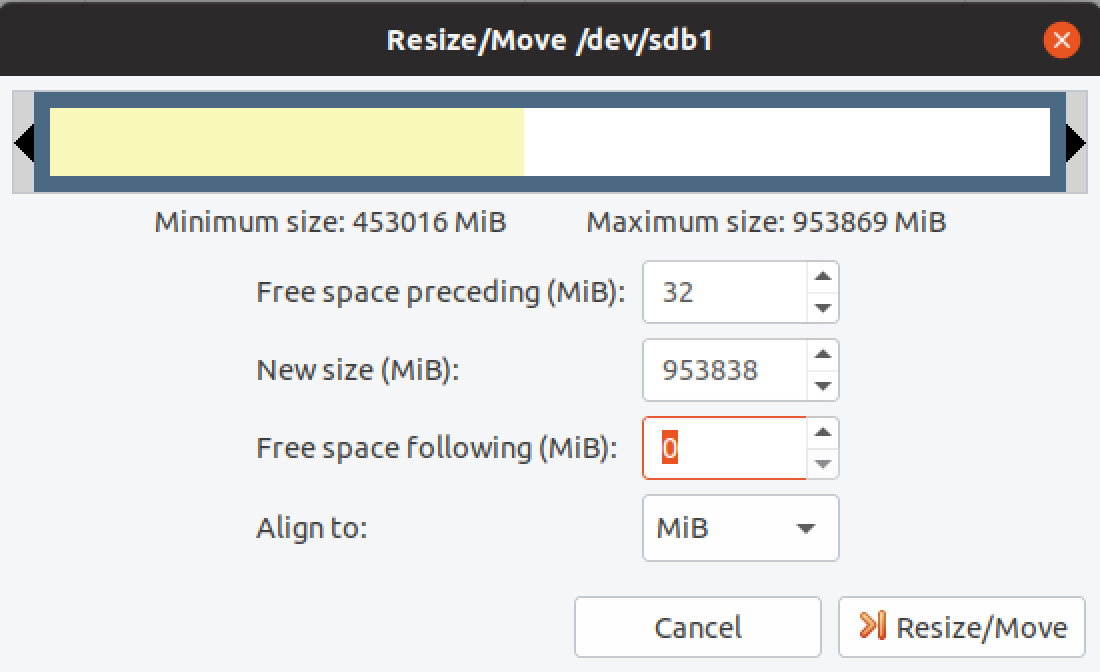
Noting the maximum size and leaving the preceding space alone, I adjusted the New size entry to 953,838 leaving 0 free space following. Select Resize/Move then Apply all operations (Green Tick in the top corner) and we’re done.
- Move the new drive back to the RaspiBlitz and power it on.
Hopefully it starts up and works fine. :)
Conclusion
I left this far too long and far too late. Much later than I should have. My volume was reporting only 3GB free space and 100% utilisation which is obviously not the right approach. I’d suggest people think about doing this when they hit 10% remaining and not much more than that.
The Bitcoin/Lightning also hammers your SSD, shortening its life so swapping out for an identically sized drive would follow all steps except 4 & 5 and should work fine as well.
Whilst this whole exercise had my node offline for 36 hours end to end, there were life distractions, sleep and a learning curve inbetween. It should really only take about 2-3 hours for a similar sized drive.
Good luck!
Managing Lightning Nodes
Previously I’ve written about my Bitcoin/Lightning Node and more recently about setting up my RaspiBlitz.
It’s been five months since then. I’ve learned a lot and frankly the number of websites that actually provide information on how to manage your Lightning Node have a lot of assumed knowledge. So I’d like to share how I manage my node lately with a few things I learned along the way that will hopefully make things easier for others to avoid the mistakes I made.
The latest version of RaspiBlitz incorporates the lovely Lightning Terminal which incorporates Loop, Pool and Faraday into a simple web interface. So we’ll need that installed before we go further. Log into your Raspiblitz via Terminal and when you’re in the web interface, enable both of the below if you haven’t already:
- (SERVICES) LIT (loop, pool, faraday)
- (SERVICES) RTL Web interface
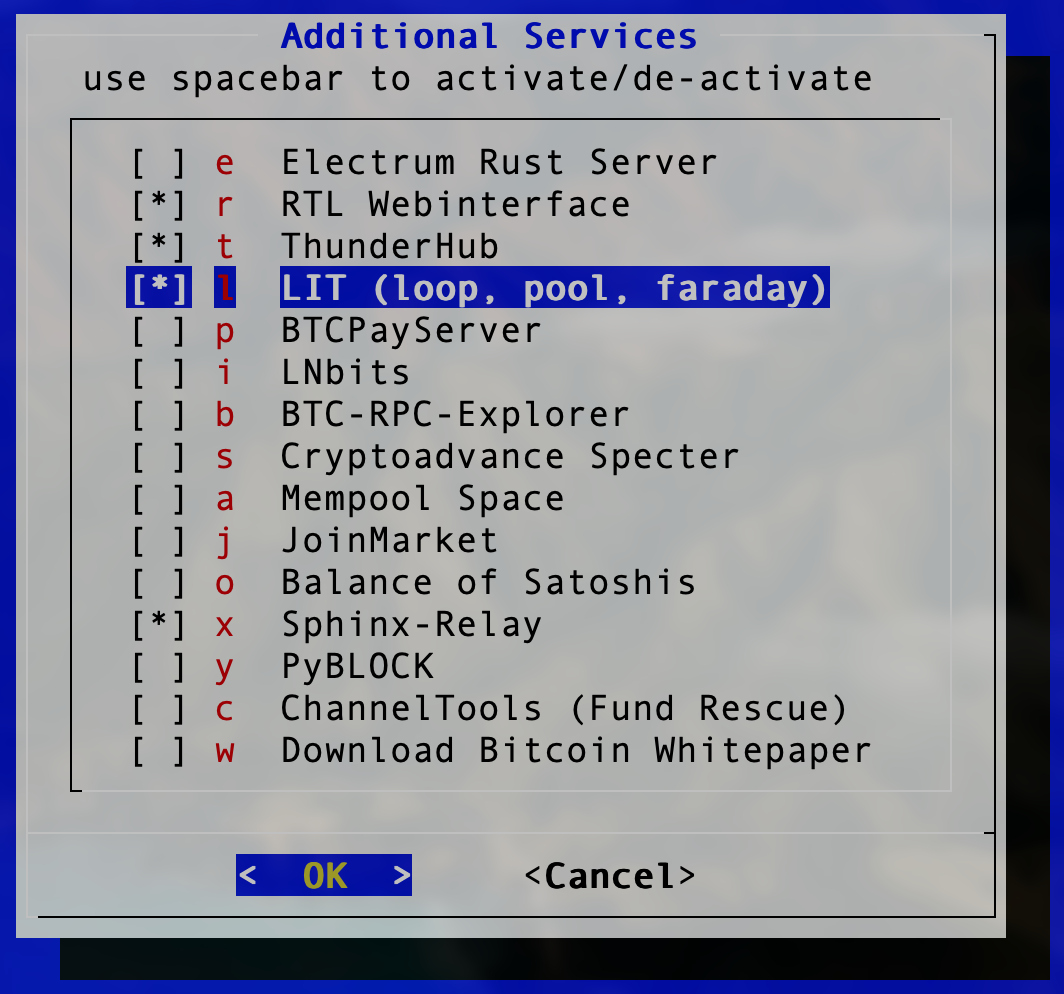 Install LIT from the Additional Services Menu
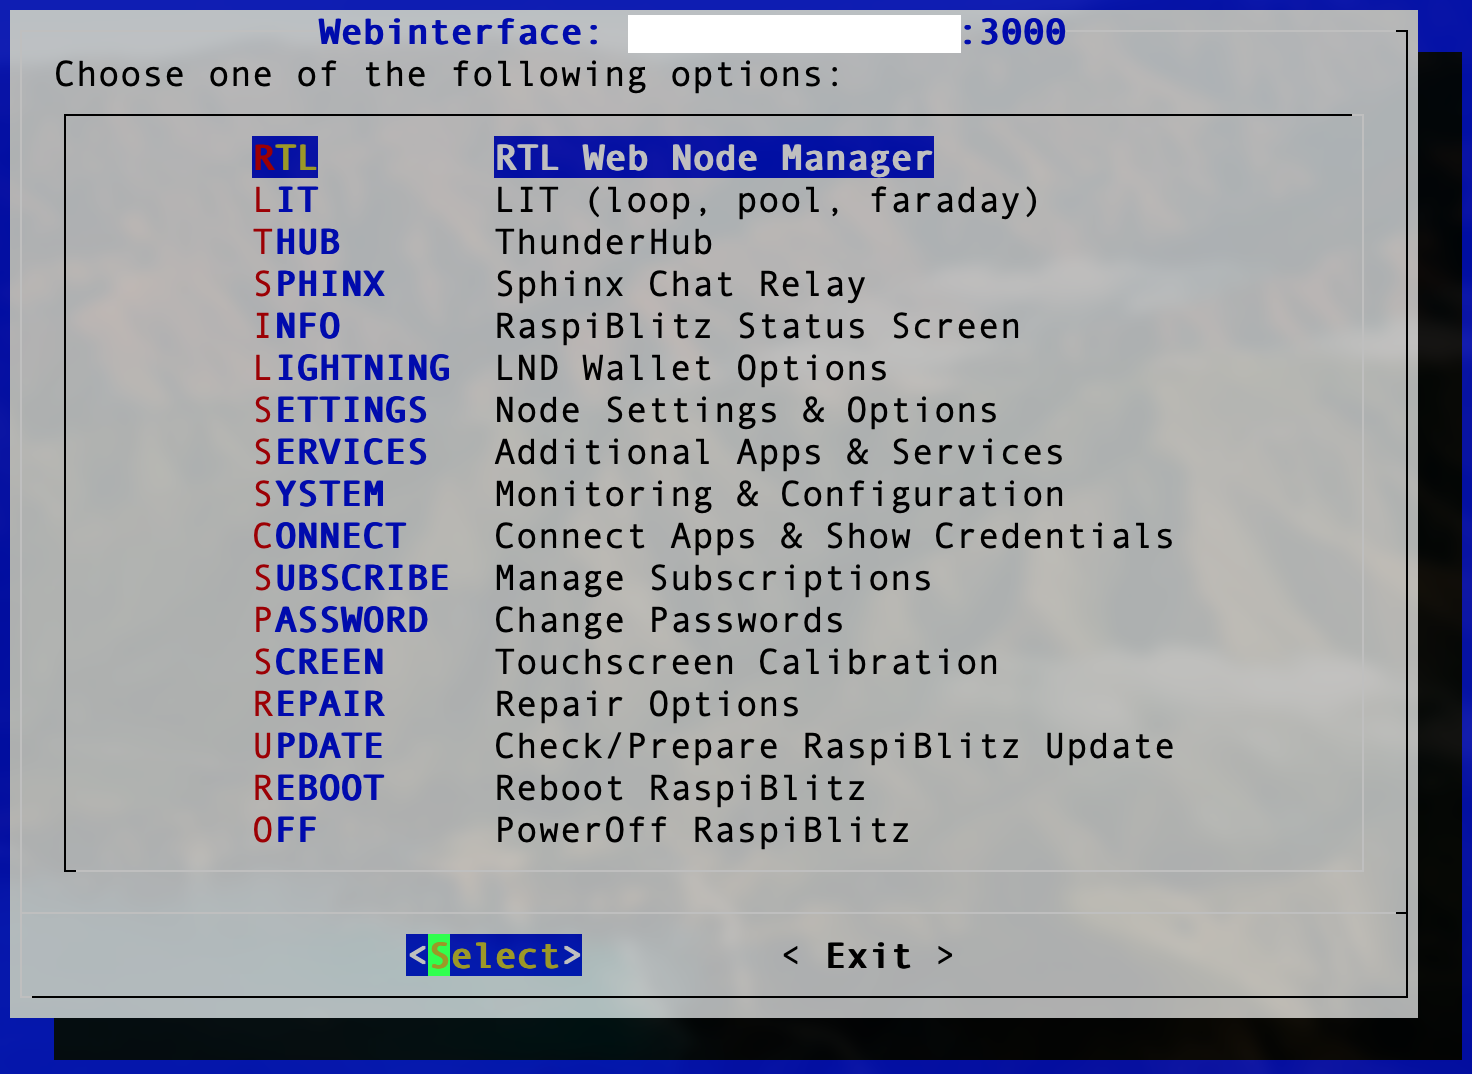 You should see LIT in the User Interface Main Menu Now
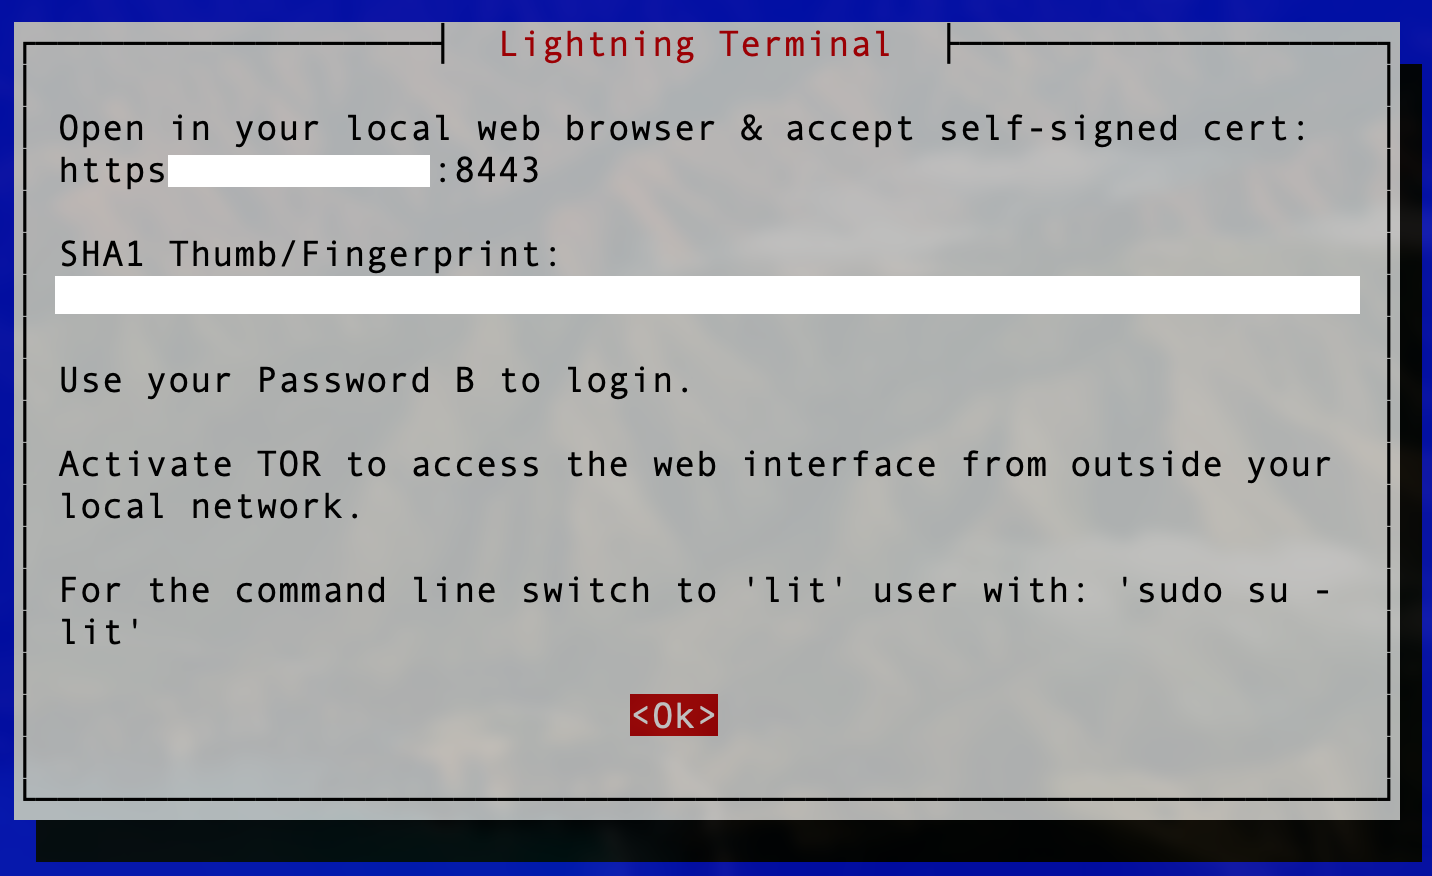 Lightning Terminal note the port and your IP Address to Log in
Initial Funding
When you start adding funds to your node, if you don’t live in the USA, you’re not big on options. In the USA, you can use Strike but otherwise there aren’t any direct Fiat–>Lightning services I’ve found to date. That’s okay but to set up your node you’ll need to buy BitCoin and face the on-chain transaction fee.
The best option I have found is MoonPay and you simply select BTC, (you can change the Default Currency through the Hamburger menu on the top-right if you like), select the value in your Fiat Currency of choice or BitCoin amount, then after you continue, enter your BitCoin/Lightning Node’s BitCoin address (NOT the Lightning Address please…) and then your EMail. Following the verification EMail, enter your payment details and it will process the transaction and your BitCoin shows up.
Previously I’ve used apps that use MoonPay integration like BlueWallet and Breez, but that’s a problem because if you do buy BitCoin, it ends up on your mobile device’s BitCoin Wallet and it’s stuck. You need to then do another on-chain transaction which will cost you more in fees. By using MoonPay directly to your own node’s BitCoin address, you only have to deal with that once.
FYI: A $50 AUD transaction cost me $8.12 AUD in fees, though this is essentially flat so doubling that to $100 AUD and you’re up for $8.14 AUD in fees therefore if you’re setting up a node for the first time, be aware it makes sense to add as much as you can manage to get started. More about that later.
Another FYI: MoonPay has a KYC (Know Your Customer) cut-off value and this is the equivalent of $118USD (0.00271BTC at time of publishing) which requires Identification before they’ll process the transaction. If you’re concerned about this, then you can make multiple transactions but that’ll obviously cost more in fees. And about those fees, you don’t get the option to set the fee in sats/vB…more about that next.
Timing Is Everything
BitCoin isn’t like banking whereby transaction fees are fixed (mind you, Fiat transaction fees are often buried so deep you’ll never see them but believe me they’re there…) as in they don’t vary over time. (Insert joke about Fiat bank fees always going up over time, but I digress…)
BitCoin is totally different. Simplistically your fees are based on transaction backlog for the current block against the current mining fee. The more demand, the bigger backlog, the higher the fees. This is a simplification, but the details are quite dry but feel free to read up if you care.
Fees are typically referred to in sats/vB (Satoshis per virtual-Byte) which you can read about here and the differences between bytes and virtual bytes here. It’s a SegWit thing. Anyhow, the lower the number, the less your fees will be for your on-chain transaction.
The mechanism for setting your level of impatience for any on-chain transaction is the Fee in sats/vB. If you’re impatient then set a really high number, if you’re in no hurry then set a low number. To get an idea of the historical and current view of the fees, have a look at Mempool.space.
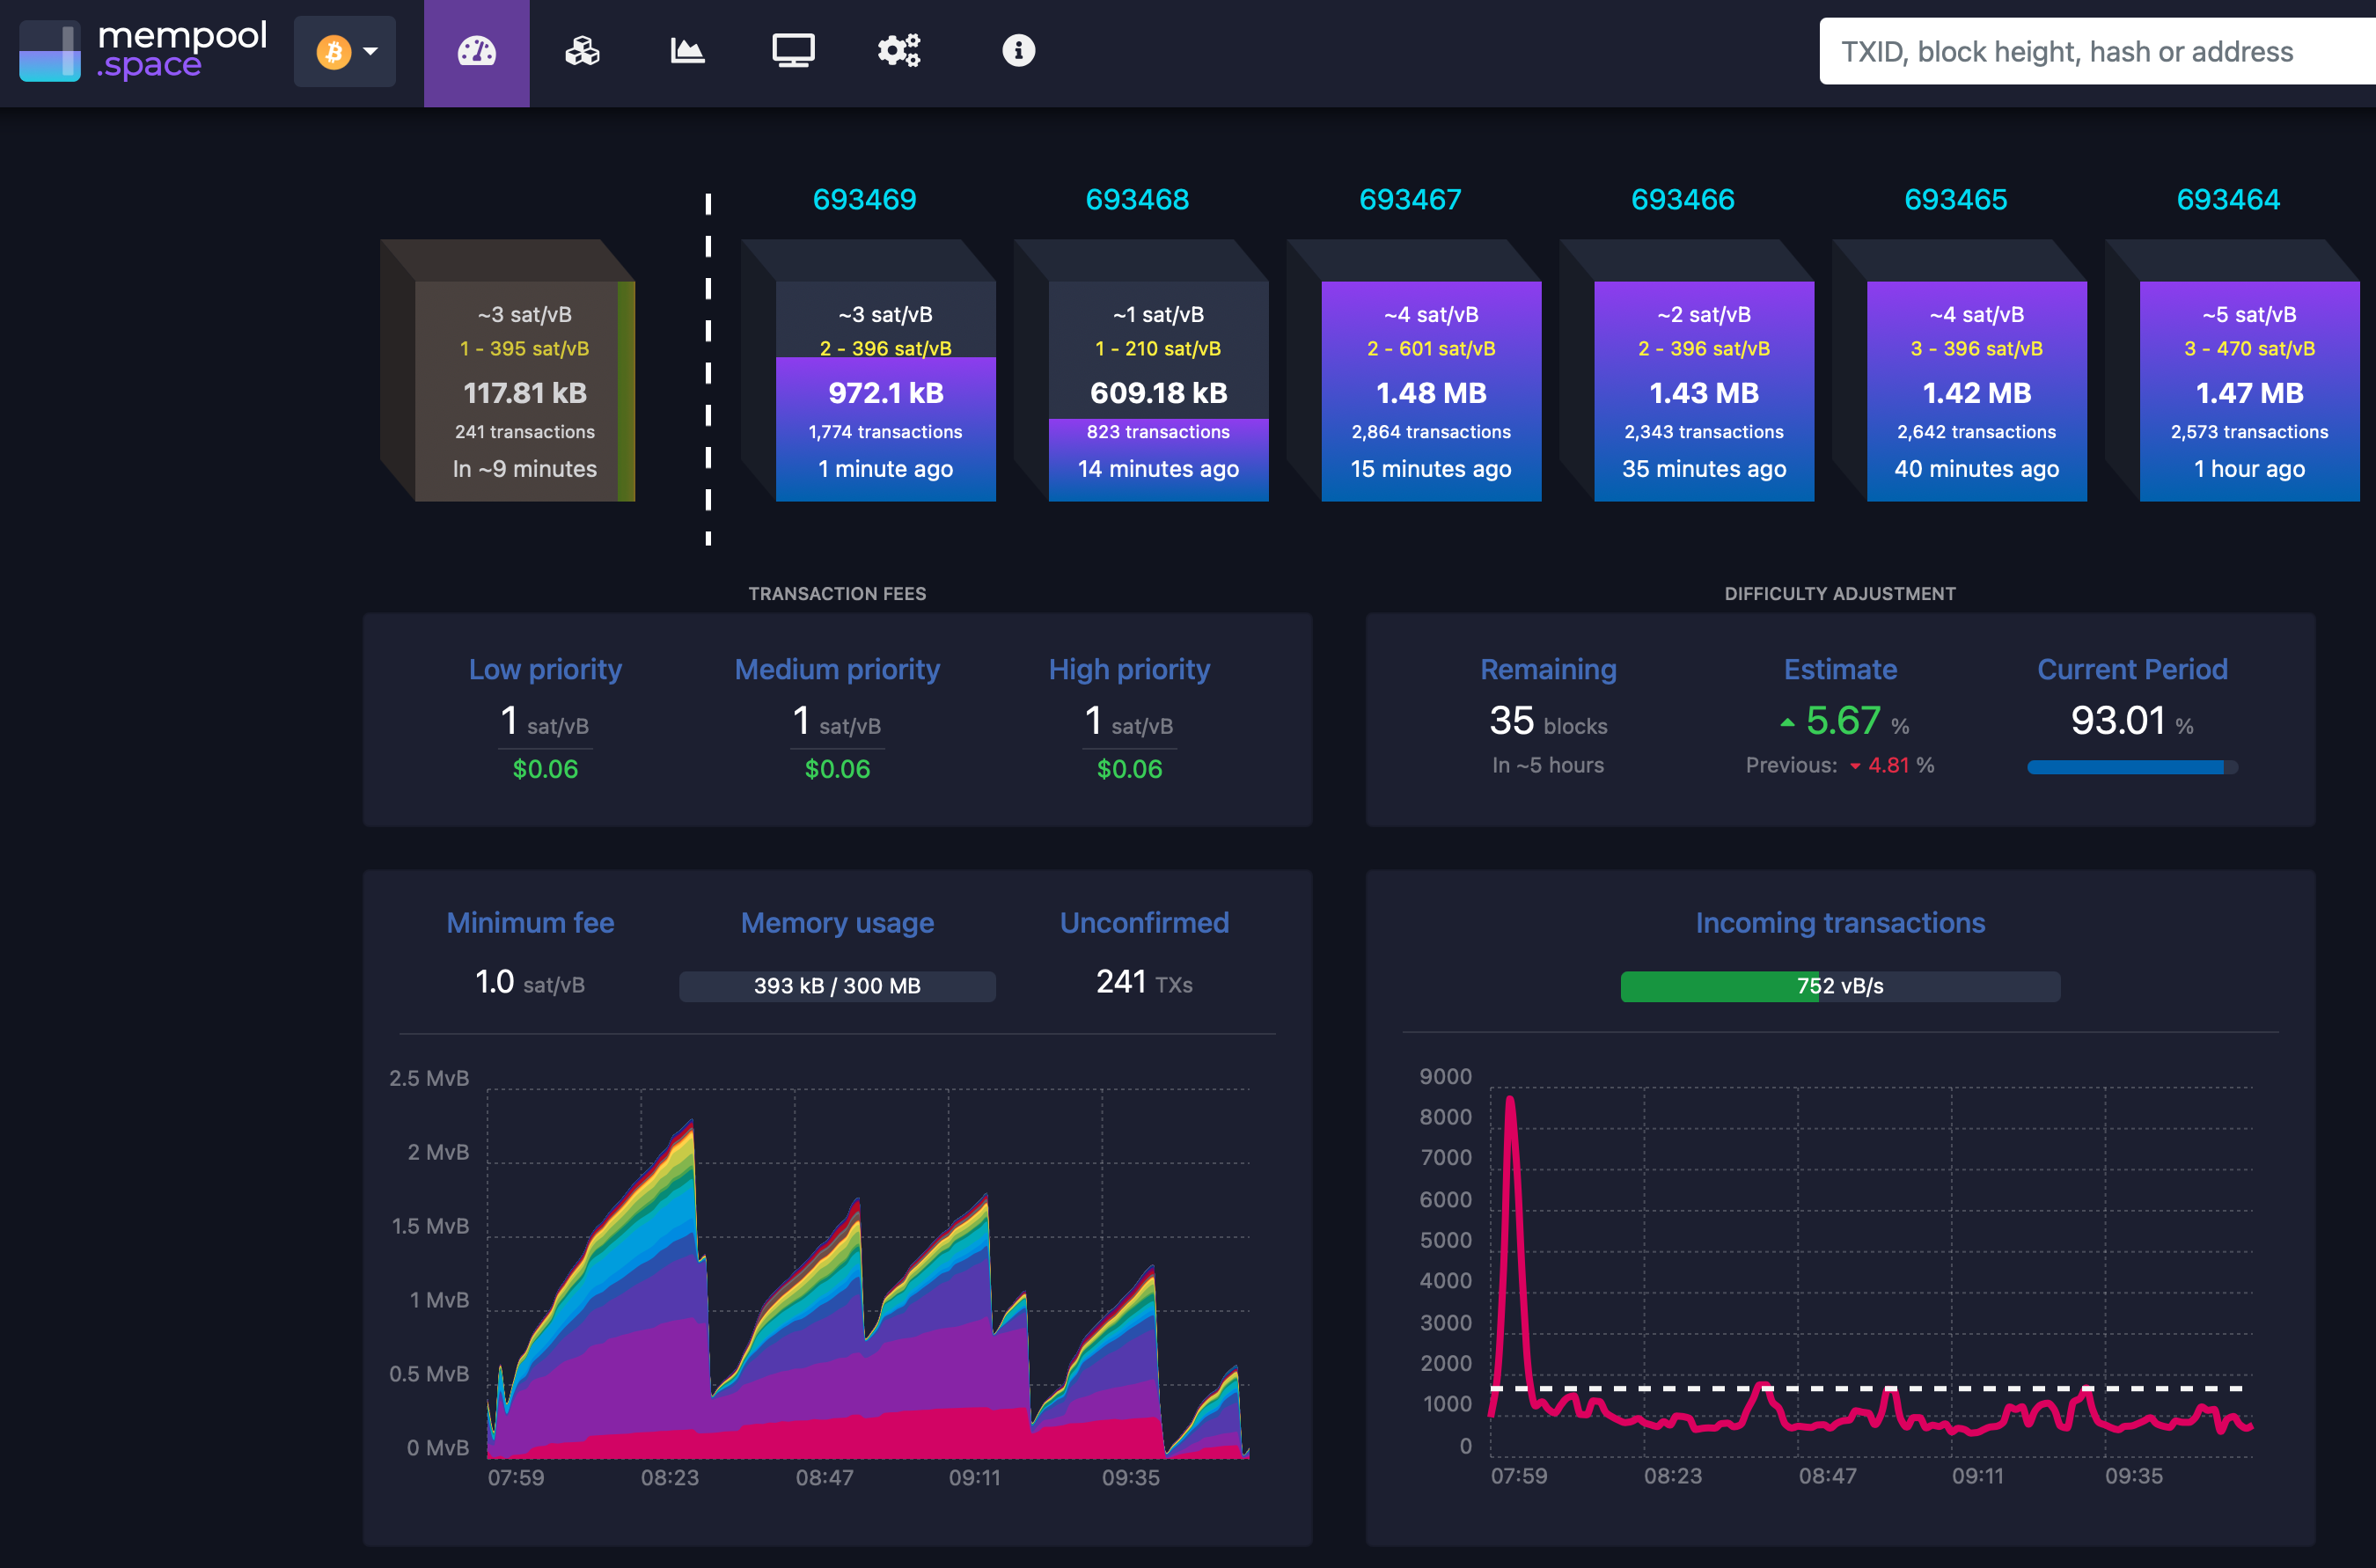 MemPool Shows Lots of Information About Block Transactions at a High Level
Fees are quite low at the moment so for transactions where you can set this, 1 sat/vB will see your transaction processed quite cheaply and very quickly - most likely even in the current block (10 minutes).
So Now You Have BitCoin
How does it feel now you have BitCoin on your Node? For me? Me’h - it’s a thing maybe I’m just used to it now, but you are effectively your own bank at this point. If you want to avoid losing money in on-chain fees then you need to stick to lightning transactions wherever you can where the fees are measured usually between 1 and 10 sats. BitCoin on-chain transactions all incur fees and using Lightning requires a Channel - multiple actually. To open a channel you need an on-chain transaction. To close a channel, you need an on-chain transaction. While that channel is open though, there are not on-chain fees at all.
To review - there are five transaction types people get charged on-chain fees for:
- Converting from Fiat to BitCoin
- Converting from BitCoin to Fiat
- Opening a Lightning Channel
- Closing a Lightning Channel
- A BitCoin transaction (i.e. purchasing something with BitCoin)
To be clear, these are all technically just a BitCoin on-chain transaction - it’s just the end purpose that I’m referring to.
Choose The Node, Choose The Channel Limits
There are two factors to consider when opening a channel to a new node: how well connected is it; and can I afford the minimum channel size?
A good resource to find the best connected node is 1ML but there’s a huge amount of information so finding the most relevant information isn’t always easy. In short, the best place to start is to think about where you’re intending to send sats to or to receive them from, simply because the more direct the connection to the node, the less fees and the more likely the transaction will succeed.
For incoming sats, in the world of podcasting, LNPay, Breez and Sphinx.
For outgoing sats, I personally use BitRefill to buy gift cards as a method to convert to Fiat from time to time. Another example of this is Fold.
However there’s an issue. There’s no indication on 1ML and no other way to easily determine the minimum channel size unless you attempt to open a channel with that node first. You first need enough sats on-chain for you to initiate an open channel request, and then if that throws an error it will tell you the minimum channel size. Thus you can only really determine this by interrogating, and poking the node. (Sigh)
For two I mentioned above, I’ve done the work for you:
- BitRefill = 0.1 BTC (10M sats)
- Fold = 0.05 BTC (5M sats)
COUGH
Well…I have 300k or so to play with, so I guess not.
The next best option is a node that’s connected to the one you want, which you can trace through 1ML if you have the patience.
Other factors to consider when choosing a node to open a channel with:
- Age: The longer the node has been around, the more likely it is to be around in future
- Availability: The more available it is the better. It’s annoying when sats are stuck in a channel with a node that’s offline and you can’t access them.
- TOR: In the IP Address space if you see an Onion address, then TOR accessibility might be useful if you are privacy concerned.
If it’s the first channel you open, your best bet is to pick a big, well connected node as most of these are connected to one of the Lightning Loop Nodes (More on that later).
Channel Size
Since we want to minimise our on-chain fees, we want to try this “Lightning” thing everyone is raving about, so we open a channel. Since we don’t want to be endlessly opening and closing channels it’s best to open the biggest channel that you can afford. In order to use Loop In and Out, you must have at least 250k sats (about $105USD at time of writing) and if you want to quickly open channels and build a node with a lot of Inbound liquidity I’d recommend starting with at least 300k or more, as we know we’ll lose some as we Loop Out and open new channels. (More on that later)
The other issue with smaller channels is that they get clogged easily. When you want to spend any sats and all you have are a bunch of small channels, if the amount you’re trying to spend requires a little bit from each channel then all it takes is for one channel to fail and the transaction will fail overall. The routing and logic continues to improve but larger channels make spending and receiving sats so much easier and keeping your node balance above 250k sats lets you use Loop.
I made the mistake early on of not investing enough when opening channels so I had lots of small channels. It was a huge pain when I was trying to move around even moderate amounts (100k sats).
Circular Rebalance
Circular rebalancing is a nice feature you can use when you have two or more channels. It allows you to move local sats from the selected channel into the local sats of the destination channel - or you can think of it as receiving a sats balance increase from the other channel. The Ride The Lightning web interface is my favourite web UI for circular rebalancing.
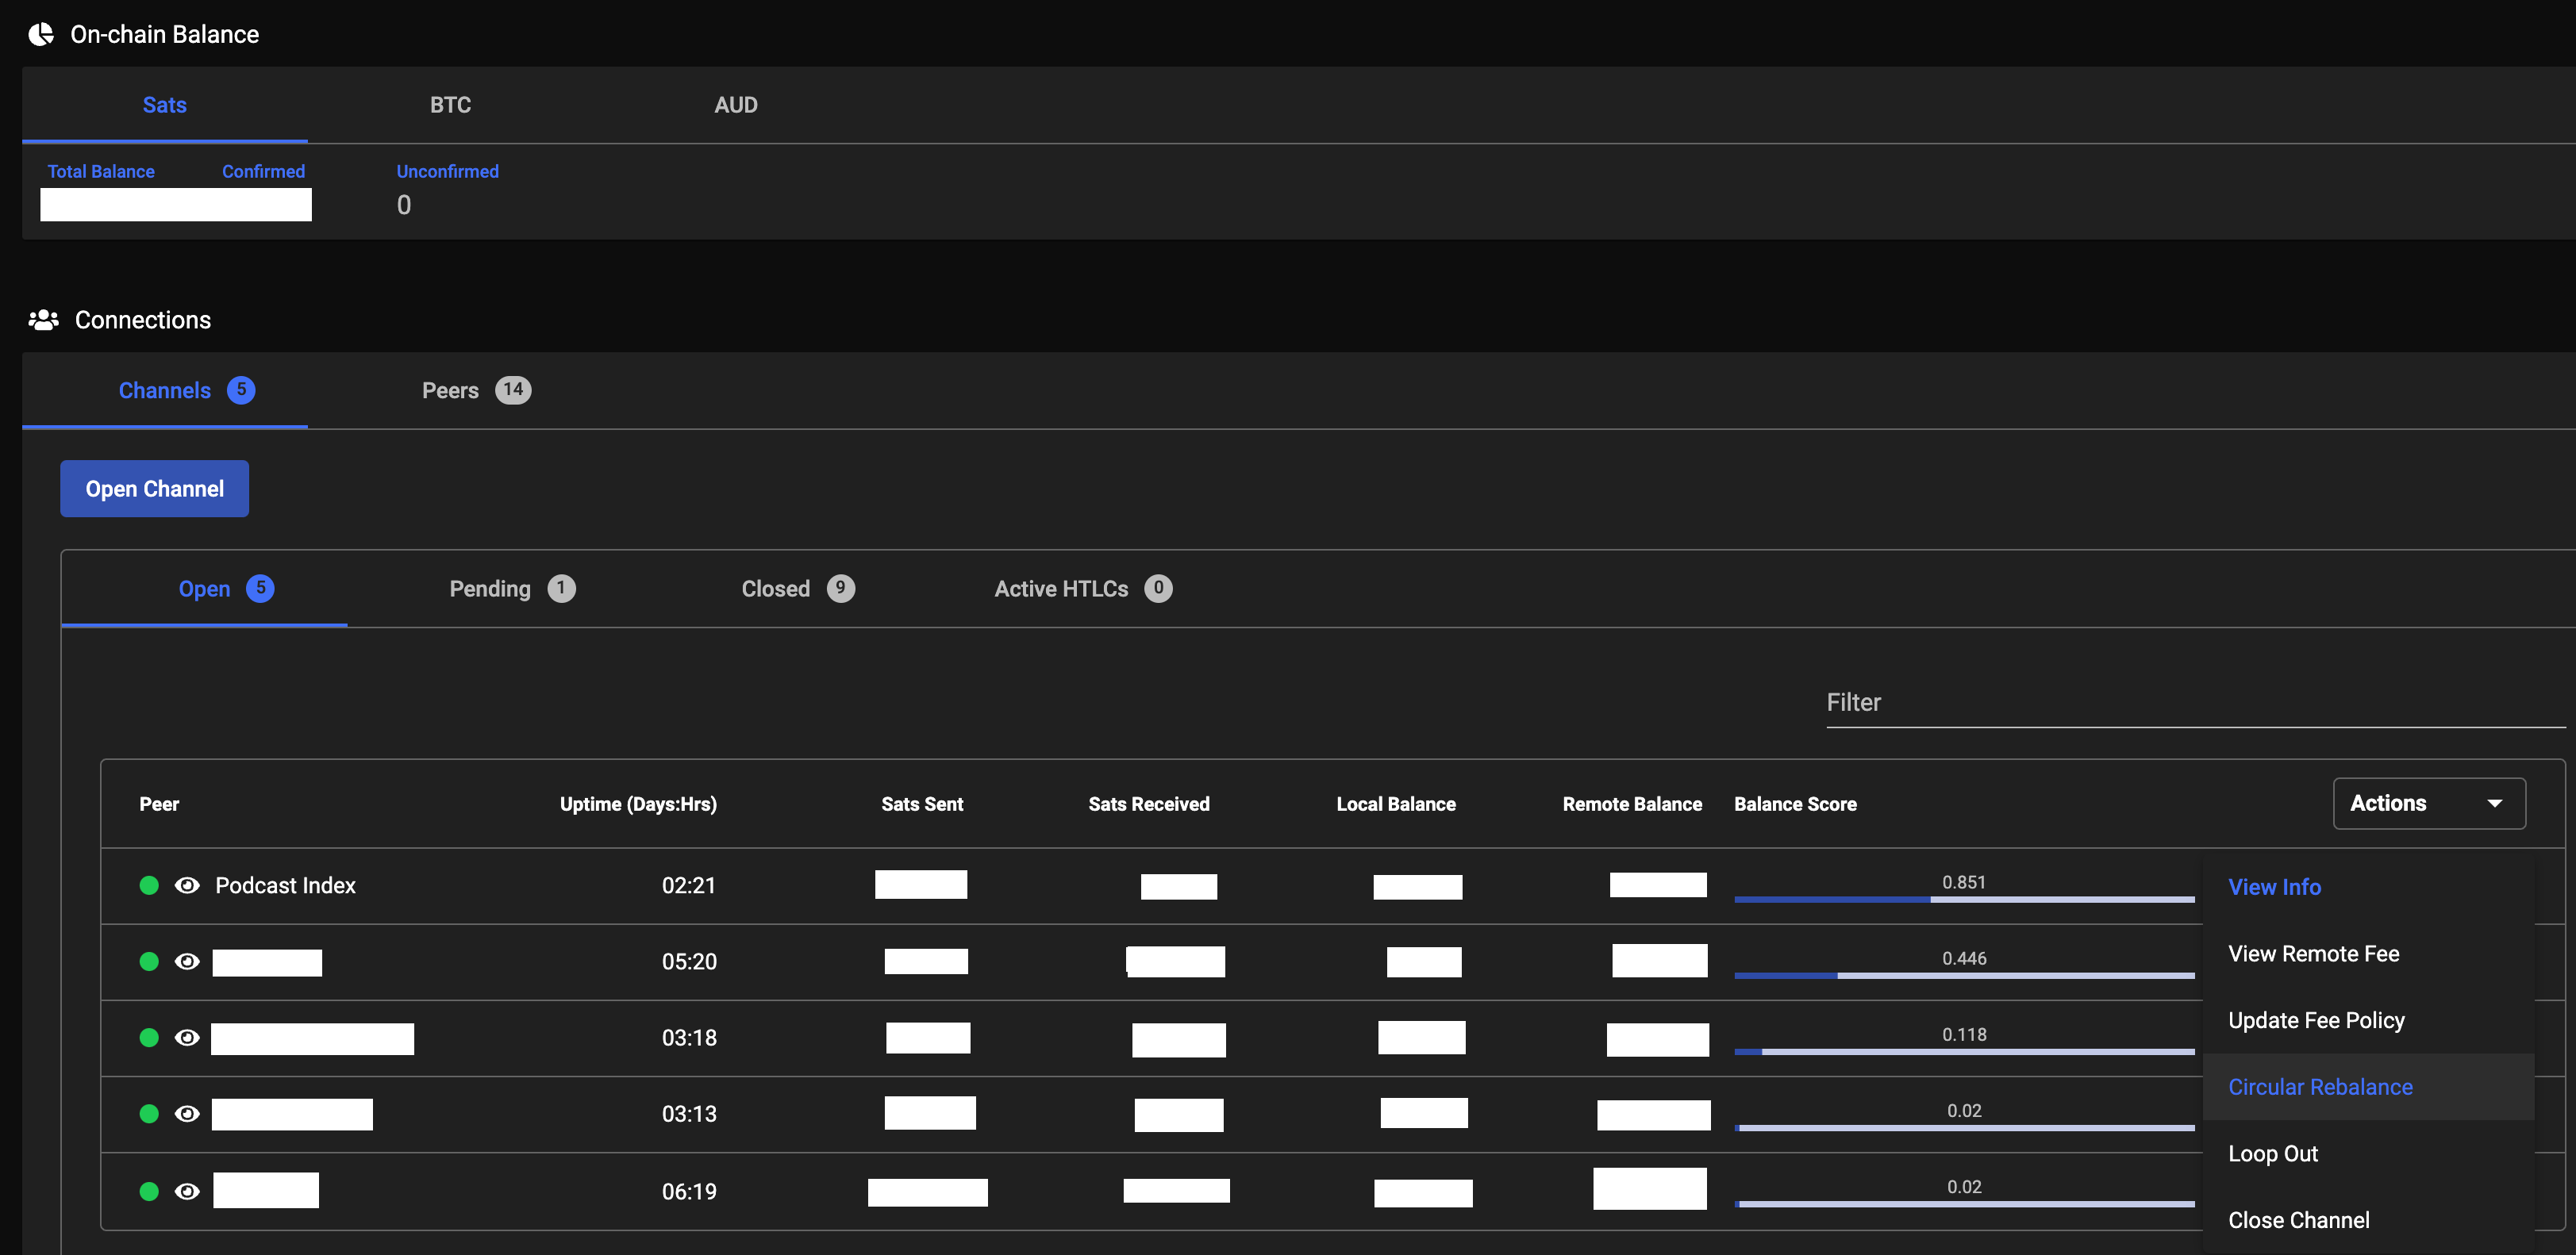 Ride The Lightning Channels View
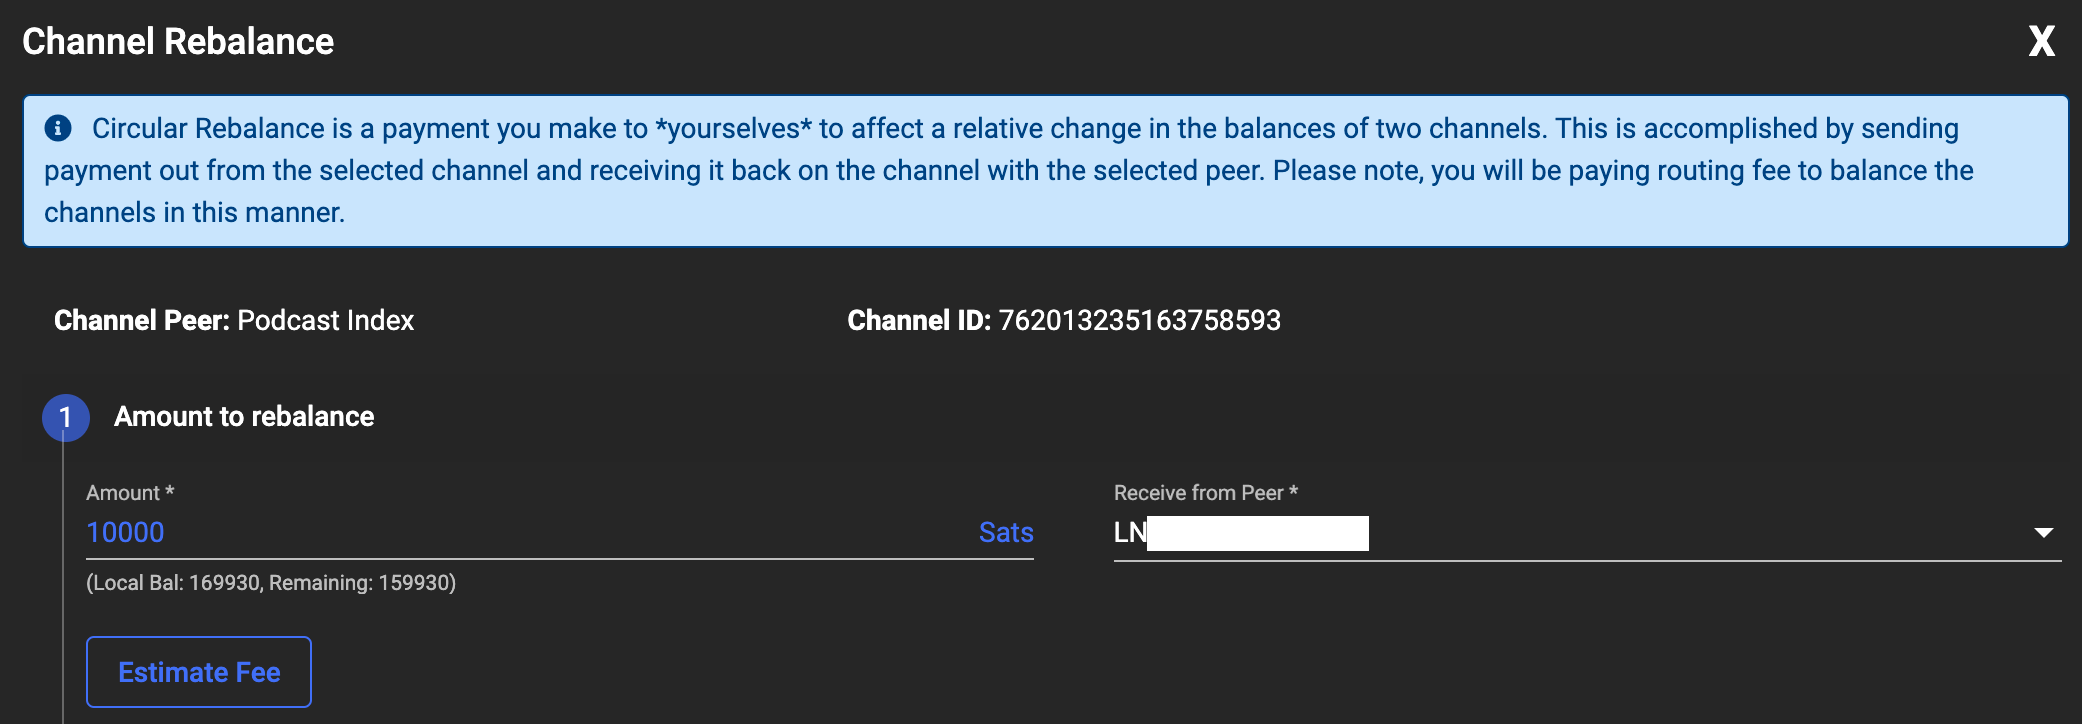 Rebalance a Channel Step One
 Rebalance a Channel Step Two
Behind the scenes it’s simply an Invoice from one channel to another channel. It gets routed outside through other Lightning Nodes and in the example above, there are 5 hops at a cost of 1011 milli-Sats (round that down to 1 sat).
Using this method you can shuffle sats between your channels for very few sats which can be handy if you want to stack your sats in one channel, distribute your sats evenly to balance your node for routing and so on.
Balancing Your Node
There are three ways you can “balance” your node:
- Outbound Priority (Spending lots of sats)
- Inbound Priority (Receiving lots of sats)
- Routing
For the longest time I was confused by the expression, “You can set up a routing node” insofar as what the hell that meant. It’s not a special “type” of node, it just means you keep all of your channels as balanced as possible - meaning your Inbound and Outbound balances are equal. Obviously to achieve a routing node it’s necessary to have 50% of the value of your channels in total in your node, otherwise it would be perfectly balanced.
Keeping in mind that “balancing” a node actually refers to the channels on that node being predominantly balanced or biased for one of the above three options. I suppose there should be a fourth option that describes my node best: “confused”.
Loop In
In Lightning you can move on-chain BitCoin into a channel that you want to add Local balance to changing it to Lightning sats you can spend via Lightning. Why would you do this?
Let’s say you’ve bought some new BitCoin and it’s appeared on your node - it’s not Lightning Sats yet so you can only spend it on-chain (high fees = no good). You already have a bunch of mostly empty channels and you don’t want to open a new channel: this is when you could use Loop In.
 Loop In Interface in Lightning Terminal
Loop In only works for a single channel at a time, and with the 250k minimum, that channel must have at least that many sats of available capacity for Loop In to work.
Loop works by using a special looping Node (series of Nodes probably) maintained by Lightning Labs. At this time they enforce a 250k minimum to a 6.56M maximum per loop in a transaction. The concept is simple: reduce on-chain fees by grouping multiple loop transactions together. Your transaction attracts a significantly lower fee than if you were to open a new channel with your BitCoin balance and you don’t disturb the channels you already have.
Loop Out
Like Looping In, Out works the other way around. It some ways it’s far more useful as you can use Looping Out to build a series of channels cyclicly (more on that shortly).
Whilst Looping In carries the same 250k minimum, Loop Out is limited to your available Local capacity, though still can not exceed 6.56M maximum per loop out a transaction.
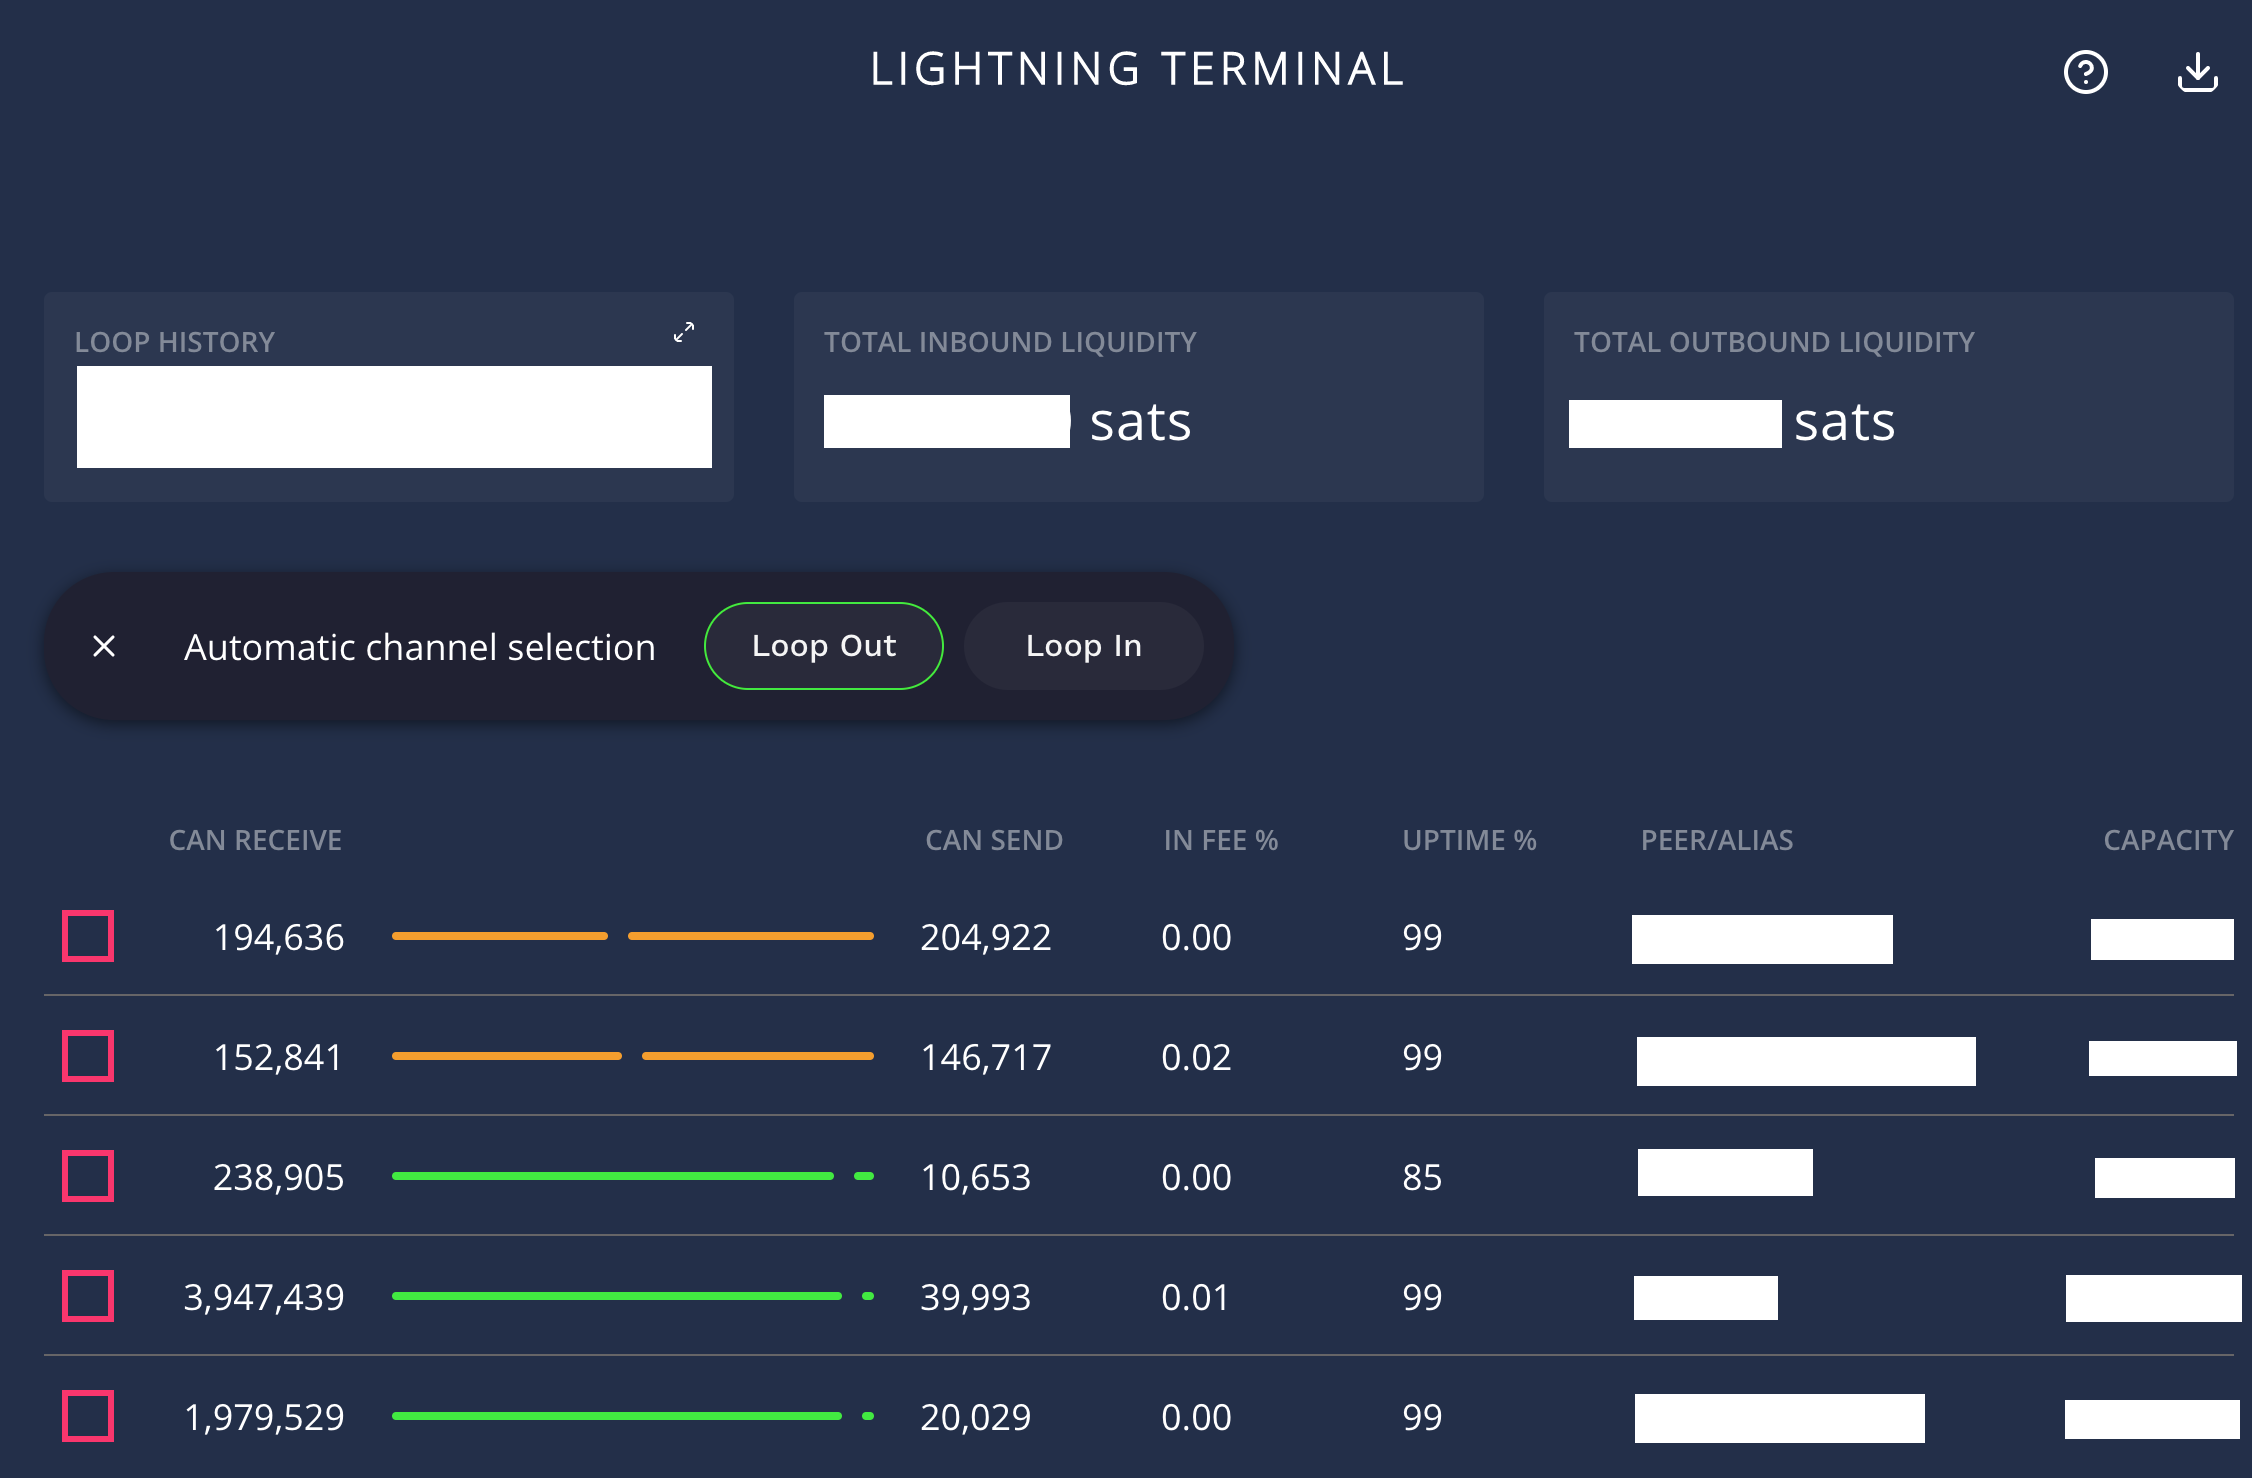 Loop Out Interface in Lightning Terminal
 Loop Out can Manually Select Specific Channels if there’s Liquidity
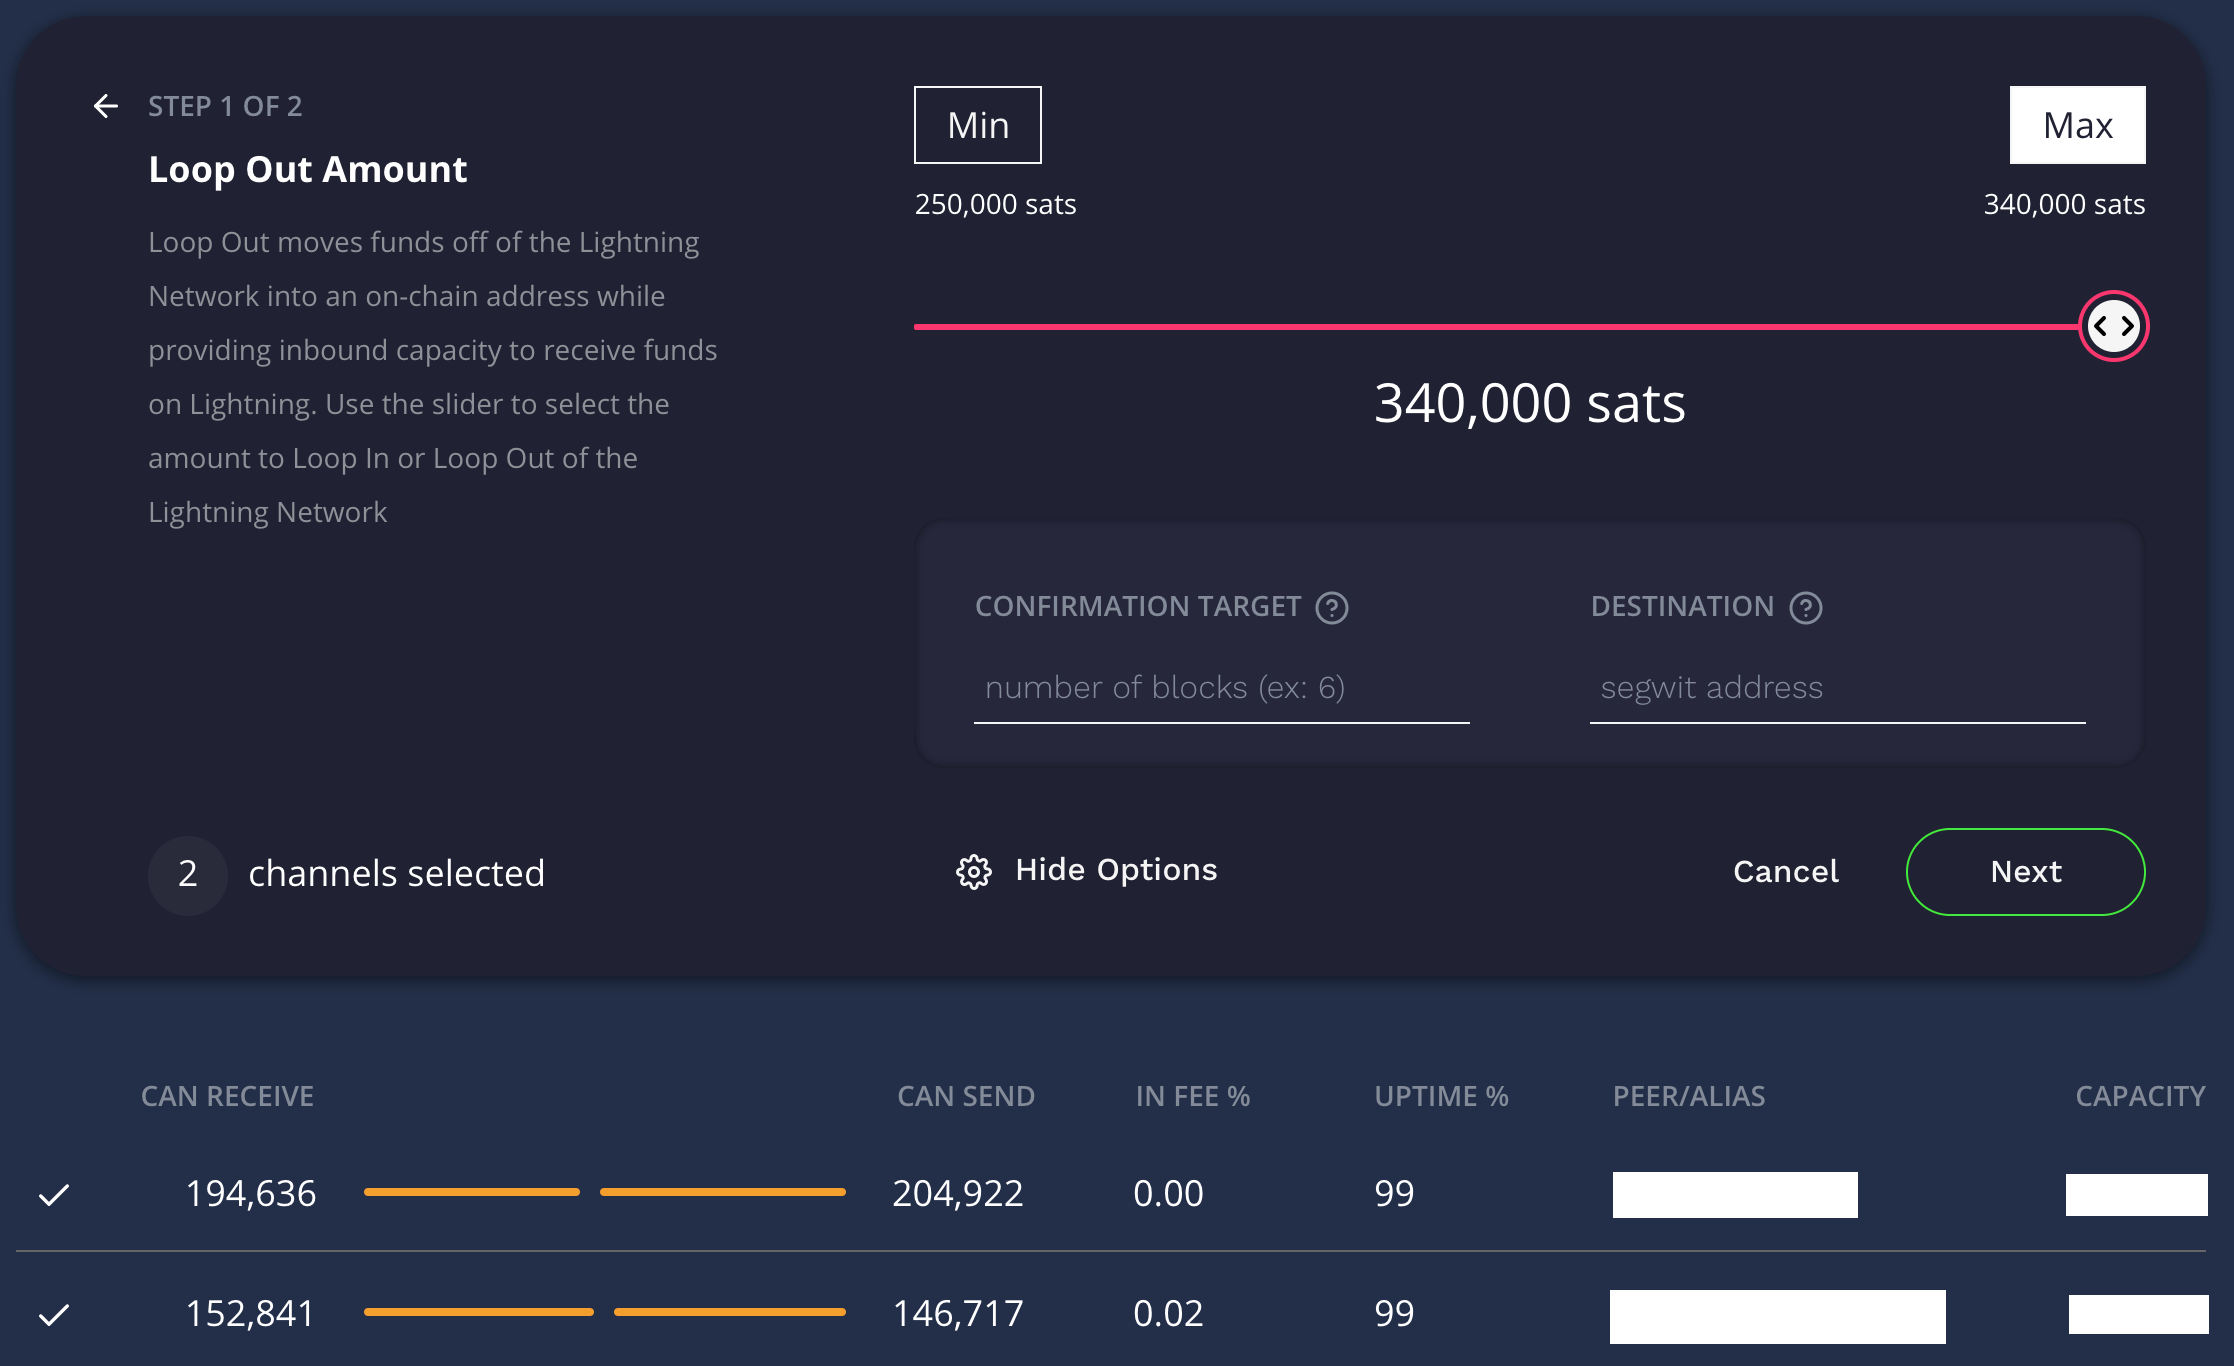 Loop Out of 340k sats from two channels
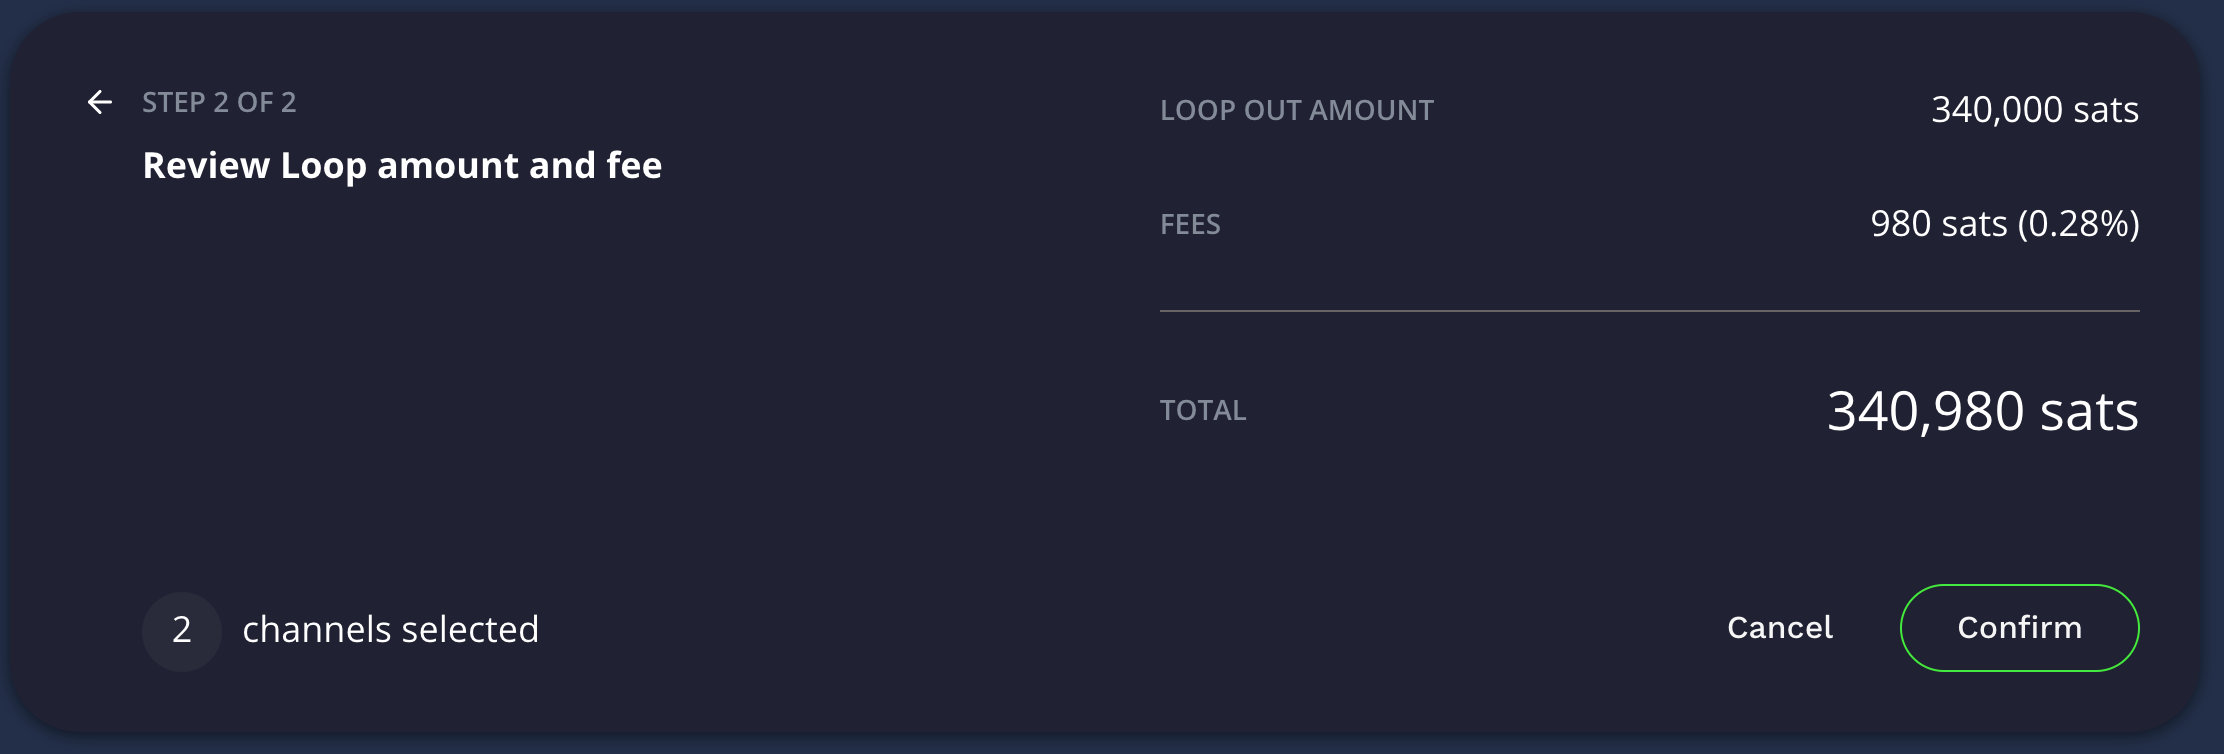 Loop Out showing a fee of 980 sats
 Processing the Loop Out
If the Loop Out fails, you can try to rebalance your channels to put your sats into a highly connected node prior to the loop out, or you could lower the amount and try again until it succeeds. You can adjust the Confirmation Target and send it to a specific BitCoin destination if you want (if you leave that blank, it defaults to the node you’re initiating the Loop Out from which is normally what you’d do).
If you want to keep the fees as low as possible, you should set the number of block confirmations to a larger number. By default I believe it’s 9 blocks (not completely sure) which cost me 980 sats in my example, but by setting this higher it should drop the fees however I did not test enough times to confirm this myself.
Once it completes your node will report those sats now against your on-chain balance, ready for BitCoin spending directly should you wish to.
If you stack your sats into a single channel, you can also use the RTL interface, under Channels select the right-hand side drop down and select “Loop Out”. Again, a minimum 250k sats are required.
 Looping Out via Ride The Lightning
Stack a Channel, Loop It Out, Open New Channel, Repeat
If you’re building your Node from scratch and you’ve started with a single channel that you opened with your initial BitCoin injection, then there’s a technique you can use to build your single channel node into a well connected node with many channels.
The process:
- Stack a Channel (Once you have 2 or more Channels)
- Loop It Out
- Open New Channel
- Repeat
The whole process could take multiple days to complete for multiple channels and it will consume some of your sats in the process, but you’re essentially shuffling around the same sats and re-using them to open more channels to improve your nodes connectivity.
Maintenance
Operating a node isn’t a full time job, but it’s also not a set and forget thing either. I had an issue with my DuckDNS not updating the dynamic address after a power outage at home. I noticed that there hadn’t been many streaming sats coming in for a week when I checked and found the error and corrected it. Another time I noticed I’d had a large number of transactions pass through my node and my channels were pegged and skewed and no routing was occurring. So I rebalanced my channels.
Sometimes I’ve had people open channels and then every balance/re-balance I attempted failed. Others open a channel and their end is highly unreliable trapping a lot of sats in the channel. When I need/want to use them I have to wait until they’re online again.
My observation has been that there are many people tinkering with BitCoin Lightning, and they tend not to put much money into it. That’s fine - I can’t really judge that since that’s how I started out. However these are the sorts of people that aren’t tending to their node, ensuring it’s online, ensuring it’s well funded and hence are most likely to have poor availability.
I originally allowed channels of only 30k sats, but have since increased this to 250k sats minimum channel size. Since doing this I’ve had less nuisance channels be opened and have had to prune far fewer channels. The message is: it’s not set and forget, in the same way your bank account isn’t either. If you care about your money, check your transactions.
That’s it
I think that’s it for now. Hopefully the things I’ve learned are helpful to somebody. Whilst a lot of the above is a simplification in some dimensions, I realise I still have a lot to learn and it’s a journey. Whether you think BitCoin and Lightning are the future or just a stepping stone along the way, one thing I believe for certain: it’s a fascinating system that’s truly disrupting the financial sector in a way that hasn’t previously been possible and it’s fun to learn how it works.
Many thanks to Podcasting 2.0, RaspiBlitz and both Adam Curry and Dave Jones for their inspiration.
Retro Mac Pro Part 2
I wrote previously about why I invested in a Mac Pro and I realised I didn’t describe how I’d connected everything up, in case anyone cares. (They probably don’t but whatever…)
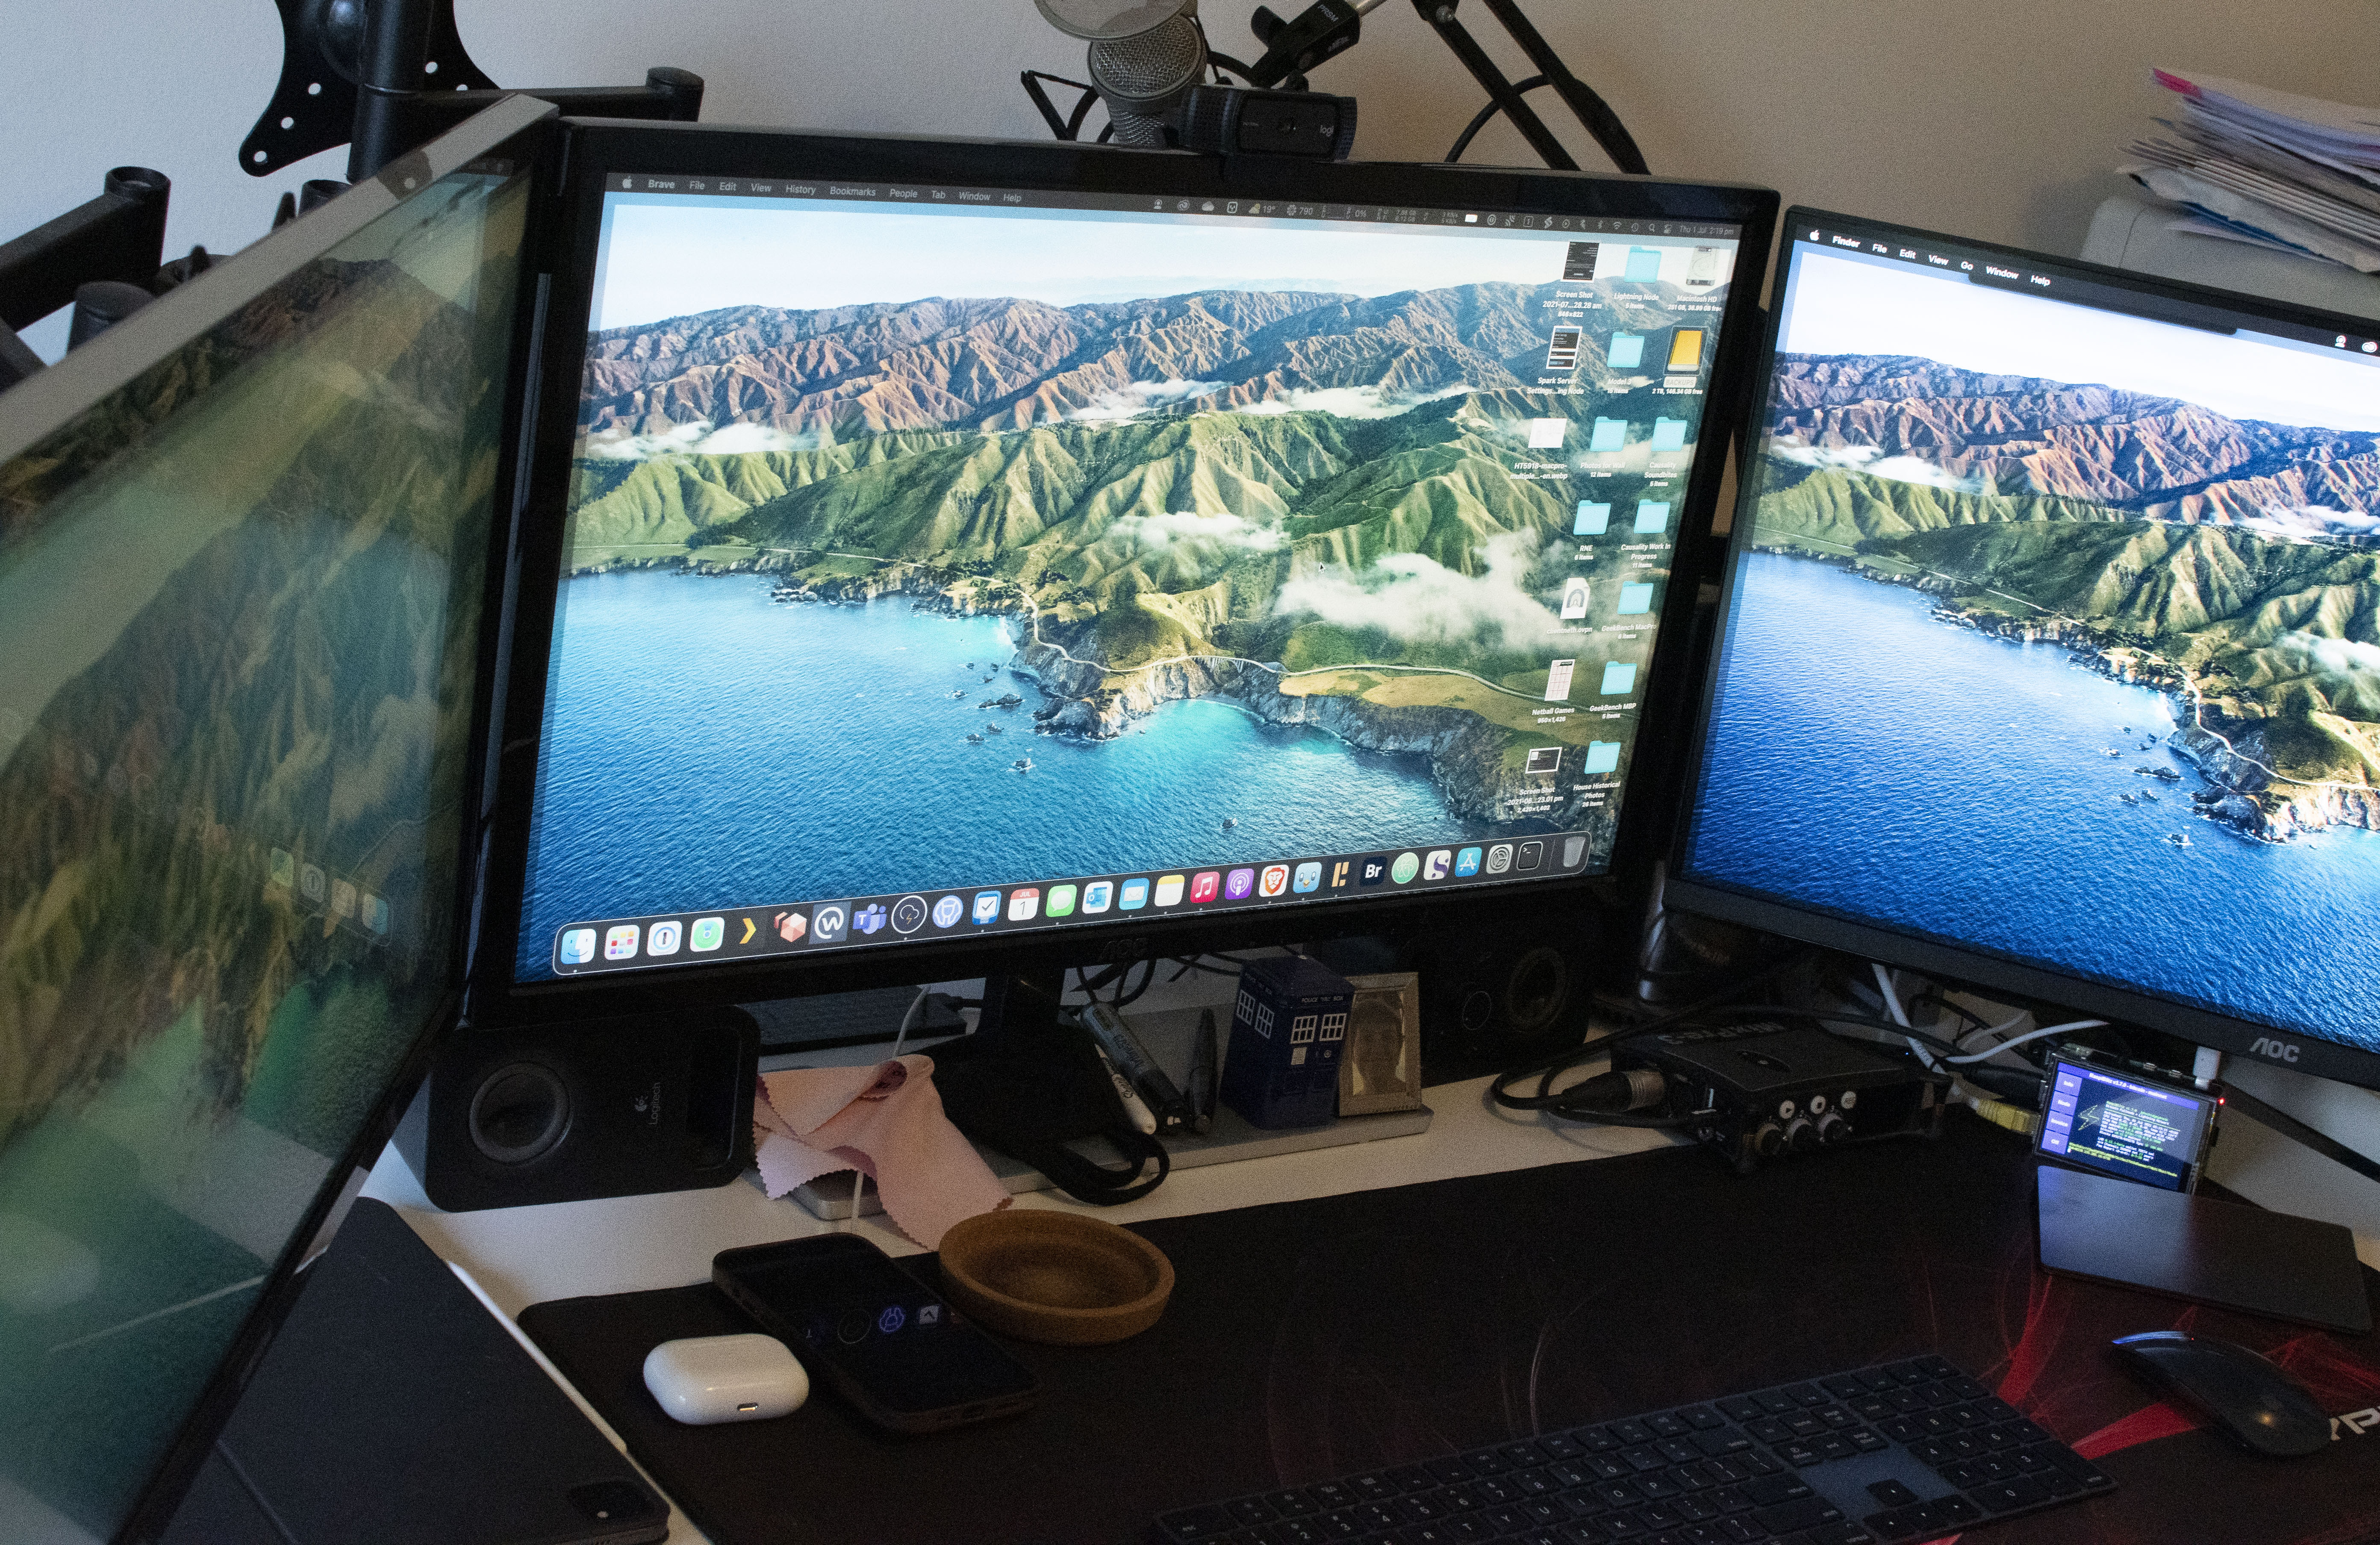
The Mac Pro 2013 has three Thunderbolt 2 buses and due to the bandwidth restrictions for 4K UHD 60Hz displays, you can only fully drive one 60Hz display per Thunderbolt 2 bus. Hence I have the two 60Hz monitors connected via Mini-DisplayPort to DisplayPort cables, one to each Bus.
The third monitor is an interesting quandry. I’d read that you can’t use a third monitor unless you connect it to the HDMI port, and it’s only HDMI 1.4 therefore it can only output 30Hz at 4K. However that’s not entirely true. Yes, it is HDMI 1.4 but that’s not the only way you can connect a monitor. By using a spare Mini-DisplayPort to HDMI Cable you can connect a monitor directly to the third Thunderbolt bus and it lights up the display, also at 30Hz.
I suspect that Apple made a design choice with the third Thunderbolt 2 bus, such that it’s also connected to the two Gigabit Ethernet ports and HDMI output. Therefore whatever remaining bandwidth would be available by limiting video output to 30Hz at 4k, allows the other components the bandwidth they require. In my case it’s annoying but not the end of the world, given the next best option was about four times the price.
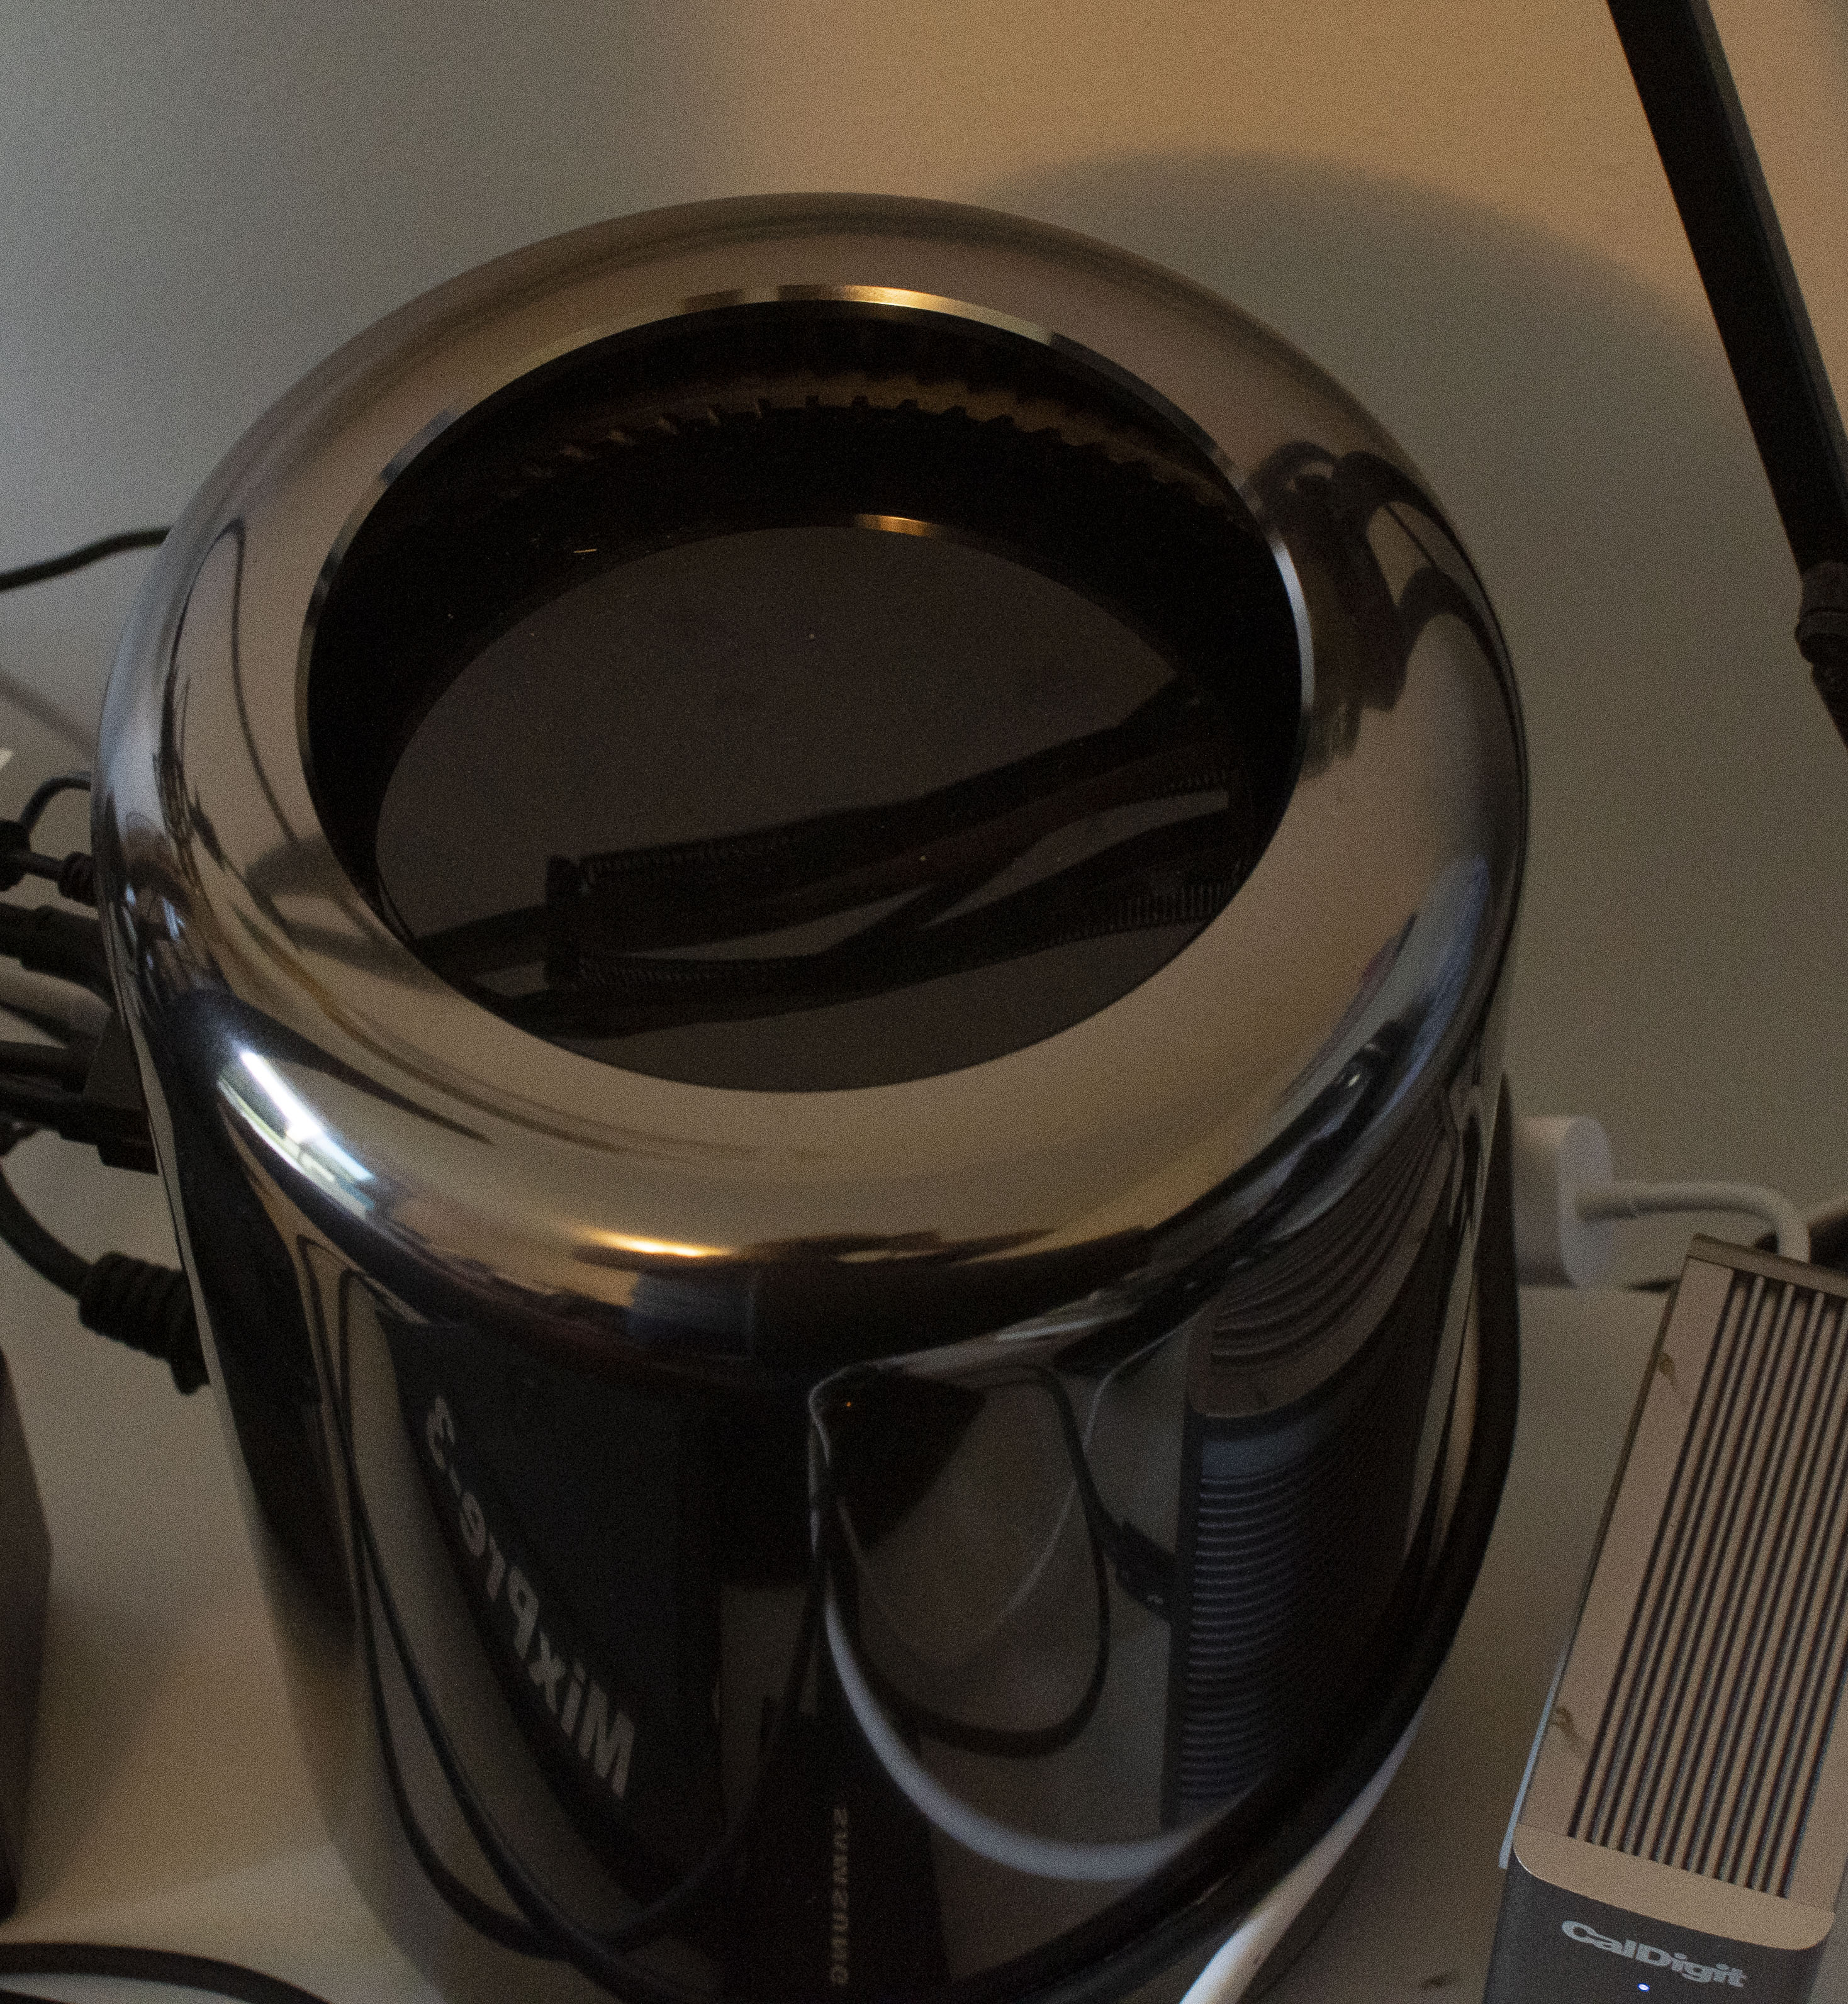
Seeing as how I have a perfectly good TS3+ dock, and that Apple still sell Thunderbolt 2 cables and a bi-directional Thunderbolt 2 to Thunderbolt 3 adaptor, I’ve connected those to that third Thunderbolt 2 bus, then I drive the third monitor using a DisplayPort to DisplayPort cable from the TS3+ instead. This then allows me to connect anything to the TS3+ that’s USB-C to the Mac Pro and adds a much needed SD Card slot as well.
In order to fit everything on my desk I’ve added a monitor arm on each side for the side monitors which overhang the desk, and placed the Mac Pro behind the gap between the middle and right-hand side monitors. If you need access to the Mac Pro or the TS3+ Dock, simply swing the right hand monitor out of the way.
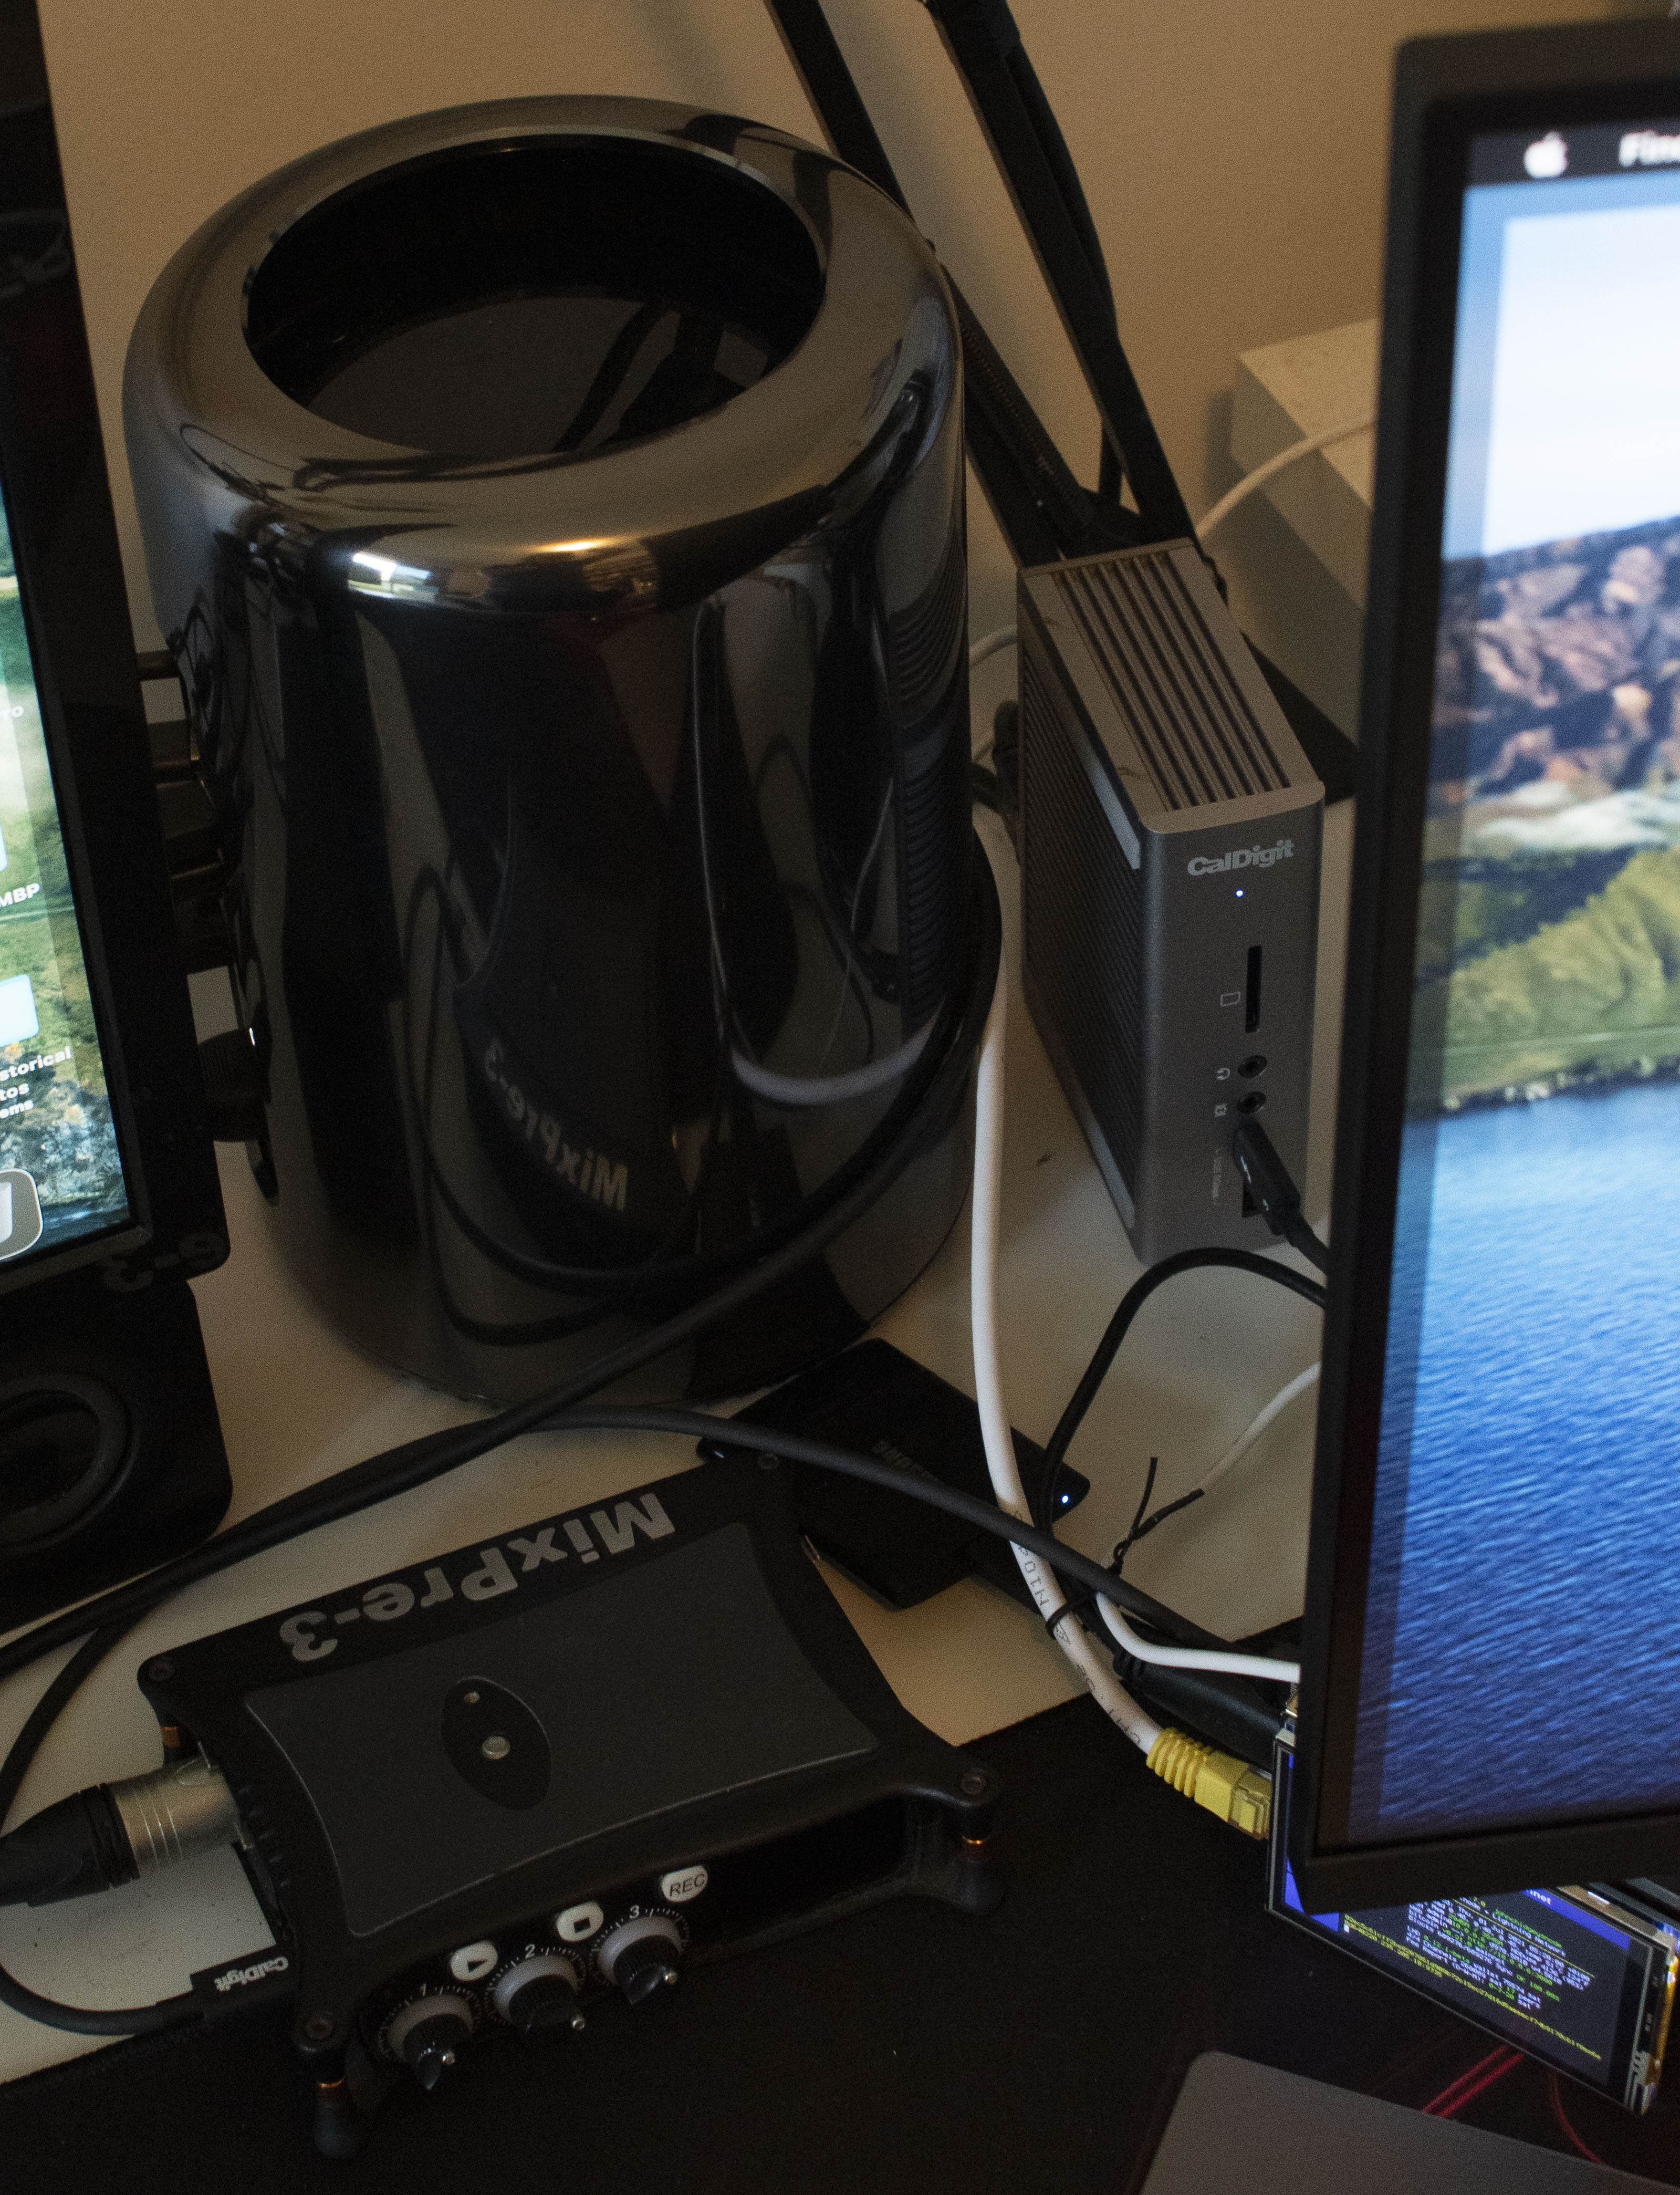
Since I podcast sometimes, I’ve also attached my Boom Arm behind the Dock and the Mix Pre3 is connected via the powered USB-C output on the TS3+ and it works perfectly. Less interesting are the connections to the hardwired Ethernet, speakers and webcam but that’s pretty much it.
Retro Mac Pro
After an extended forced work-from-home mandated due to COVID19, I’ve had a lot of time to think about how best to optimise my work environment at home for optimal efficiency. I started with a sit/stand desk and found that connecting my MacBook Pro 13" via a CalDigit TS3+ allowed me to drive two 4K UHD displays at 60Hz and give me a huge amount of screen real-estate that was very useful for my job.
I retained the ability to disconnect and move into the office should I wish to, though in reality I only spent a total of 37 days physically in the office (not continuously, between various lockdown orders) in the past 12 months. When I was outside the office, I used my laptop occasionally but found the iPad Pro was good enough for most things I wanted to do and its battery life was better, plus I could sign documents - which is a common thing in my line of work.
It all wasn’t smooth sailing though. I found that the MBP was actually quite sluggish in the user interface when connected to the 4K screens, and that the internal fans would spin up to maximum all the time, many times without any obvious cause. I started to remove applications that were running in the background like iStat Menus, Dropbox, and a few others and that helped, but I still noticed that it was also spinning up now during Time Machine backups and Skype, Skype for Business, Microsoft Teams and Zoom.
This was a problem since I spent most of my workday on Teams calls and the microphone was picking up the annoying background grind of the cooling fans in the MBP. For this reason I started thinking about how to resolve the two issues: sluggish graphics and running the laptop hot all of the time, without sacrificing screen real-estate in HiDPi (of which I’d become rather dependent).
So I got to thinking: why am I still using a laptop when I’m spending 90% of my time at my home office desk? I wanted to keep using a Mac, and whilst I missed my 2009 Nehalem Mac Pro, I didn’t miss how noisy it also was, it’s power drain, the fact it was an effective space-heater all year round and frankly wasn’t currently officially supported by Apple1 anyway.
There are only a few currently supported Macs that can drive the amount of screen real-estate I wanted: the Mac Pros (2013, 2019), the iMac 5K (with discrete graphics) and the iMac Pro. There are, as yet, no M1 (Apple Silicon) Macs that can drive more than one external display. Buying a new Mac was out of the question with my budget strictly set at $1,400 AUD (about $1K USD at time of writing) it was down to used Macs. The goal was to get a powerful Mac that I could extend and upgrade as funds permitted. The more recent iMacs weren’t as upgradable and even a used iMac Pro was out of my budget and I won’t find a 2019 Mac Pro used since they’re too new and would also be too expensive (even used).
So call me crazy if you like, but I invested in a used 2013 Mac Pro - a Retro-Mac Pro if you like. It had spent its life in an office environment and for the past two years lay unused in a corner with its previous user leaving the company and they’d long since switched to Mac Minis. It had a damaged power cable, no box and no manuals and apart from some dust was in excellent condition.
I’ve now had a it for just under a week and I’m loving it! It’s the original entry-level model with twin FirePro D300s, 3.7GHz Quad-core Intel Xeon E5 with 16GB DDR3 RAM and a basic 256GB SSD. I can upgrade the SSD with a Sintech adaptor and a 2TB NVMe stick for $340 AUD, and go to 64GB RAM for about $390 AUD, but I’m in no hurry for the moment.
Admittedly the Mac Pro can only drive two of the 4k UHD screens at 60Hz with the third only at 30Hz but that amount of high-DPI screen real-estate is exactly what I’m looking for. Dragging a window between the 60Hz and 30Hz screens is a bit weird, but I have my oldest, cheapest 4K monitor as my static/cross-reference/parking screen anyway so that’s a limitation I can live with.
Yes, I could have built a Hackintosh.
Yes, I could run Windows on any old PC.
I wanted a currently supported Mac.
For those thinking, “But John, there’s Apple Silicon Macs with multi-display support just around the corner” well yes, that’s probably true. But I know Apple. They will leave multi-UHD monitor support only for their highest-end products which will still cost the Earth. So you might ALSO say, “But John, Intel Macs are about to die, melt, burn and become the neglected step-son that was once the golden-haired-child of the Apple family” and that’s true too, but I can still run Linux/Windows/ANYTHING on this thing, for a decade to come long after macOS ceases to be officially supported. That said, the fact you can still apply hacks to the 2009 Mac Pro and run Big Sur, it’s likely the 2013 Mac Pro will be running a slightly crippled but functional macOS for a long time yet, or at least until Apple give up on Intel support for Apple Silicon features, but that’s another story.
And you might also think, “John, why the hell would you buy a Mac that’s had so many reliability problems?” Well I did a lot of research given the Mac Pro 2013’s reputation, and based on what I found the original D300 model was relatively fine with very few issues. The D500 and D700 models had significantly worse reliability as they ran hotter (they were more powerful) and due to the thermal corner Apple built themselves into with the Mac Pro design at that point, ended up being unreliable with prolonged usage, due to excessive heat.
I can report the Mac Pro runs the two primary screens buttery smooth, it is effectively silent and doesn’t ever break a sweat. Being a geek however subjective measurements aren’t enough. The following GeekBench 5 scores for comparison:
| Metric | Mac Pro Score | MacBook Pro Score | % Difference |
|---|---|---|---|
| CPU Single-Core | 837 | 1,026 | - 22.5% |
| CPU Multi-Core | 3,374 | 3,862 | - 14.4% |
| OpenCL | 20,482 / 21,366 | 8,539 | + 239% |
| Metal | 23,165 / 23,758 | 7,883 | + 293% |
| Disk Read (MB/s) | 926 | 2,412 | - 260% |
| Disk Write (MB/s) | 775 | 2,039 | - 263% |
By all measurements above my Macbook Pro should be the better machine, and you’d hope so being 5 years newer than the Mac Pro 2013. My usage to date however hasn’t shown that - almost the opposite, which begs the question - for my use case where screen real-estate matters the most, the graphics power from a discrete FirePro is far more valuable than a significantly faster SSD. Not only that but with the same amount of RAM you’d think the Macbook Pro would perform as well, however it’s using an integrated graphics chipset, hence sharing that RAM and driving two 4K screens was killing its performance, whereas the Mac Pro doesn’t sacrifice any of its RAM and maintains full performance even when driving those screens.
I don’t often encode video in Handbrake anymore or audio but when I do the Mac Pro isn’t quite as fast but it’s pretty close to the Macbook Pro or certainly good enough for me. The interesting and surprising thing to note is that a 7 year old desktop machine was a better fit for my needs at the price than any current model on offer by Apple.
I’m looking forward to many years of use out of a stable desktop machine, noting that whilst my use-case was a bit niche, it’s been an effective choice for me.
-
An officially support Mac is one where Apple releases an Operating System version that will install without modification on that model of Mac. ↩︎