Herein you’ll find articles on a very wide variety of topics about technology in the consumer space (mostly) and items of personal interest to me. I have also participated in and created several podcasts most notably Pragmatic and Causality and all of my podcasts can be found at The Engineered Network.
Building A Synology Hugo Builder
I’ve been using GoHugo (Hugo) as a static site generator on all of my sites for about three years now and I love it’s speed and its flexibility. That said a recent policy change at a VPS host had me reassessing my options and now that I have my own Synology with Docker capability I was looking for a way to go ultra-slim and run my own builder, using a lightweight (read VERY low spec) OpenVZ VPS as the Nginx front-end web server behind a CDN like CloudFlare. Previously I’d used Netlify but their rebuild limitations on the free tier were getting a touch much.
I regularly create content that I want to set to release automatically in the future at a set time and date. In order to accomplish this Hugo needs to rebuild the site periodically in the background such that when new pages are ready to go live, they are automatically built and available to the world to see. When I’m debugging or writing articles I’ll run the local environment on my Macbook Pro and only when I’m happy with the final result will I push to the Git repo. Hence I need a set-and-forget automatic build environment. I’ve done this on spare machines (of which I current have none), on a beefier VPS using CronJobs and scripts, on my Synology as a Virtual machine using the same (wasn’t reliable) before settling on this design.
Requirements
The VPS needed to be capable of serving Nginx from folders that are RSync’d from the DropBox. I searched through LowEnd Stock looking for deals for 256GB of RAM, SSD for a cheap annual rate and at the time got the “Special Mini Sailor OpenVZ SSD” for $6 USD/yr which was that amount of RAM and 10GB of SSD space, running CentOS7. (Note: These have sold out but there’s plenty of others around that price range at time of writing)
Setting up the RSync, NGinx, SSH etc is beyond the scope of this article however it is relatively straight-forward. Some guides here might be helpful if you’re interested.
My sites are controlled via a Git workflow, which is quite common for website management of static sites and in my case I’ve used GitHub, GitLab and most recently settled on the lightweight and solid Gitea which I also self-host now on my Synology. Any of the above would work fine but having them on the same device makes the Git Clone very fast but you can adjust that step if you’re using an external hosting platform.
I also had three sites I wanted to build from the same platform. The requirements roughly were:
- Must stay within Synology DSM Docker environment (no hacking, no portainer which means DroneCI is out)
- Must use all self-hosted, owned docker/system environment
- A single docker image to build multiple websites
- Support error logging and notifications on build errors
- Must be lightweight
- Must be an updated/recent/current docker image of Hugo
The Docker Image And Folders
I struggled for a while with different images because I needed one that included RSync, Git, Hugo and allowed me to modify the startup script. Some of the hugo build dockers out there were actually quite restricted to a set workflow like running up the local server to serve from memory or assumed you had a single website. The XdevBase / HugoBuilder was perfect for what I needed. Preinstalled it has:
- rsync
- git
- Hugo (Obviously)
Search for “xdevbase” in the Docker Registry and you should find it. Select it and Download the latest - at time of writing it’s very lightweight only taking up 84MB.
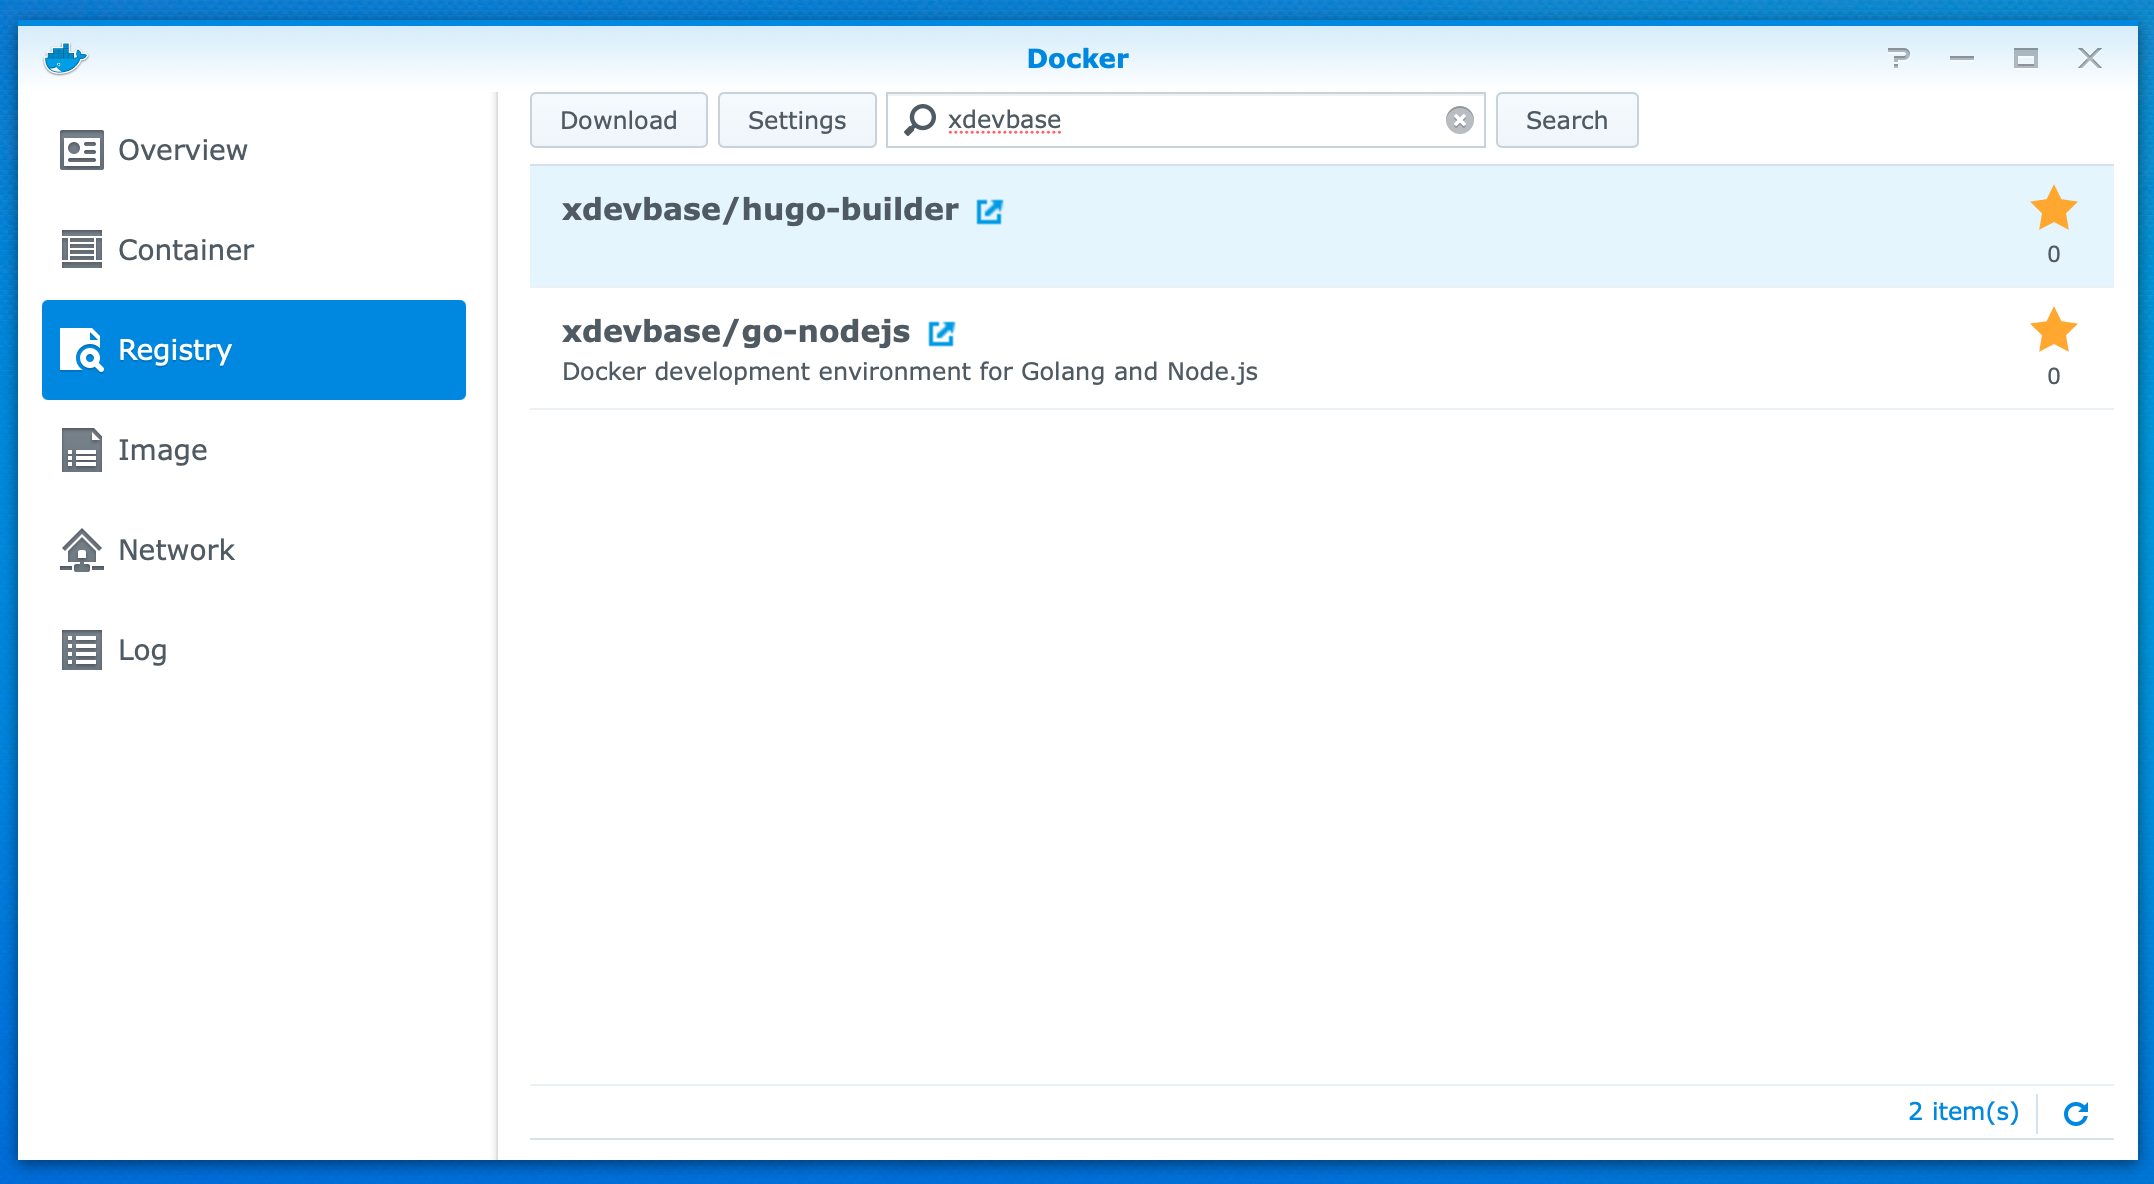
After this open “File Station” and start building the supporting folder structure you’ll need. For me I had three websites: TechDistortion, The Engineered Network and SlipApps, hence I created three folders. Firstly under the Docker folder which you should already have if you’ve played with Synology docker before, create a sub-folder for Hugo - for me I imaginatively called mine “gohugo”, then under that I created a sub-folder for each site plus one for my logs.
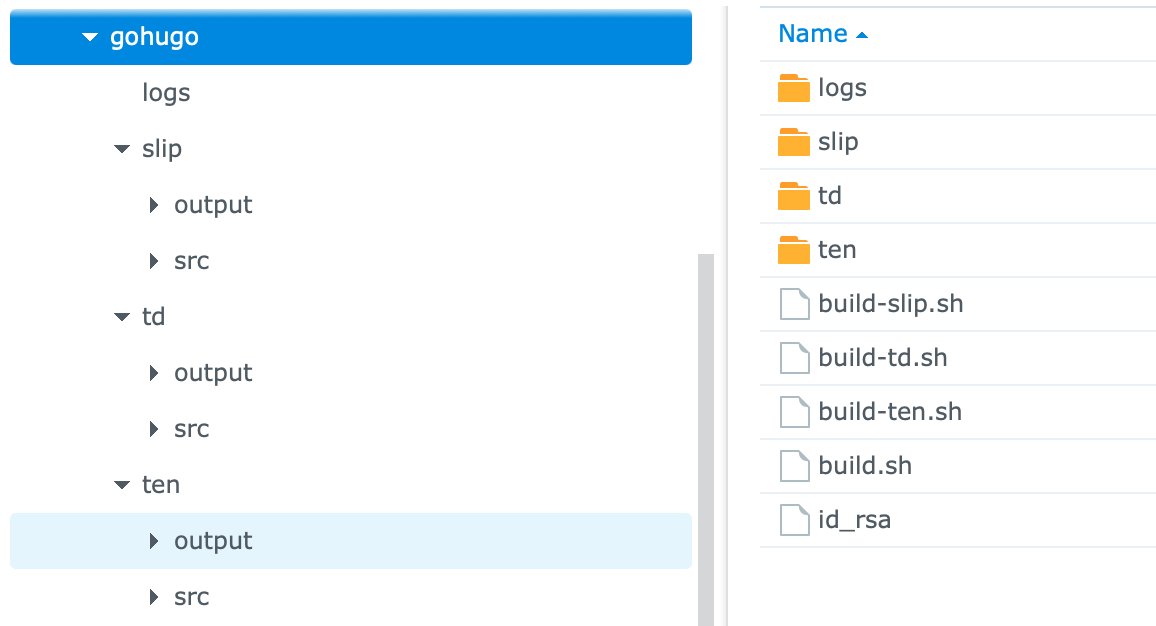
Under each website folder I also created two more folders: “src” for the website source I’ll be checking out of Gitea, and “output” for the final publicly generated Hugo website output from the generator.
Scripts
I spent a fair amount of time perfecting the scripts below. The idea was to have an over-arching script that called each site one after the other in a never-ending loop with a mandatory wait-time between the loops. If you attempt to run independent dockers each on a timer and any other task runs on the Synology, the two or three independently running dockers will overlap leading to an overload condition the Synology will not recover from. The only viable option is to serialise the builds and synchronising those builds is easiest using a single docker like I have.
Using the “Text Editor” on the Synology or using your text editor of choice and copying the files across to the correct folder, create a main build.sh file and as many build-xyz.sh files as you have sites you want to build.
#!/bin/sh
# Main build.sh

# Stash the current time and date in the log file and note the start of the docker
current_time=$(date)
echo "$current_time :: GoHugo Docker Startup" >> /root/logs/main-build-log.txt

while :
do
	current_time=$(date)
	echo "$current_time :: TEN Build Called" >> /root/logs/main-build-log.txt
	/root/build-ten.sh
	current_time=$(date)
	echo "$current_time :: TEN Build Complete, Sleeping" >> /root/logs/main-build-log.txt
	sleep 5m

	current_time=$(date)
	echo "$current_time :: TD Build Called" >> /root/logs/main-build-log.txt
	/root/build-td.sh
	current_time=$(date)
	echo "$current_time :: TD Build Complete, Sleeping" >> /root/logs/main-build-log.txt
	sleep 5m

	current_time=$(date)
	echo "$current_time :: SLIP Build Called" >> /root/logs/main-build-log.txt
	/root/build-slip.sh
	current_time=$(date)
	echo "$current_time :: SLIP Build Complete, Sleeping" >> /root/logs/main-build-log.txt
	sleep 5m
done

current_time=$(date)
echo "$current_time :: GoHugo Docker Build Loop Ungraceful Exit" >> /root/logs/main-build-log.txt
curl -s -F "token=xxxthisisatokenxxx" -F "user=xxxthisisauserxxx1" -F "title=Hugo Site Builds" -F "message=\"Ungraceful Exit from Build Loop\"" https://api.pushover.net/1/messages.json

# When debugging is handy to jump out into the Shell, but once it's working okay, comment this out:
#sh
This will create a main build log file and calls each sub-script in sequence. If it ever jumps out of the loop, I’ve set up a Pushover API notification to let me know.
Since all three sub-scripts are effectively identical except for the directories and repositories for each, The Engineered Network script follows:
#!/bin/sh

# BUILD The Engineered Network website: build-ten.sh
# Set Time Stamp of this build
current_time=$(date)
echo "$current_time :: TEN Build Started" >> /root/logs/ten-build-log.txt

rm -rf /ten/src/* /ten/src/.* 2> /dev/null
current_time=$(date)
if [[ -z "$(ls -A /ten/src)" ]];
then
	echo "$current_time :: Repository (TEN) successfully cleared." >> /root/logs/ten-build-log.txt
else
	echo "$current_time :: Repository (TEN) not cleared." >> /root/logs/ten-build-log.txt
fi

# The following is easy since my Gitea repos are on the same device. You could also set this up to Clone from an external repo.
git --git-dir /ten/src/ clone /repos/engineered.git /ten/src/ --quiet
success=$?
current_time=$(date)
if [[ $success -eq 0 ]];
then
	echo "$current_time :: Repository (TEN) successfully cloned." >> /root/logs/ten-build-log.txt
else
	echo "$current_time :: Repository (TEN) not cloned." >> /root/logs/ten-build-log.txt
fi

rm -rf /ten/output/* /ten/output/.* 2> /dev/null
current_time=$(date)
if [[ -z "$(ls -A /ten/output)" ]];
then
	echo "$current_time :: Site (TEN) successfully cleared." >> /root/logs/ten-build-log.txt
else
	echo "$current_time :: Site (TEN) not cleared." >> /root/logs/ten-build-log.txt
fi

hugo -s /ten/src/ -d /ten/output/ -b "https://engineered.network" --quiet
success=$?
current_time=$(date)
if [[ $success -eq 0 ]];
then
	echo "$current_time :: Site (TEN) successfully generated." >> /root/logs/ten-build-log.txt
else
	echo "$current_time :: Site (TEN) not generated." >> /root/logs/ten-build-log.txt
fi

rsync -arvz --quiet -e 'ssh -p 22' --delete /ten/output/ bobtheuser@myhostsailorvps:/var/www/html/engineered
success=$?
current_time=$(date)
if [[ $success -eq 0 ]];
then
	echo "$current_time :: Site (TEN) successfully synchronised." >> /root/logs/ten-build-log.txt
else
	echo "$current_time :: Site (TEN) not synchronised." >> /root/logs/ten-build-log.txt
fi

current_time=$(date)
echo "$current_time :: TEN Build Ended" >> /root/logs/ten-build-log.txt
The above script can be broken down into several steps as follows:
- Clear the Hugo Source directory
- Pull the current released Source code from the Git repo
- Clear the Hugo Output directory
- Hugo generate the Output of the website
- RSync the output to the remote VPS
Each step has a pass/fail check and logs the result either way.
Your SSH Key
For this work you need to confirm that RSync works and you can push to the remote VPS securely. For that extract the id_rsa key (preferably generate a fresh key-pair) and place that in the /docker/gohugo/ folder on the Synology ready for the next step. As they say it should “just work” but you can test if it does once your docker is running. Open the GoHugo docker, go to the Terminal tab and Create–>Launch with command “sh” then select the “sh” terminal window. In there enter:
ssh bobtheuser@myhostsailorvps -p22
That should log you in without a password, securely via ssh. Once it’s working you can exit that terminal and smile. If not, you’ll need to dig into the SSH keys which is beyond the scope of this article.
Gitea Repo
This is now specific to my use case. You could also clone your Repo from any other location but for me this was quicker easier and simpler to map my repo from the Gitea Docker folder location. If you’re like me and running your own Gitea on the Synology you’ll find that repo directory under the /docker/gitea sub-directories at …data/git/respositories/ and that’s it. Of course many will not be doing that, but setting up external Git cloning isn’t too difficult but beyond the scope of this article.
Configuring The Docker Container
Under the Docker –> Image section, select the downloaded image then “Launch” it, set the Container Name to “gohugo” (or whatever name you want…doesn’t matter) then configure the Advanced Settings as follows:
- Enable auto-restart: Checked
- Volume: (See below)
- Network: Leave it as bridge is fine
- Port Settings: Since I’m using this as a builder I don’t care about web-server functionality so I left this at Auto and never use that feature
- Links: Leave this empty
- Environment –> Command: /root/build.sh (Really important to set this start-up command here and now, since thanks to Synology’s DSM Docker implementation, you can’t change this after the Docker container has been created without destroying and recreating the entire docker container!)
There’s a lot of little things to add here to make this work for all the sites. In future if you want to add more sites then stopping the Docker, adding Folders and modifying the scripts is straight-forward.
Add the following Files: (Where xxx, yyy, zzz are the script names representing your sites we created above, aaa is your local repo folder name)
- docker/gohugo/build-xxx.sh map to /root/build-xxx.sh (Read-Only)
- docker/gohugo/build-yyy.sh map to /root/build-yyy.sh (Read-Only)
- docker/gohugo/build-zzz.sh map to /root/build-zzz.sh (Read-Only)
- docker/gohugo/build.sh map to /root/build.sh
- docker/gohugo/id_rsa map to /root/.ssh/id_rsa (Read-Only)
- docker/gitea/data/git/respositories/aaa map to /repos (Read-Only) Only for a locally hosted Gitea repo
Add the following Folders:
- docker/gohugo/xxx/output map to /xxx/output
- docker/gohugo/xxx/src map to /xxx/src
- docker/gohugo/yyy/output map to /yyy/output
- docker/gohugo/yyy/src map to /yyy/src
- docker/gohugo/zzz/output map to /zzz/output
- docker/gohugo/zzz/src map to /zzz/src
- docker/gohugo/logs map to /root/logs
When finished and fully built the Volumes will look something like this:
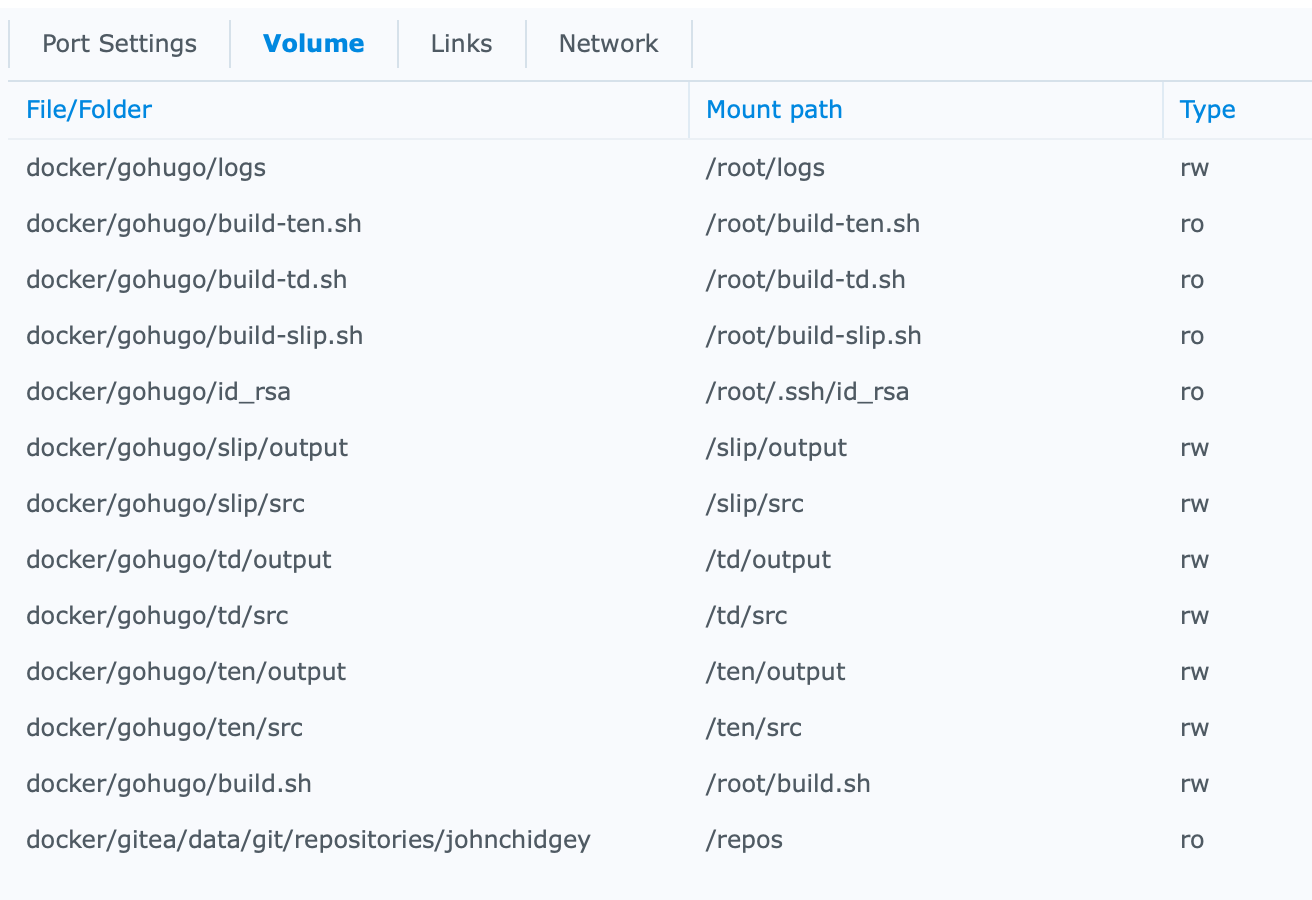
Apply the Advanced Settings then Next and select “Run this container after the wizard is finished” then Apply and away we go.
Of course, you can put whatever folder structure and naming you like, but I like keeping my abbreviations consistent and brief for easier coding and fault-finding. Feel free to use artistic licence as you please…
Away We Go!
At this point the Docker should now be periodically regenerating your Hugo websites like clockwork. I’ve had this setup running now for many weeks without a single hiccup and on rebooting it comes back to life and just picks up and runs without any issues.
As a final bonus you can also configure the Synology Web Server to point at each Output directory and double-check what’s being posted live if you want to.
Enjoy your automated Hugo build environment that you completely control :)
Building Your Own Bitcoin Lightning Node Part Two
Previously I’ve written about my Synology BitCoin Node Failure and more recently about my RaspiBlitz that was actually successful. Now I’d like to share how I set it up with a few things I learned along the way that will hopefully make things easier for others to avoid the mistakes I made.
Previously I suggested the following:
- Set up the node to download a fresh copy of the BlockChain
- Use an External IP, as it’s more compatible than TOR (unless you’re a privacy nut)
Beyond that here’s some more suggestions:
- If you’re on a home network behind a standard Internet Modem/Router: change the Raspberry Pi to a fixed IP address and set up port forwarding for the services you need (TCP 9735 at a minimum for Lightning)
- Don’t change the IP from DHCP to Fixed IP until you’ve first enabled and set up your Wireless connection as a backup
- Sign up for DuckDNS before you add ANY Services (I tried FreeDNS but DuckDNS was the only one I found that supports Let’s Encrypt)
Let’s get started then…
WiFi First
Of course this is optional, but I think it’s worth having even if you’re not intending to pull the physical cable and shove the Pi in a drawer somewhere (please don’t though it will probably overheat if you did that). Go to the Terminal on the Pi and enter the following:
sudo nano /etc/wpa_supplicant/wpa_supplicant.conf
Then add the following to the bottom of the file:
network={
ssid="My WiFi SSID Here"
psk="My WiFi Password Here"
}
This is the short-summary version of the Pi instructions.
Once this is done you can reboot or enter this to restart the WiFi connection:
sudo wpa_cli -i wlan0 reconfigure
You can confirm it’s connected with:
iwgetid
You should now see:
wlan0 ESSID:"My WiFi SSID Here"
Fixed IP
The Raspberry Pi docs walk through what to change but I’ll summarise it here. Firstly if you have a router to connect to the internet, likely it’s one of the standard subnets like 192.168.1.1 and it’s your gateway, but to be sure from the Raspberry Pi terminal (after you’ve SSH’d in) type:
route -ne
It should come back with a table with Destination 0.0.0.0 to a Gateway, most likely something like 192.168.1.1 as Iface (Interface) Eth0 for hardwired Ethernet and wlan0 for WiFi. Next type:
cat /etc/resolv.conf
This should list the nameservers you’re using - make a note of these in a text-editor if you like. Then edit your dhcpcd.conf. I use nano but you can use vi or any other linux editor of your choice:
sudo nano /etc/dhcpcd.conf
Add the following (or your equivalent) to the end of the conf: (Where xxx is your Fixed IP)
interface eth0
static ip_address=192.168.1.xxx
static routers=192.168.1.1
static domain_name_servers=192.168.1.1  fe80::9fe9:ecdf:fc7e:ad1f%eth0
Of course when picking your Fixed IP on the local network, make sure your DHCP allocation has a free zone above or below which it’s a safe space. On my network I only allow DHCP between .20 and .254 of my subnet but you can reserve any which way you prefer.
Once this is done reboot your Raspberry Pi and confirm you can connect via SSH at the Fixed IP. If you can’t, try the WiFi IP address and check your settings. If you still can’t, oh dear you’ll need to reflash your SD card and start over. (If that happens don’t worry, your Blockchain on the SSD will not be lost)
Dynamic DNS
If you’re like me you’re running this on your home network and you have a “normal” internet plan behind an ISP that charges more for a Fixed IP on the Internet and hence you’ve got to deal with a Dynamic IP address that’s public-facing. #Alas
There are many Dynamic DNS sites out there, but finding one that will work reliably, automatically, with Let’s Encrypt isn’t easy. Of course if you’re not intending to use public-facing utilities that need a TLS certificate like I am (Sphinx) then you probably don’t need to worry about this step or at least any Dynamic DNS provider would be fine. For me, I had to do this to get Sphinx to work properly.
DuckDNS allows you to sign in with credentials ranging from Persona, to Twitter, GitHub, Reddit and Google: pick whichever you have or whichever you prefer. Once logged in you can create a subdomain and add up to 5 in total. Take note of your Token and your subdomain.
In the RaspiBlitz menu go to SUBSCRIBE and select NEW2 (LetsEncrypt HTTPS Domain [free] not under Settings!) then enter the above information as requested. When it comes to the Update URL leave this blank. The Blitz will reboot and hopefully everything should just work. When you’re done the Domain will then appear on the LCD of your Blitz at the top.
You won’t know if your certificates are correctly issued until later or if you want you can dive into the terminal again and manually check, but that’s your call.
Port Forwarding Warning
Personally I only Port Forward the following that I believe is the minimum required to get the Node and Sphinx Relay working properly:
- TCP 9735 (Lightning)
- TCP 3300 & 3301 (Sphinx Relay)
- TCP 8080 (Let’s Encrypt)
I think there’s an incremental risk in forwarding a lot of other services - particularly those that allow administration of your Node and Wallet. I also use an Open VPN to my household network with a different endpoint and I use the Web UIs and Zap application on my iPhone for interacting with my Node. Even with a TLS certificate and password per application I don’t think opening things wide open is a good idea. You may see that convenience differently, so make your own decisions in this regard.
Okay…now what?
As a podcaster and casual user of your Lightning Node, not everything in the Settings and Services is of interest. For me I’ve enabled the following that are important for use and monitoring:
- (SETTINGS) LND Auto-Unlock
- (SERVICES) Accept KeySend
- (SERVICES) RTL Web interface
- (SERVICES) ThunderHub
- (SERVICES) BTC-RPC-Explorer
- (SERVICES) Lightning Loop
- (SERVICES) Sphinx-Relay
Each in turn…
LND Auto-Unlock
In lightning’s LND implementation, the Wallet with your coinage in it is automatically locked when you restart your system. If you’re comfortable with auto-unlocking your wallet on reboot without you explicitly entering your Wallet password then this feature means a recovery from a reboot/power failure etc will be that little bit quicker and easier. That said, storing your wallet password on your device for privacy nuts is probably not the best idea. I’ll let you balance convenience against security for yourself.
Accept KeySend
One of the more recent additions to the Lightning standard in mid-2020 was KeySend. This feature allows anyone to send an open Invoice to any Node that supports it, from any Node that supports it. With the Podcasting 2.0 model, the key is using KeySend to stream Sats to your nominated Node either per minute listened or as one-off Boost payments showing appreciation on behalf of the listener. For me this was the whole point, but for some maybe they might not be comfortable accepting payments from random people at random times of the day. Who can say?
RTL Web interface
The Ride The Lightning web interface is a basic but handy web UI for looking at your Wallet, your channels and to create and receive Invoices. I enabled this because it was more light-weight than ThunderHub but as I’ve learned more about BitCoin and Lightning, I must confess I rarely use it now and prefer ThunderHub. It’s a great place to start though and handy to have.
ThunderHub
By far the most detailed and extensive UI I’ve found yet for the LND implementation, ThunderHub allows everything that RTL’s UI does plus channel rebalancing, Statistics, Swaps and Reporting. It’s become my go to UI for interacting with my Node.
BTC-RPC-Explorer
I only recently added this because I was sick of going to internet-based web pages to look at information about BitCoin - things like the current leading block, pending transactions, fee targets, block times and lots and lots more. Having said all of that, it took about 9 hours to crunch through the blockchain and derive this information on my Pi, and it took up about 8% of my remaining storage for the privilege. You could probably live without it though, but if you’re really wanting to learn about the state of the BitCoin blockchain then this is very useful.
Lightning Loop
Looping payments in and out is handy to have and a welcome addition to the LND implementation. At a high level Looping allows you to send funds to/from users/services that aren’t Lightning enabled and reduces transaction fees by reusing Lightning channels. That said, maybe that’s another topic for another post.
Sphinx-Relay
The one I really wanted. The truth is that at the time of writing, the best implementation of streaming podcasts with Lightning integration is Sphinx.
Sphinx started out as a Chat application, but one that uses the distributed Lightning network to pass messages. The idea seems bizarre to start with but if you have a channel between two people you can send them a message attached to a Sat payment. The recipient can then send that same Sat back to you with their own message in response.
Of course you can add fees if you want to for peer to peer but that’s optional. If you want to chat with someone else on Sphinx, so long as they have a Wallet on a Node that has a Sphinx-Relay on it, you can participate. Things get more interesting if you create a group chat, that Sphinx call a “Tribe” at which point you can “Stake” an amount to post on the channel with a “Time to Stake” both set by the Tribe owner. If the poster posts something good, the time to stake elapses and the Staked amount returns to the original poster. If the poster posts something inflammatory then the Tribe owner can delete that post and those funds are claimed by the Tribe owner.
This effectively puts a price on poor behaviour and conversely poor-acting owners that delete all posts will find themselves with an empty Tribe very quickly. It’s an interesting system for sure but has led to some well moderated conversations in my experiences thus far even in controversial Tribes.
In mid/late 2020 Sphinx integrated Podcasts into Tribe functionality. Hence I can create a Tribe, link a single Podcast RSS Feed to that Tribe and then anyone listening to an episode in the Sphinx app and Tribe will automatically stream Sats to the RSS Feed’s nominated Lightning Node. The “Value Slider” defaults to the Streaming Sats suggested in the RSS Feed, however this can be adjusted by the listener on a sliding bar all the way down to 0 if they wish - it’s Opt in. The player itself is basic but works well enough with Skip Forwards and Backwards as well as speed adjustment.
Additionally Sphinx has apps available for iOS (TestFlight Beta), Android (Sideload, Android 7.0 and higher) and desktop OSs including Windows, Linux and MacOS as well. Most functions exist on all apps however I find myself sometimes going back to the iOS app to send/receive Sats to my Wallet/Node which isn’t currently implemented on the MacOS version. (Not since I started my own Node however) You can of course host a Node on Sphinx for a monthly fee if you prefer, but this article is about owning your own Node.
One Last Thing: Inbound Liquidity
The only part of this equation that’s a bit odd (or was for me at the beginning) is understanding liquidity. I mentioned it briefly here, but in short when you open a channel with someone the funds are on your own side, meaning you have outbound liquidity. Hence I can spend Lightning/BitCoin on things in the Network. That’s fine. No issue. The problem is when you’re a Podcaster you want to receive payments in streaming Sats, but without Inbound Liquidity you can’t do that.
The simplest way to build it is to ask, really, really nicely for an existing Lightning user to open a channel with you. Fortunately my Podcasting 2.0 acquaintance Dave Jones was kind enough to open a channel for 100k Sats to my node, thus allowing inbound liquidity for testing and setting up.
In current terms, 100k isn’t a huge channel but it’s more than enough to get anyone started. There are other ways I’ve seen including pushing tokens to the partner on the channel when it’s created (at a cost) but that’s something that I need to learn more about before venturing more thoughts on it.
That’s it
That’s pretty much it. If you’re a podcaster and you’ve made it this far you now have your own Node, you’ve added your Value tag to your RSS feed with your new Node ID, you’ve set up Sphinx Relay and your own Tribe and with Inbound Liquidity you’re now having Sats streamed to you by your fans and loyal listeners!
Many thanks to Podcasting 2.0, Sphinx, RaspiBlitz, DuckDNS and both Adam Curry and Dave Jones for inspiration and guidance.
Please consider supporting each of these projects and groups as they are working in the open to provide a better podcasting future for everyone.
Building Your Own Bitcoin Lightning Node
After my previous attempts to build my own node to take control of my slowly growing podcast streaming income didn’t go so well I decided to bite the bullet and build my own Lightning Node with new hardware. The criteria was:
- Minimise expenditure and transaction fees (host my own node)
- Must be always connected (via home internet is fine)
- Use low-cost hardware and open-source software with minimal command-line work
Because of the above, I couldn’t use my Macbook Pro since that comes with me regularly when I leave the house. I tried to use my Synology, but that didn’t work out. The next best option was a Raspberry Pi, and two of the most popular options out there are the RaspiBolt and RaspiBlitz. Note: Umbrel is coming along but not quite as far as the other two.
The Blitz was my choice as it seems to be more popular and I could build it easily enough myself. The GitHub Repo is very detailed and extremely helpful. This article is not intended to just repeat those instructions, but rather describe my own experiences in building my own Blitz.
Parts
The GitHub instructions suggest Amazon links, but in Australia Amazon isn’t what it is in the States or even Europe. So instead I sourced the parts from a local importer of Rasperry Pi parts. I picked from the “Standard” list:
- $92.50 / Raspberry Pi 4 Model B 4GB
- $16.45 / Raspberry Pi 4 Power Supply (Official) - USB-C 5.1V 15.3W (White)
- $23.50 / Aluminium Heatsink Case for Raspberry Pi 4 Black (Passive Cooling, Silent)
- $34.65 / Waveshare 3.5inch LCD 480x320 (The LCD referred to was a 3.5" RPi Display, GPIO connection, XPT2046 Touch Controller but they had either no stock on Amazon or wouldn’t ship to Australia)
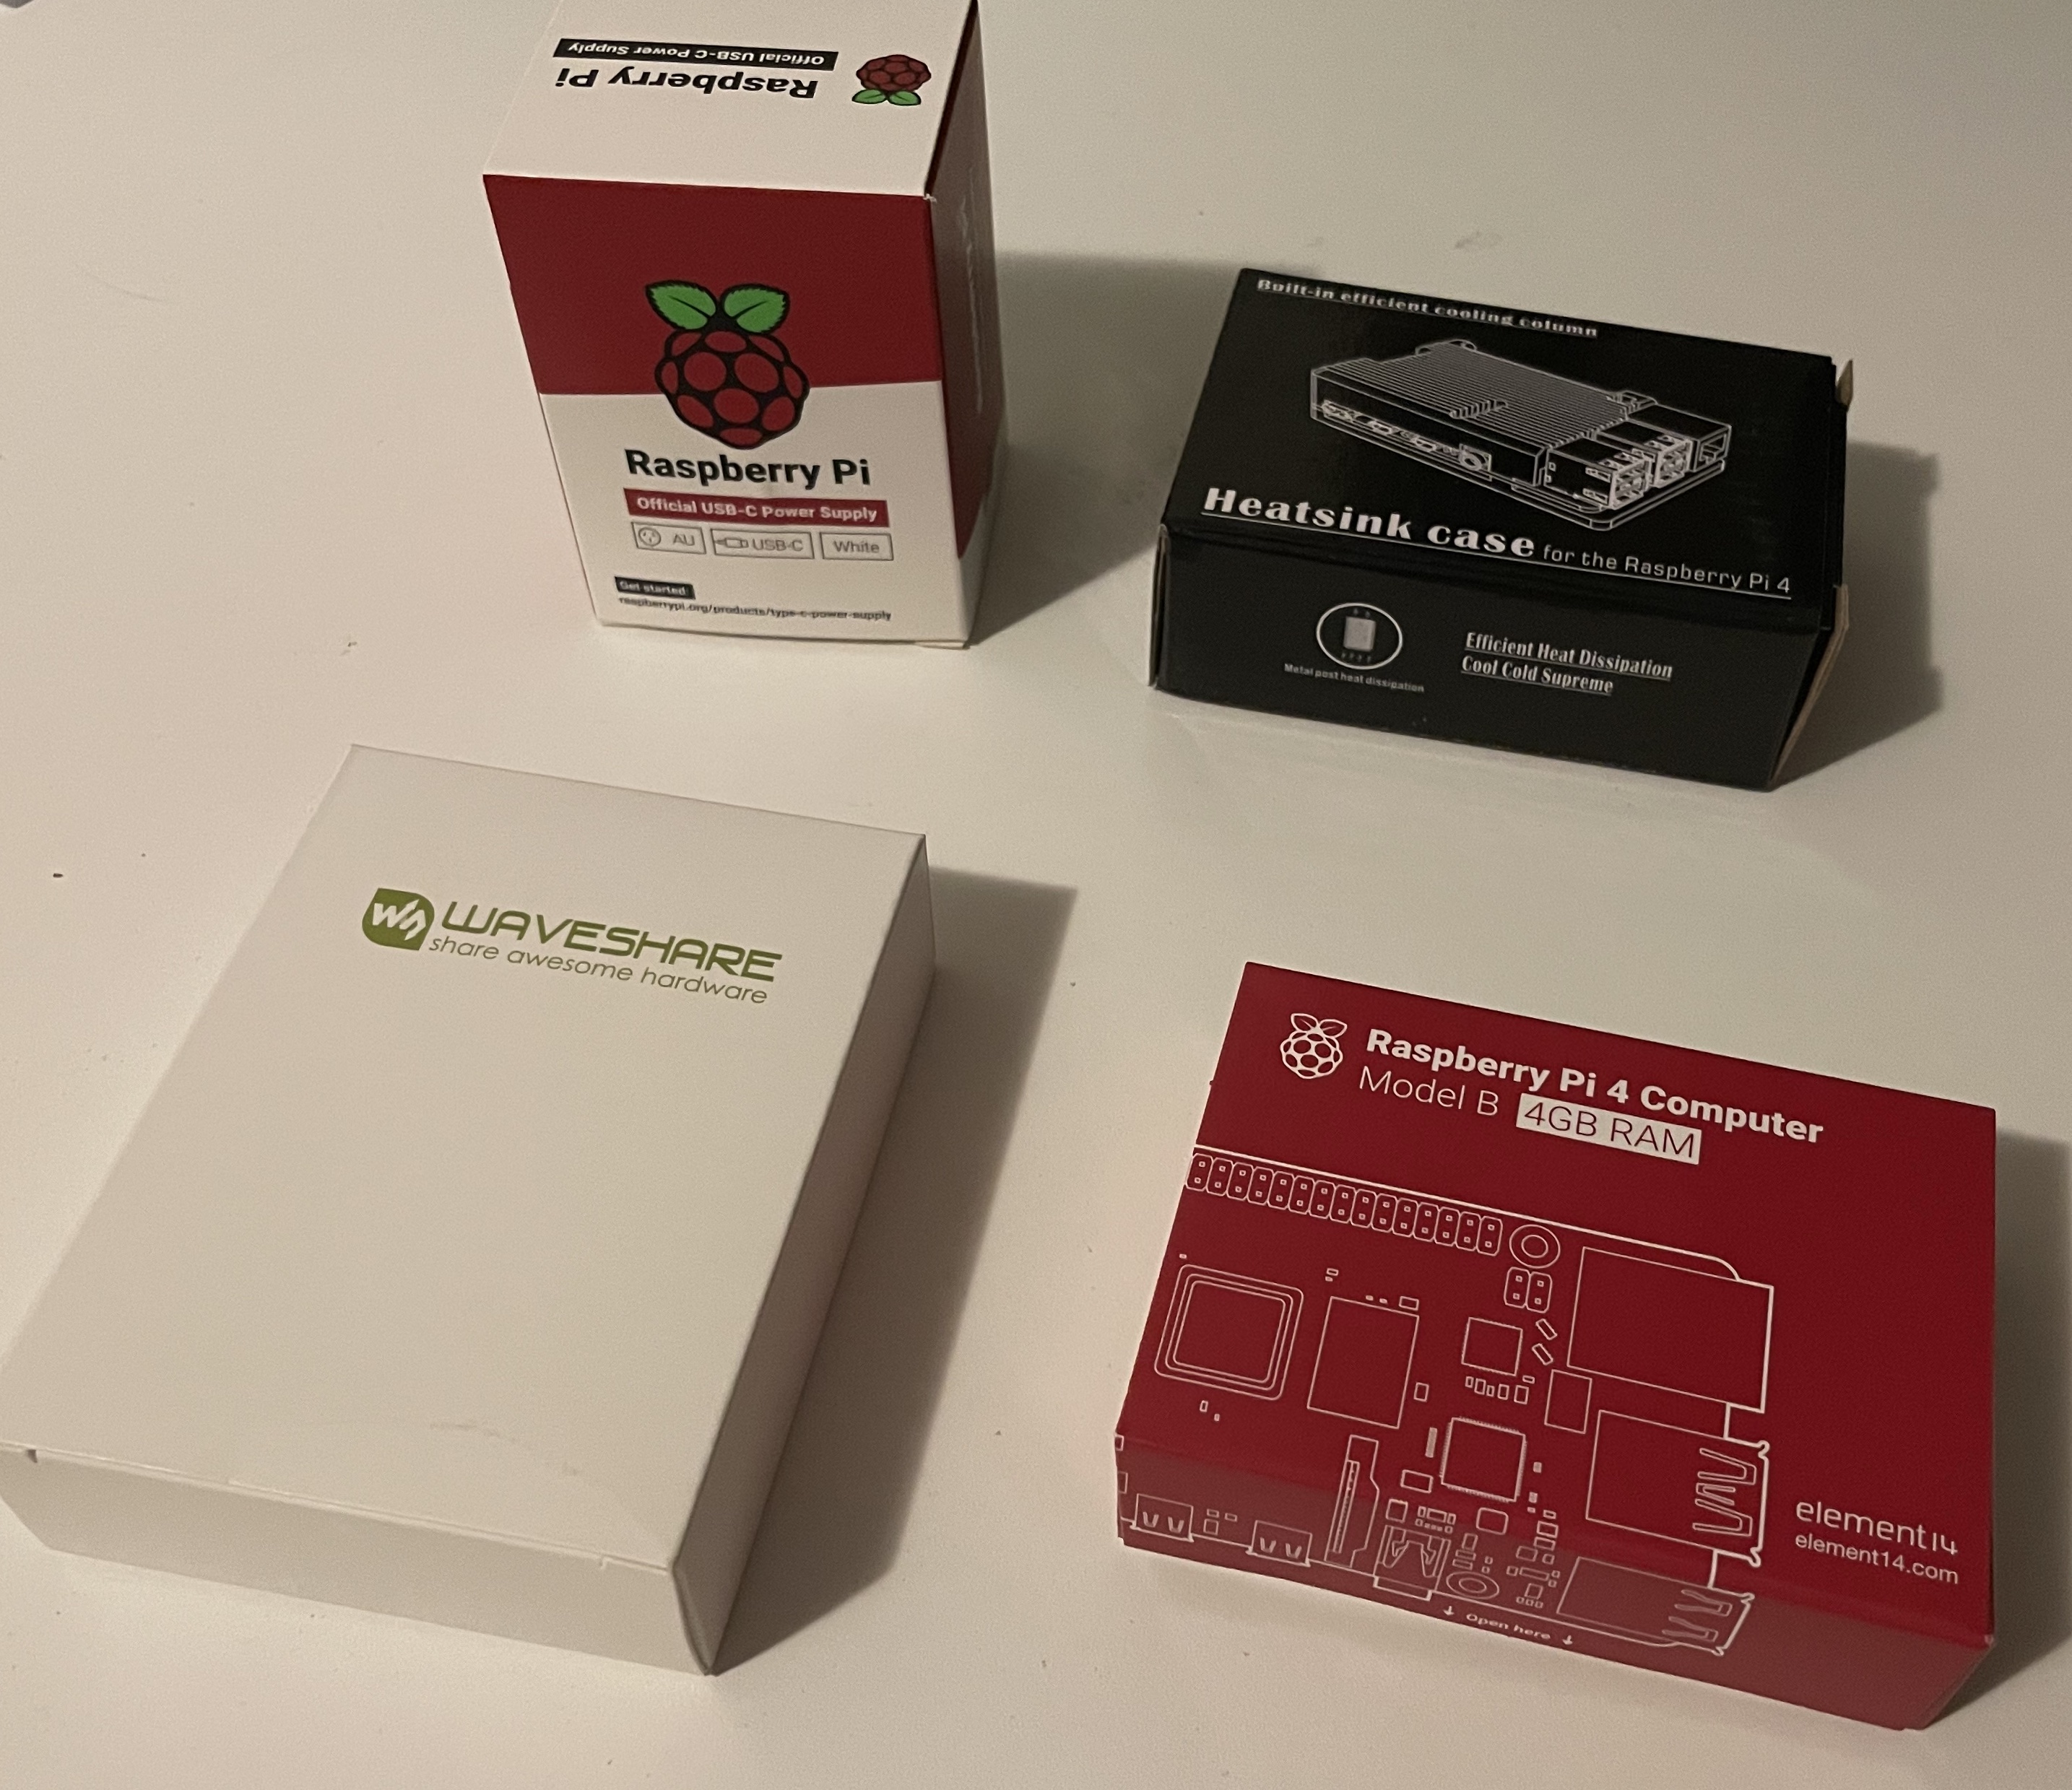 All the parts from Core Electronics
- $14 / Samsung 32GB Micro SDHC Evo Plus W90MB Class 10 with SD Adapter
On Hand
Admittedly a 1TB SSD and Case would’ve cost an additional $160 AUD, which in future I will extend probably to a fully future-proof 2TB SSD but at this point the Bitcoin Blockchain uses about 82% of that so a bigger SSD is on the cards for me, in the next 6-9 months time for sure.
Total cost: $181.10 AUD (about $139 USD or 300k Sats at time of writing)
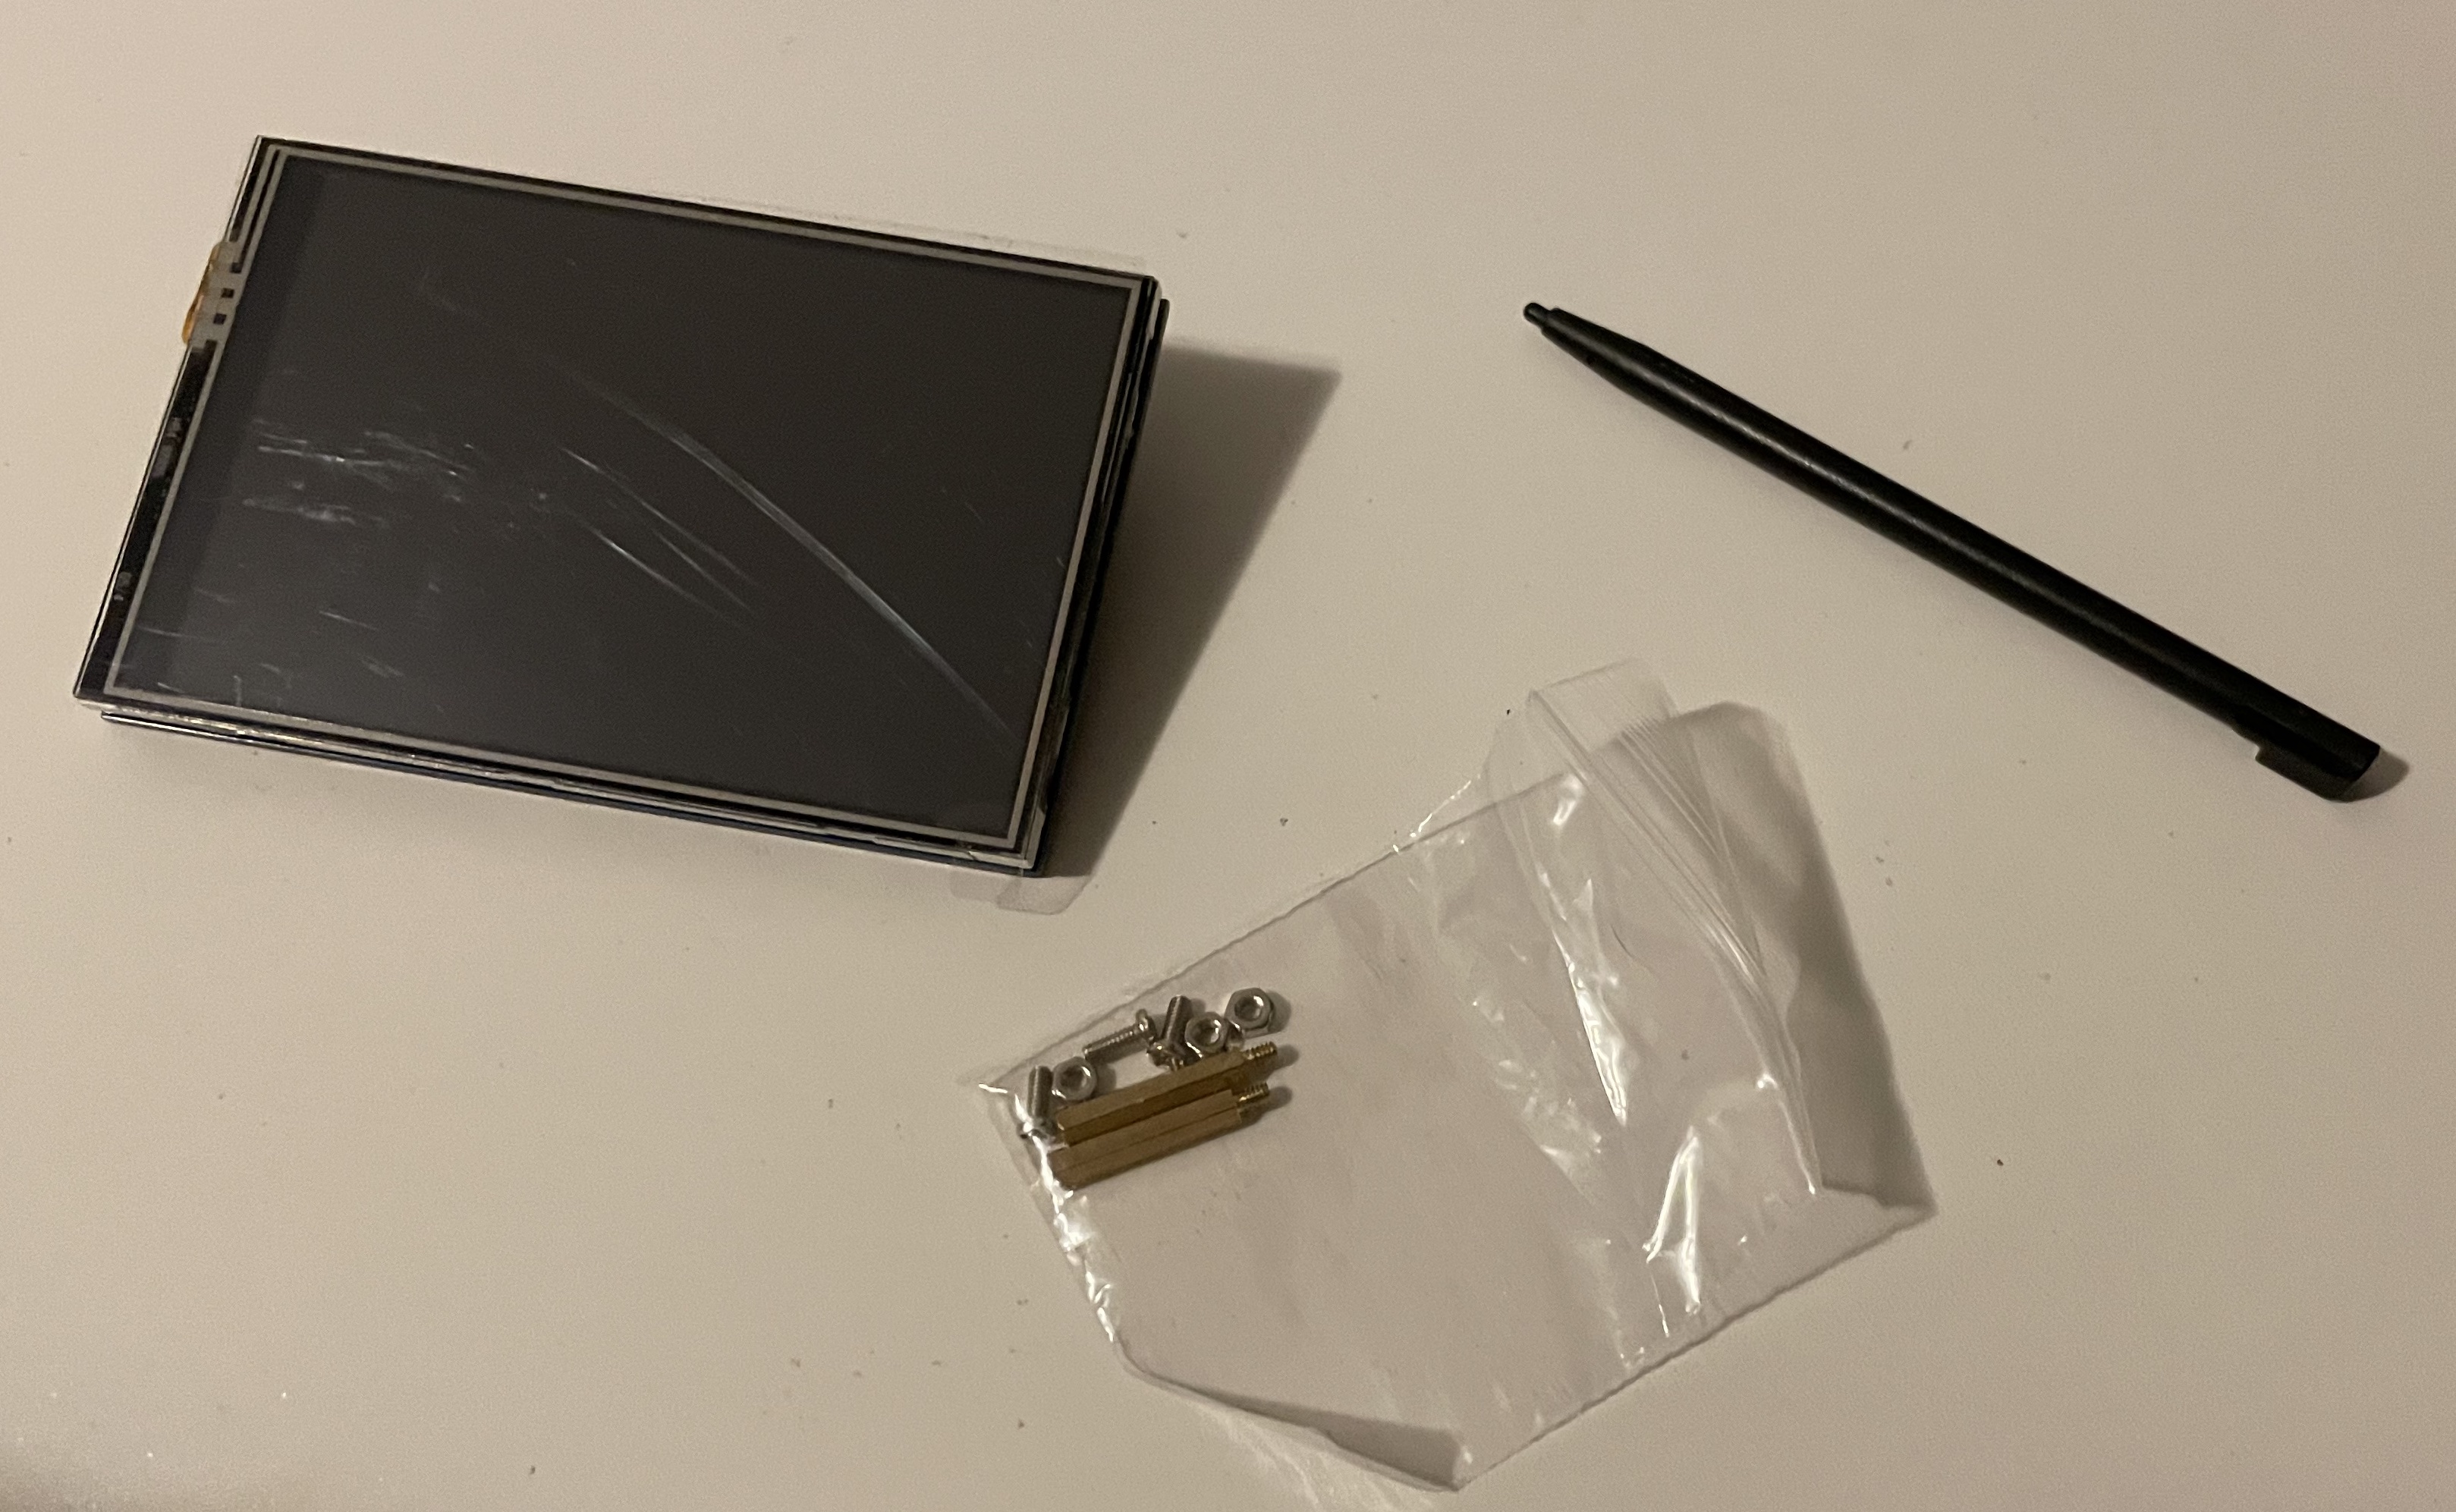 The WaveShare LCD Front View
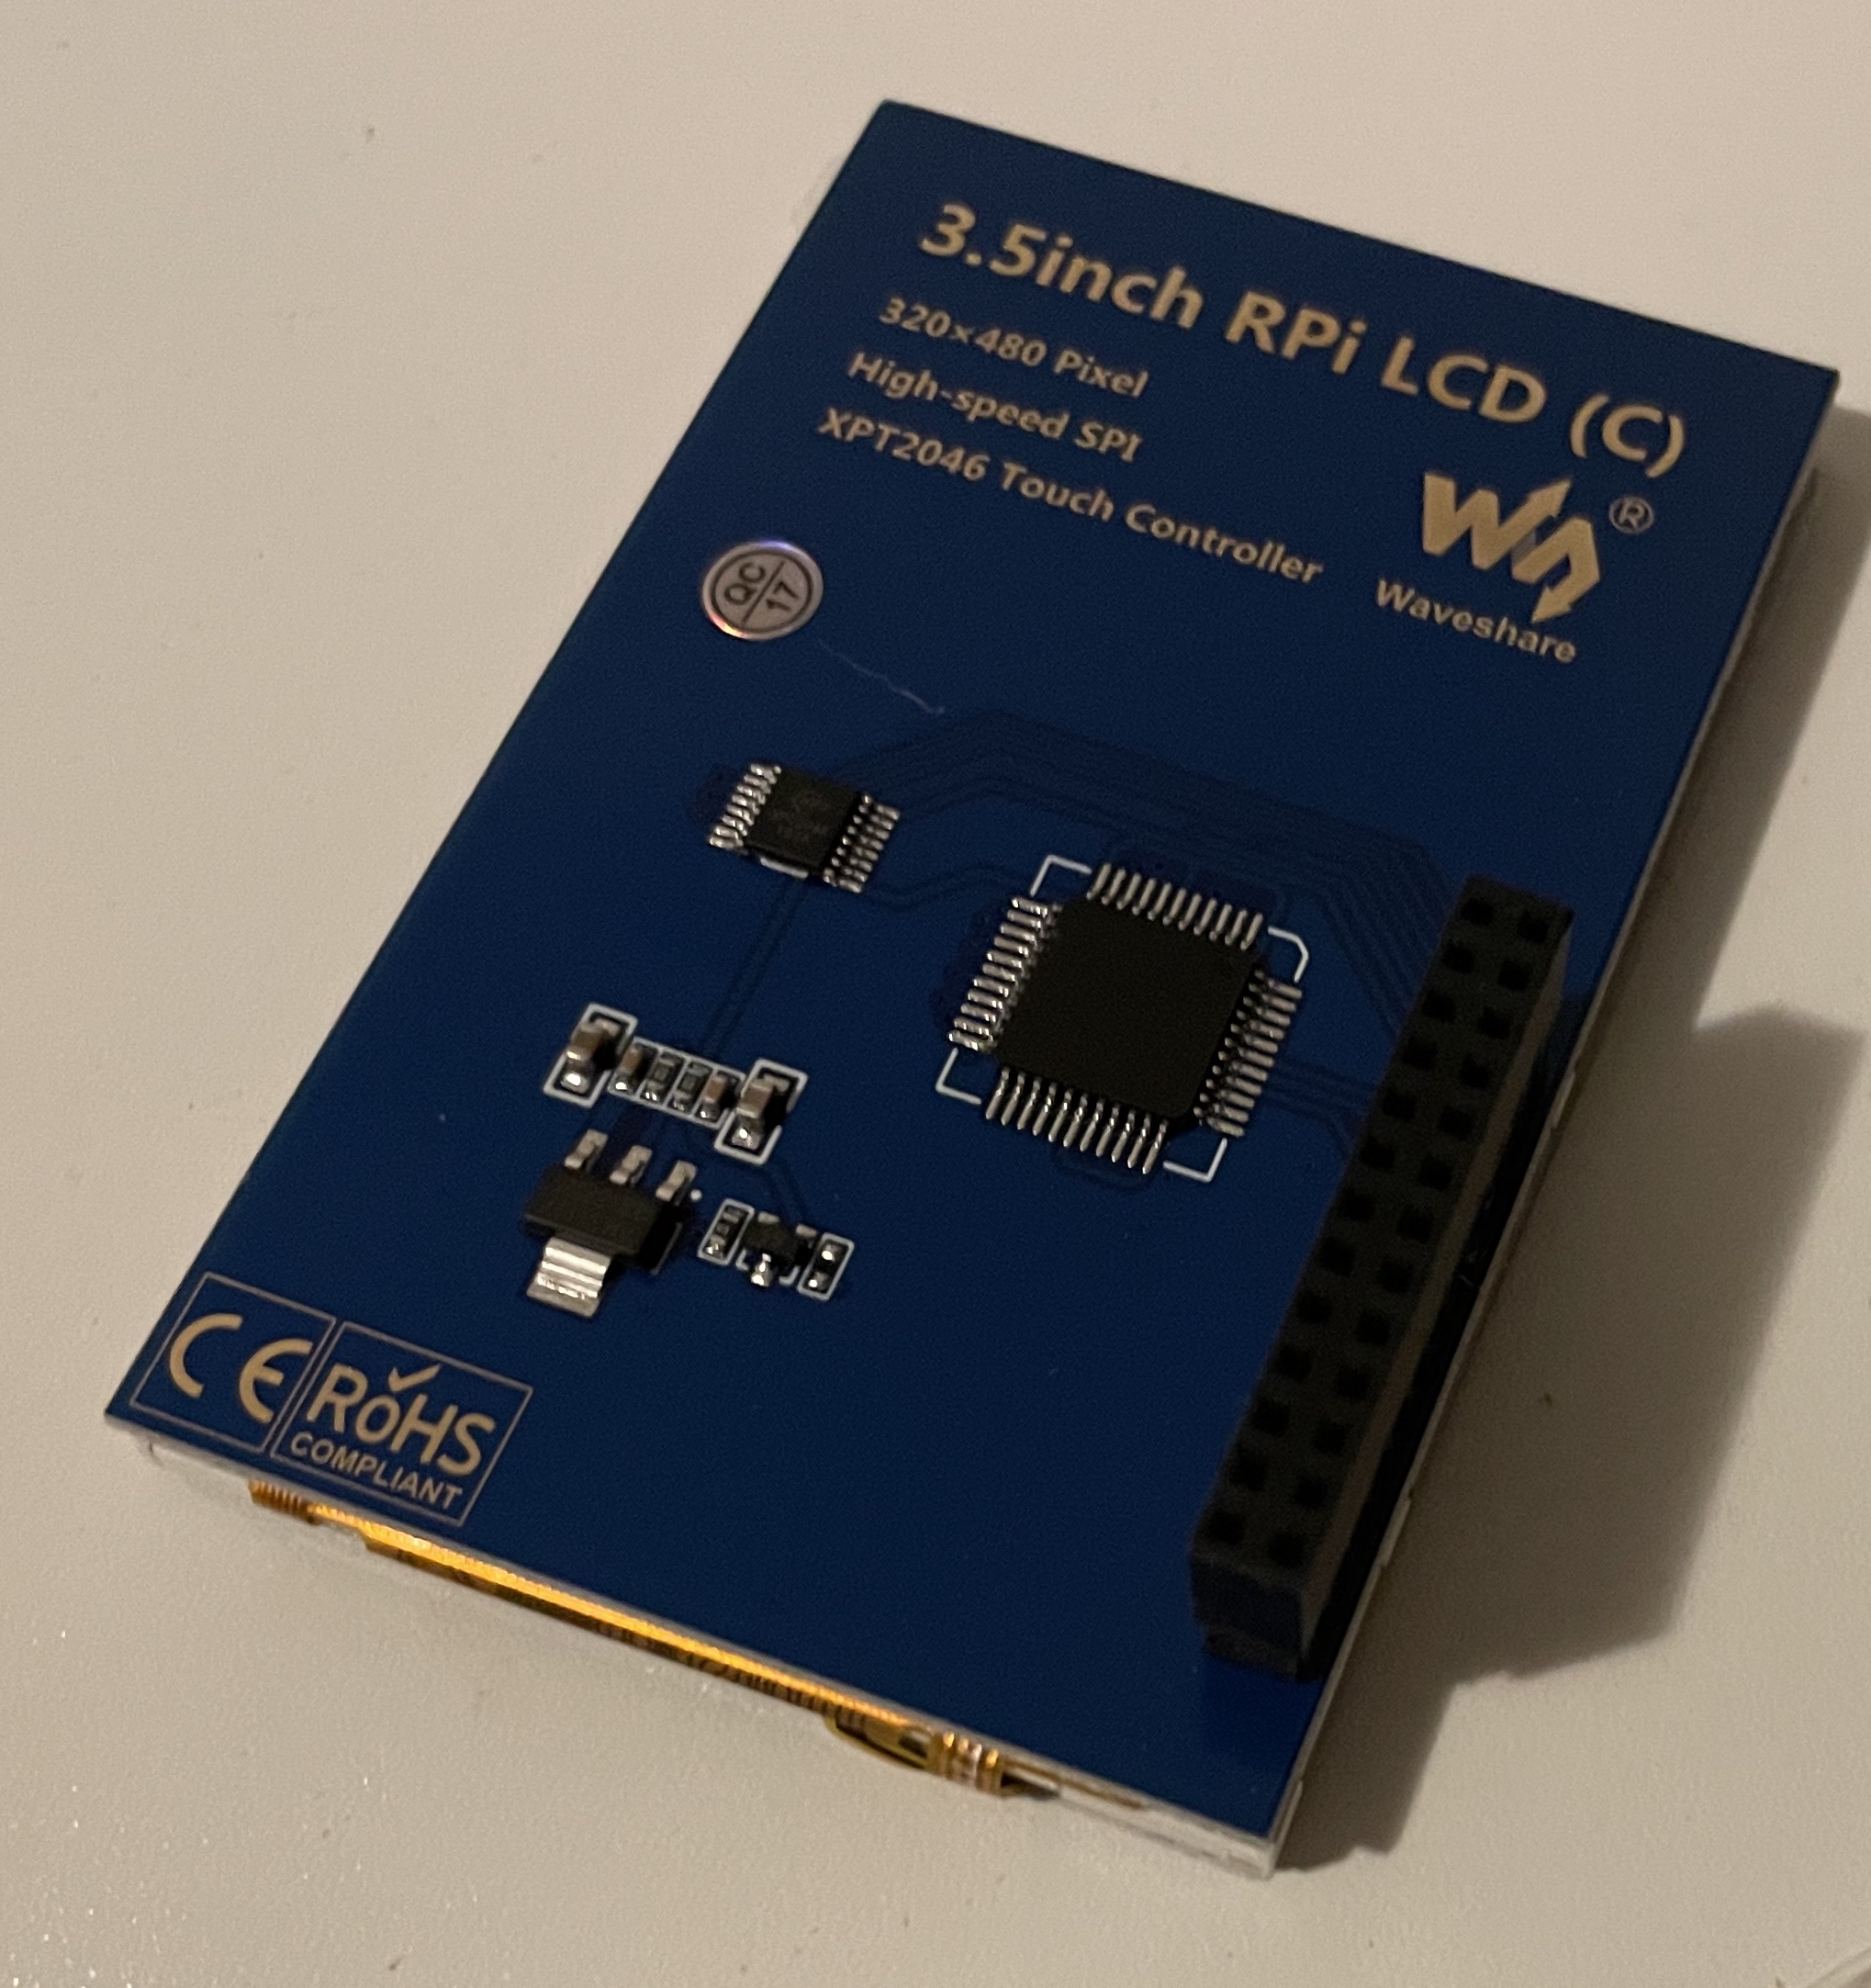 The WaveShare LCD Rear View
Assembly
The power supply is simple: unwrap, plug in to the USB-C Power Port and done. The Heatsink comes with some different sized thermal pads to sandwich between the heatsink and the key components on the Pi motherboard and four screws to clamp the two pieces together around the motherboard. Finally lining up the screen with the outer-most pins on the I/O Header and gently pressing them together. They won’t sit flat against the HeatSink/case but they don’t have to, to connect well.
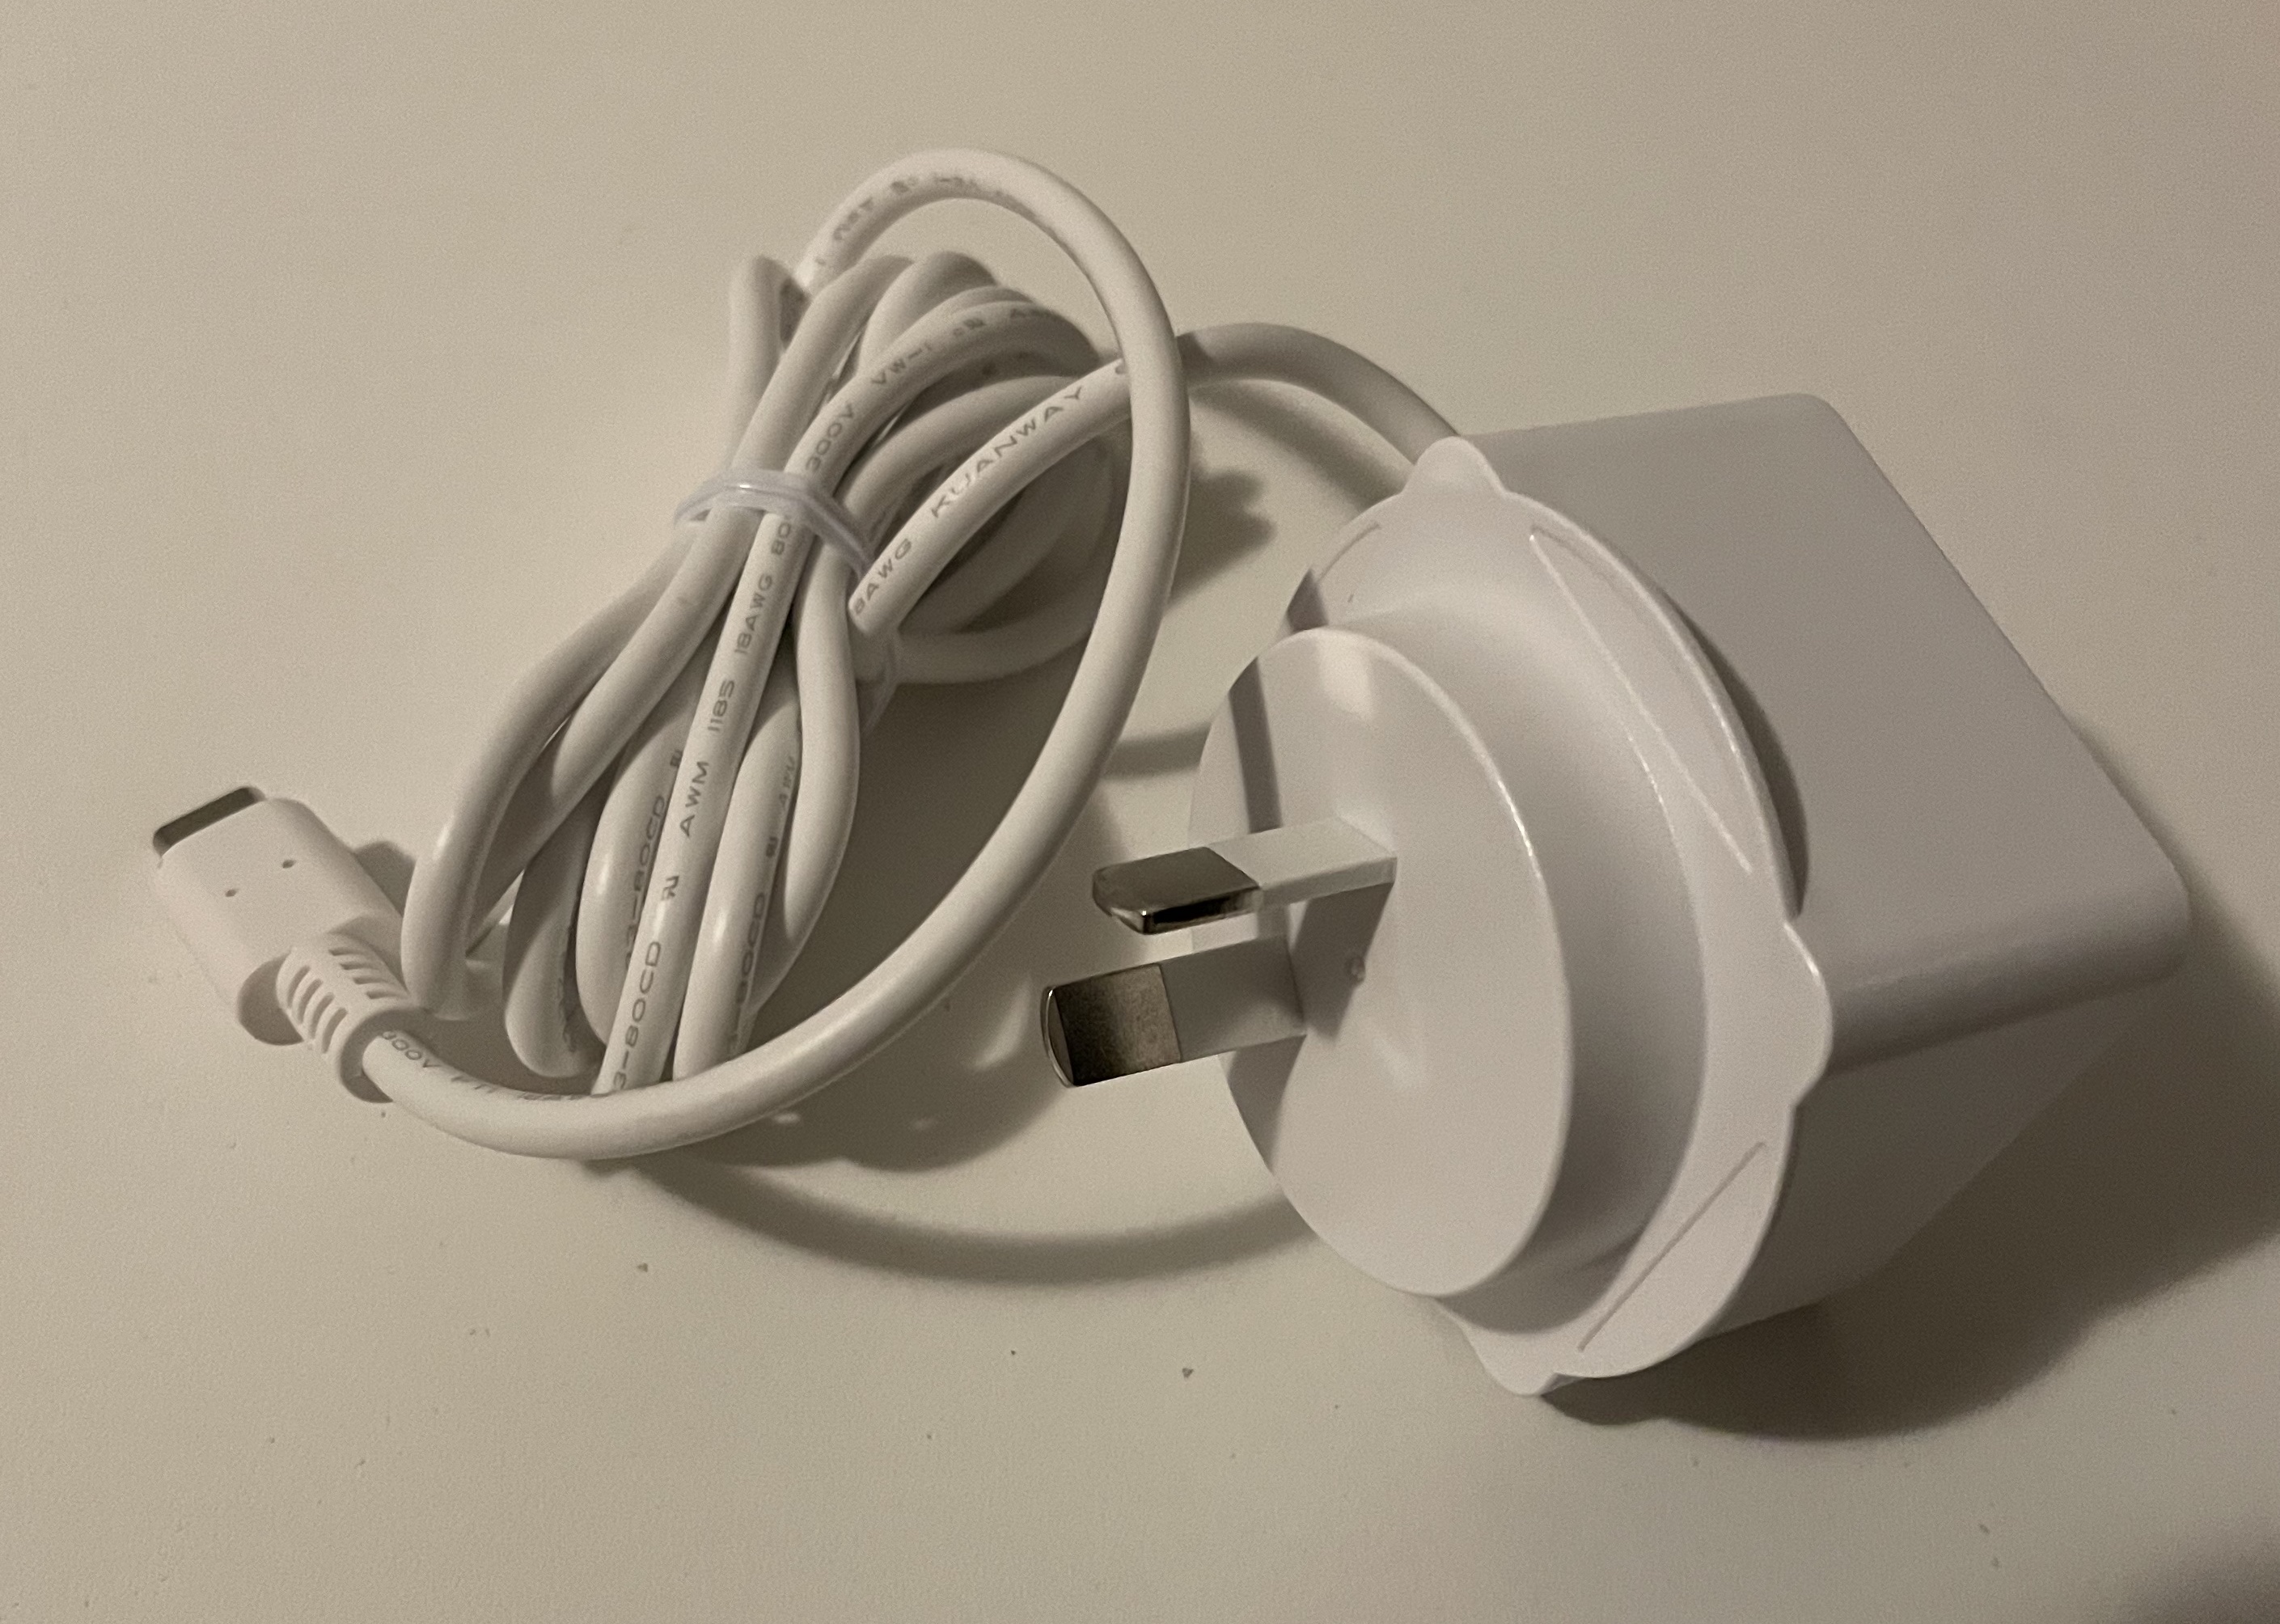 The Power Supply
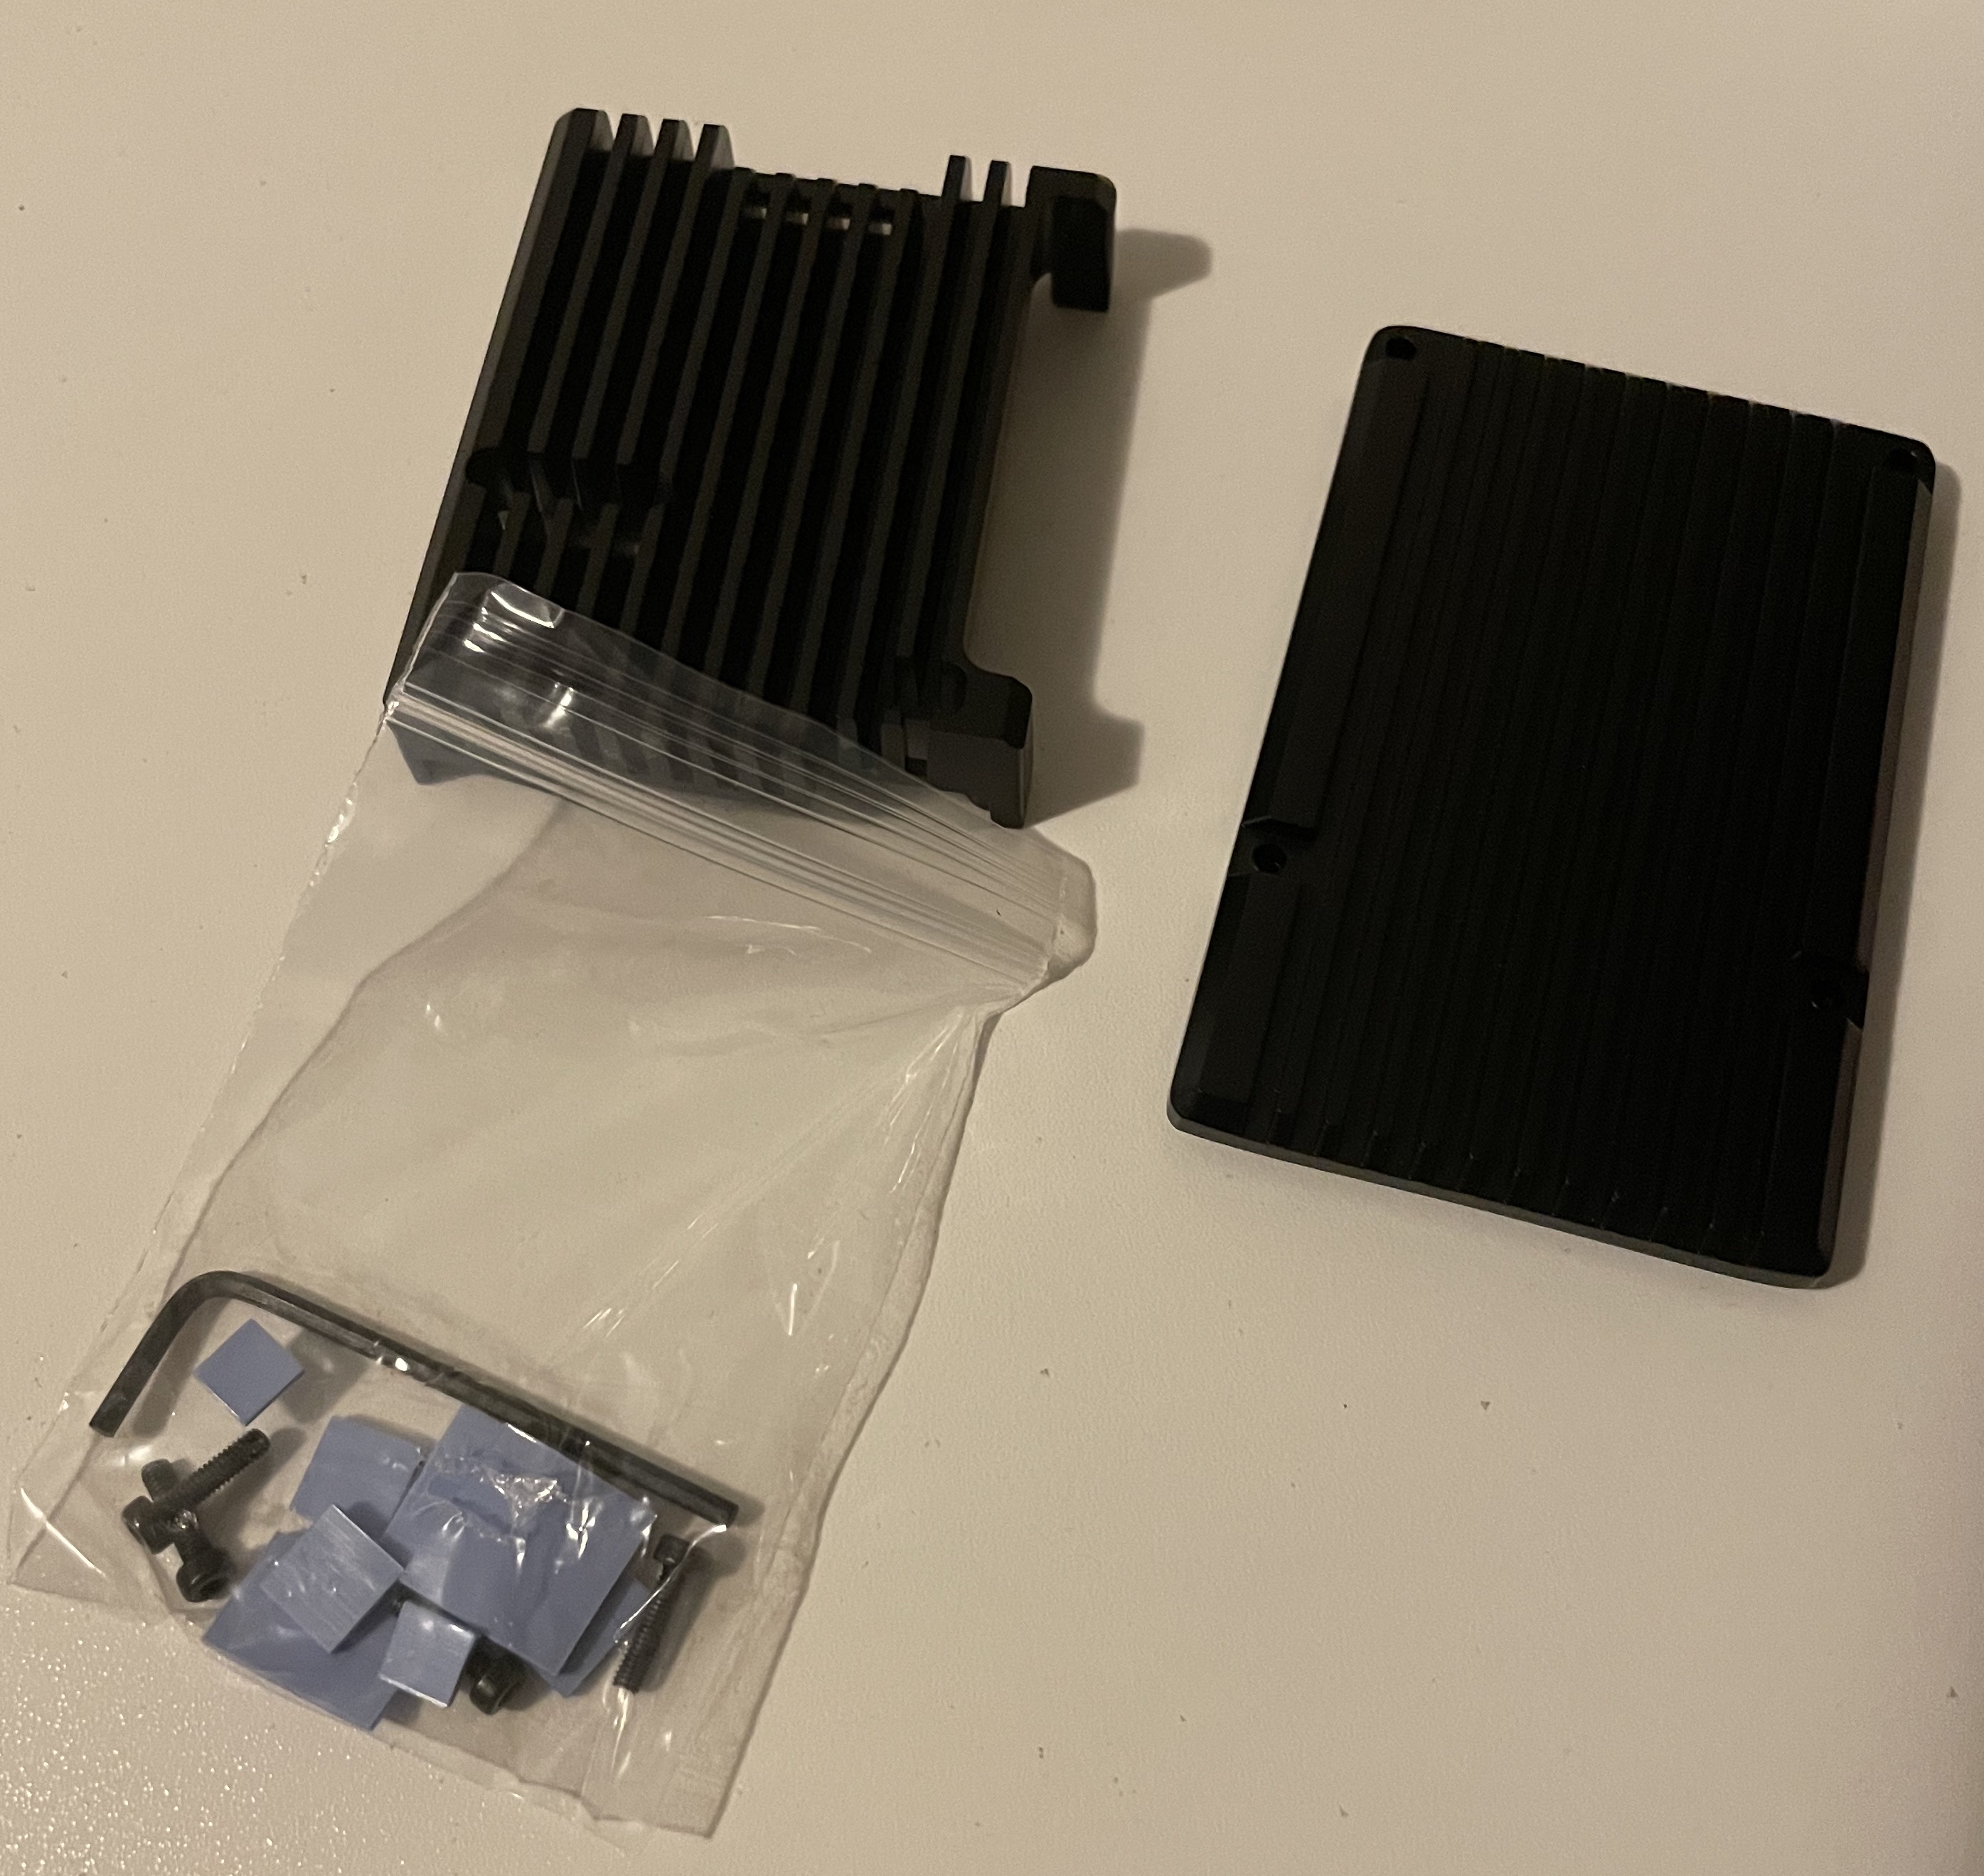 The HeatSink
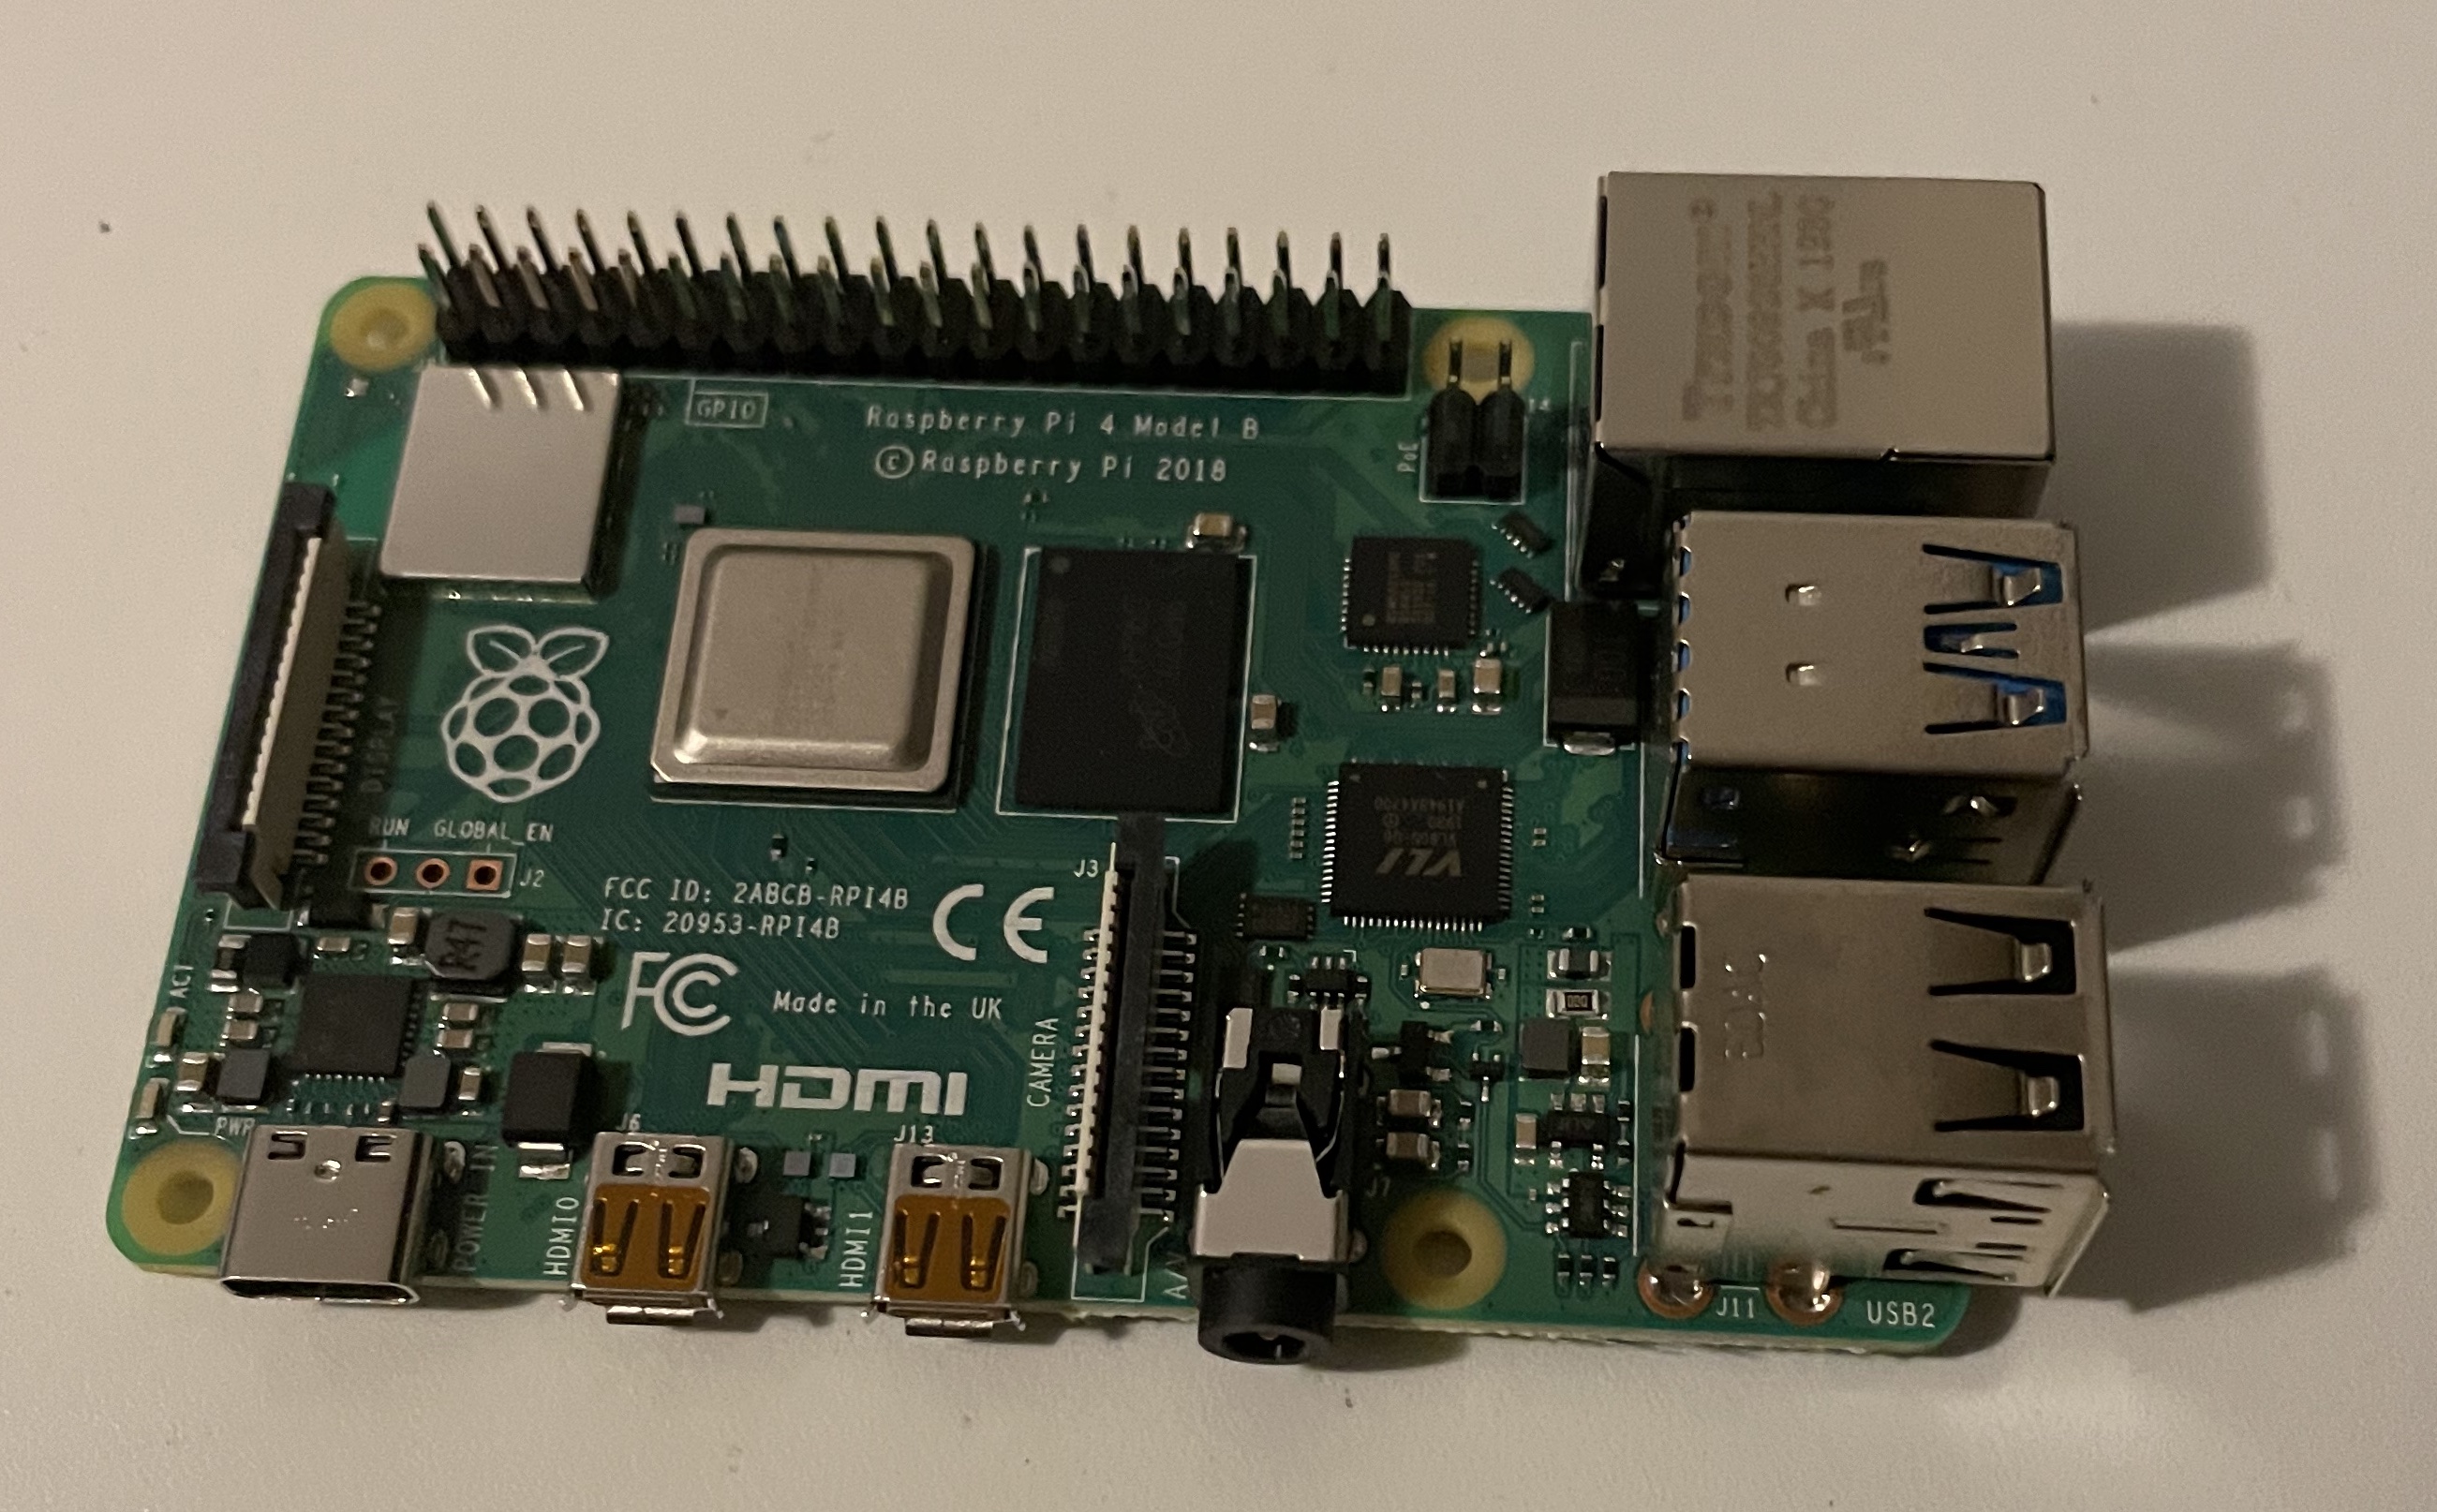 The Raspberry Pi 4B Motherboard
Burning the Image
I downloaded the boot image from the GitHub repo, and used Balena Etcher to write it on my Macbook Pro. Afterward you insert that into the Raspberry Pi, connected up the SSD to the motherboard side USB3.0 port, connect up an Ethernet cable and then power it up!
Installing the System
If everything is hooked up correctly (and you have a router/DHCP server on your hardwired ethernet you just connected it to) the screen should light up with the DHCP allocated IP Address you can reach it on with instructions on how to SSH via the terminal, like “ssh [email protected]” or similar. Open up Terminal, enter that and you’ll get a nice neat blue-screen with the same information on it. From here everything is done via the menu installer.
If you get kicked out of that interface just enter ‘raspiblitz’ and it will restart the menu.
Getting the Order Right
- Pick Your Poison For me I chose BitCoin and Lightning which is the default. There are other Crypto-currencies if that’s your choice then set your passwords and please use a Password manager with at least 32 characters - make it as secure as you can from Day One!
- TOR vs Public IP Some privacy nuts run behind TOR to obscure their identity and location. I’ve done both and can tell you that TOR takes a lot longer to sync and access and will kill off a lot of apps and makes opening channels to some other nodes and services difficult or impossible. For me, I just wanted a working node that was as interoperable as possible so I chose Public IP.
- Let the BlockChain Sync Once your SSD is formatted, if you have the patience then I recommend syncing the Blockchain from scratch. I already had a copy of it that I SCP’d across from my Synology and it saved me about 36 hours but it also caused my installer to ungracefully exit and it took me another day of messing with the command line to get it to start again and complete the installation. In retrospect, not a time saver end to end but your mileage may vary.
- Set up a New Node Or in my case, I recovered my old node at this point by copying the channel.backup over but for most others it’s a New Node and a new Wallet and for goodness sake when you make a new wallet; KEEP A COPY OF YOUR SEED WORDS!!!
- Let Lightning “Sync” It’s actually validating blocks technically but this also takes a while. For me it took nearly 6 hours for both Lightning and Bitcoin blocks to sync.
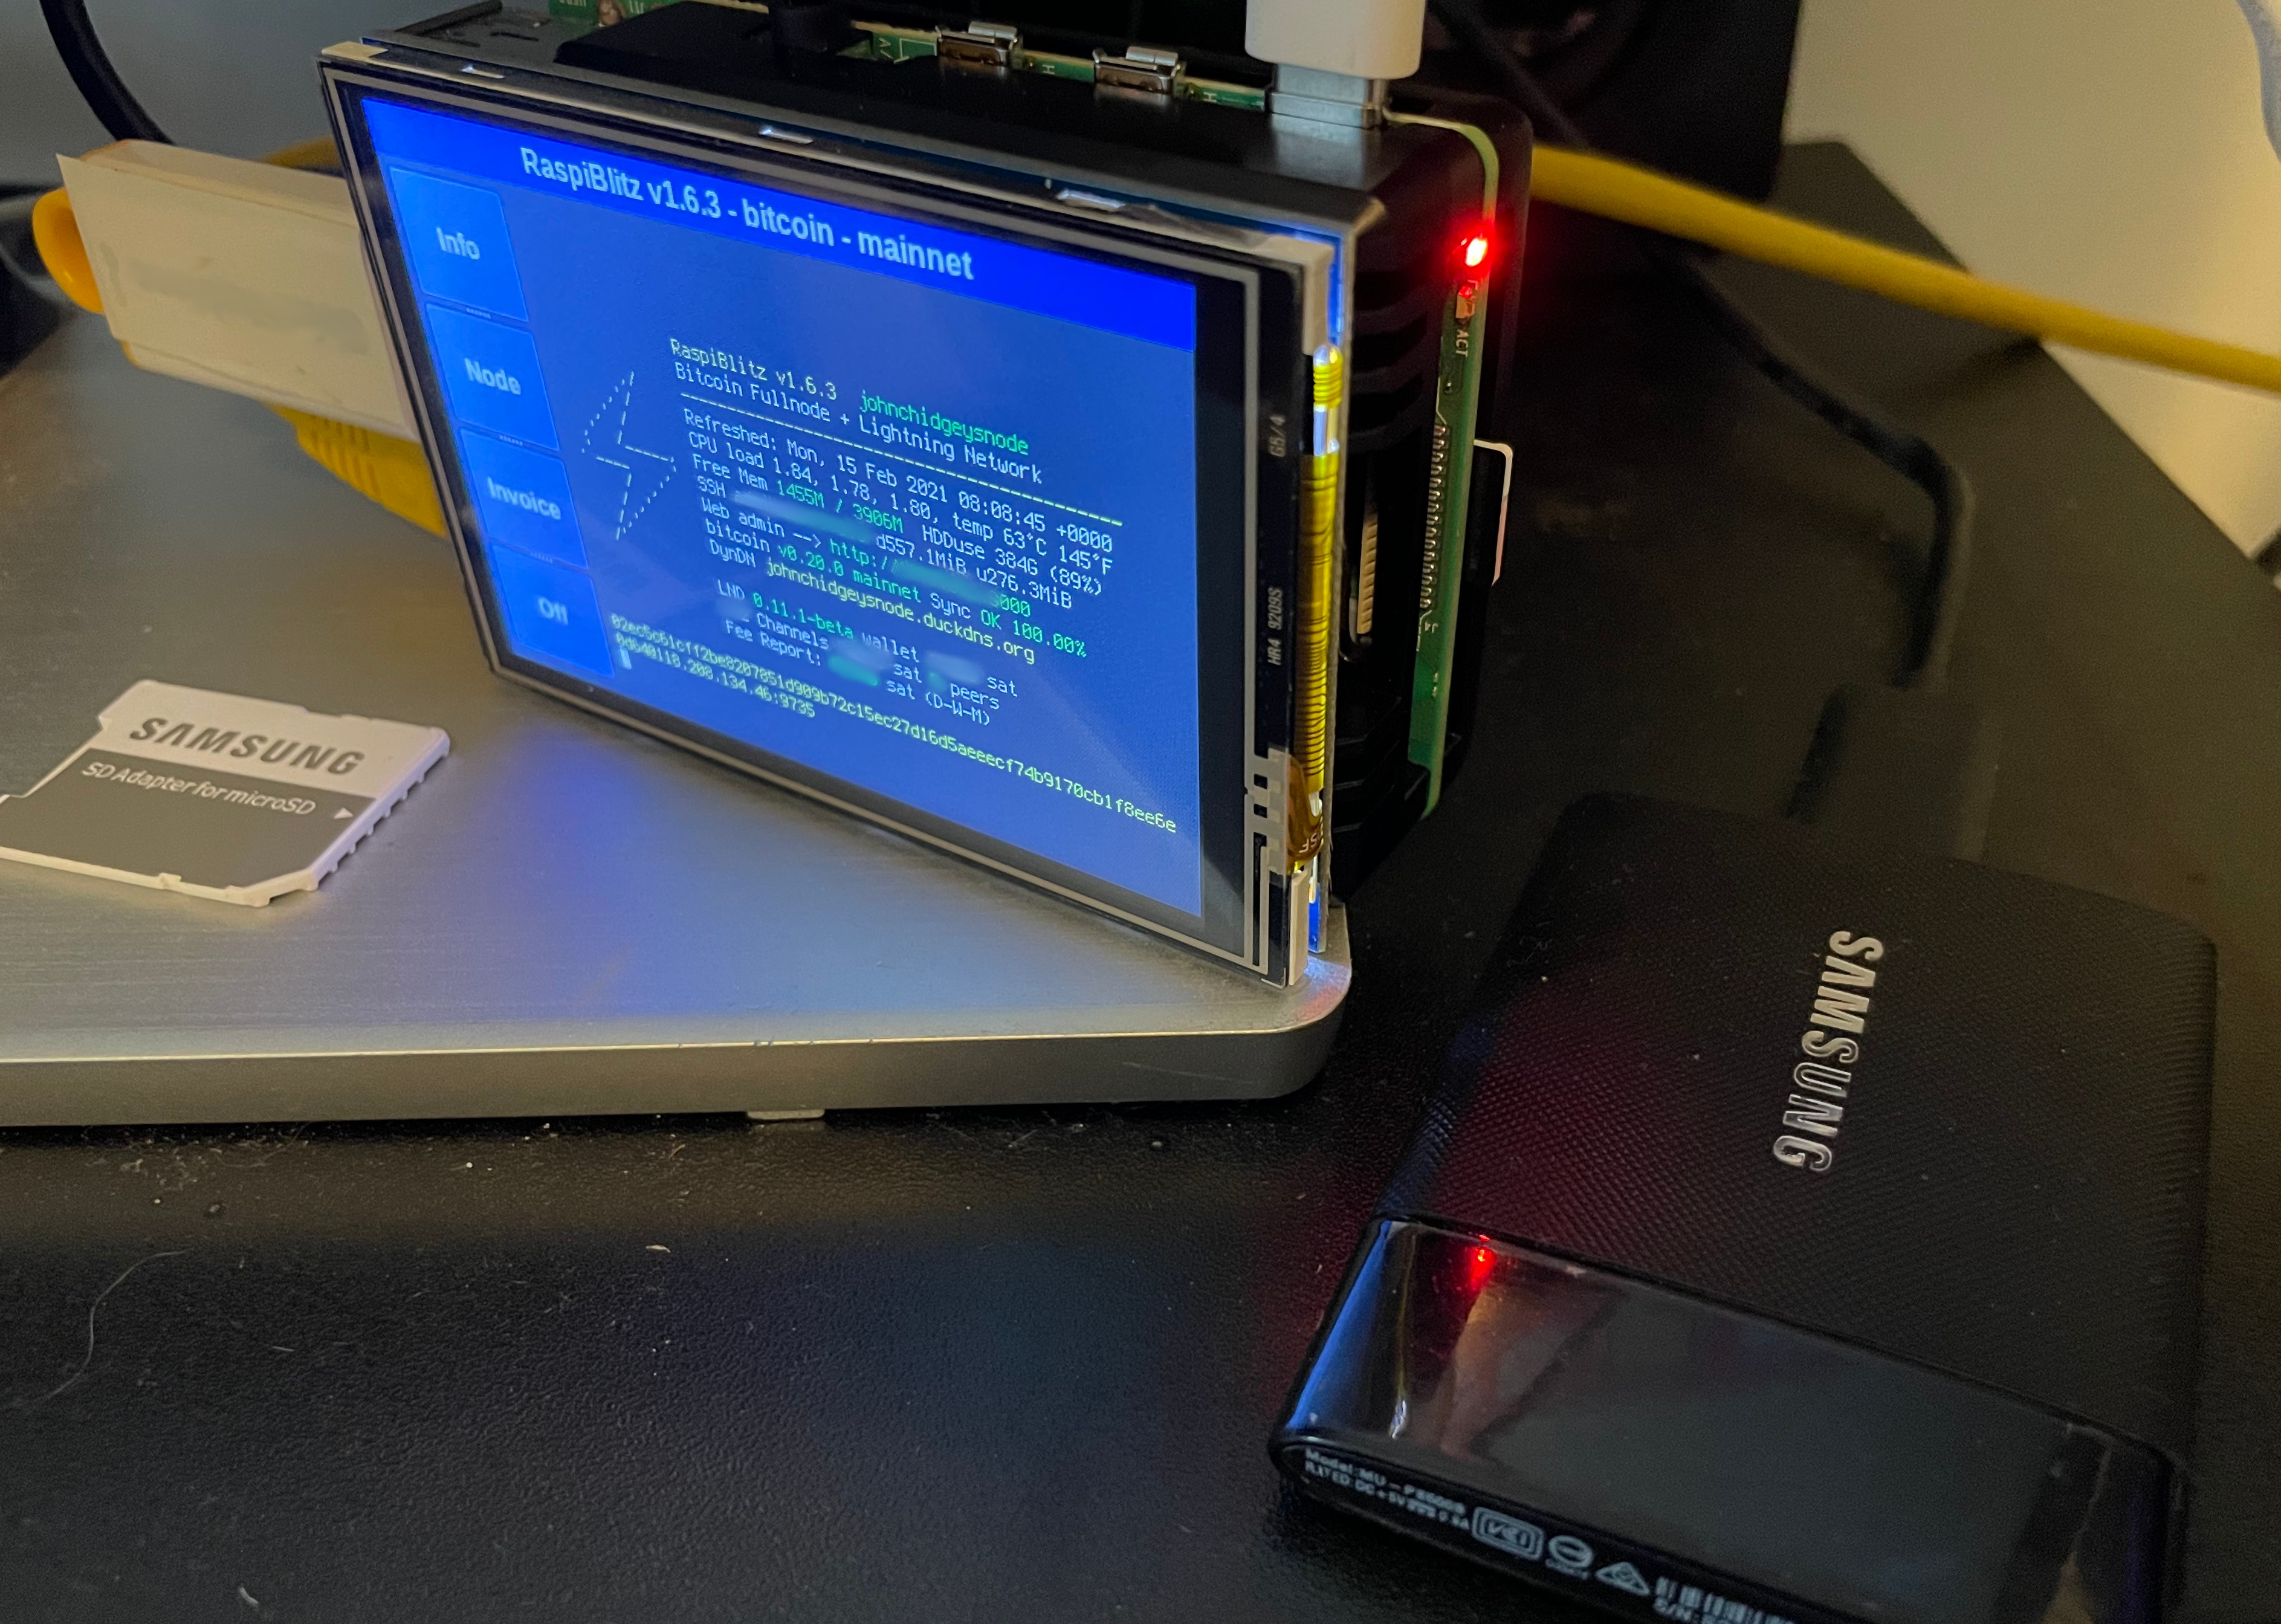 The Final Assembled Node up and Running
My Money from Attempt 2 on the Synology Recovered!
I was able to copy the channel.backup and wallet.dat files from the Synology and was able to successfully recover my $60 AUD investment from my previous attempts, so that’s good! (And it worked pretty easily actually)
In order to prevent any loss of wallet, I’ve also added a USB3.0 Thumb Drive to the other USB3.0 port and set up “Static Channel Backup on USB Drive” which required a brief format to EXT4 but worked without any real drama.
Conclusion
Building the node using a salvaged SSD cost under $200 AUD and took about 2 days to sync and set up. Installing the software and setting up all the services is another story for another post, but it’s working great!
BitCoin, Lightning and Patience
I’ve been vaguely aware of BitCoin for a decade but never really dug into it until recently, as a direct result of my interest in the Podcasting 2.0 team.
My goals were:
- Minimise expenditure and transaction fees
- Use existing hardware and open-source software
- Setup a functional lightning node to both make and accept payments
I’m the proud owner of a Synology, and it can run docker, and you can run BitCoin and Lightning in Docker containers? Okay then…this should be easy enough, right?
BitCoin Node Take 1
I set up the kylemanna/bitcoind docker on my Synology and started it syncing to the Mainnet blockchain. About a week later and I was sitting at 18% complete and averaging 1.5% per day and dropping. Reading up on this and the problem was two-fold: validating the blockchain is a CPU and HDD/SSD intensive task and my Synology had neither. I threw more RAM at it (3GB out of the 4GB it had) with no difference in performance, set the CPU restrictions to give the Docker the most performance possible with no difference and basically ran out of levers to pull.
I then learned it’s possible to copy a blockchain from one device to another and the Raspberry Pi’s sold as your own private node come with the blockchain pre-synced (up to the point they’re shipped) so they don’t take too long to catch up to the front of the chain. I then downloaded BitCoin Core for MacOS and set it running. After two days it had finished (much better) and I copied the directories to the Synology only to find that the settings on BitCoin Core were to “prune” the blockchain after validation, meaning the entire blockchain was no longer stored on my Mac, and the docker container would need to start over.
Ugh.
So I disabled pruning on the Mac, and started again. The blockchain was about 300GB (so I was told) and with my 512GB SSD on my MBP I thought that would be enough, but alas no, as the amount of free space diminished at a rapid rate of knots, I madly off-loaded and deleted what I could finishing with about 2GB to spare and the entire blockchain and associated files weighed in at 367GB.
Transferring them to the Synology and firing up the Docker…it worked! Although it had to revalidate the 6 most recent blocks (taking about 26 minutes EVERY time you restarted the BitCoin docker) it sprang to life nicely. I had a BitCoin node up and running!
Lightning Node Take 1
There are several docker containers to choose from, the two most popular seemed to be LND and c-Lightning. Without understanding the differences I went with the container that was said to be more lightweight and work better on a Synology: c-Lightning.
Later I was to discover that more plugins, applications, GUIs, relays (Sphinx for example) only work with LND and require LND Macaroons, which c-Lightning doesn’t support. Not only that design decisions by the c-Lightning developers to only permit single connections between nodes makes building liquidity problematic when you’re starting out. (More on that in another post someday…)
After messing around with RPC for the cLightning docker to communicate with the KyleManna Bitcoind docker, I realised that I needed to install ZMQ support since RPC Username and Password authentication were being phased out in preference for a token authentication through a shared folder.
UGH
I was so frustrated at losing 26 minutes every time I had to change a single setting in the Bitcoin docker, and in an incident overnight both dockers crashed, didn’t restart and then took over a day to catch up to the blockchain again. I had decided more or less at this point to give up on it.
SSD or don’t bother
Interestingly my oldest son pointed out that all of the kits for sale used SSDs for the Bitcoin data storage - even the cheapest versions. A bit more research and it turns out that crunching through the blockchain is less of a CPU intensive exercise and more of a data store read/write intensive exercise. I had a 512GB Samsung USB 3.0 SSD laying around and in a fit of insanity decided to try connecting it to the Synology’s rear port, shift the entire contents of the docker shared folders (that contained all of the blocks and indexes) to that SSD and try it again.
Oh My God it was like night and day.
Both docker containers started, synced and were running in minutes. Suddenly I was interested again!
Bitcoin Node Take 2
With renewed interest I returned to my previous headache - linking the docker containers properly. The LNCM/Bitcoind docker had precompiled support for ZMQ and it was surprisingly easy to set up the docker shared file to expose the token I needed for authentication with the cLightning docker image. It started up referencing the same docker folder (now mounted on the SSD) and honestly, seemed to “just work” straight up. So far so good.
Lightning Node Take 2
This time I went for the more-supported LND, and picked one that was quite popular by Guggero, and also spun it up rather quickly. My funds on my old cLightning node would simply have to remain trapped until I could figure out how to recover them in future.
Host-Network
The instructions I had read all related to TestNet, and advised not to use money you weren’t prepared to lose. I set myself a starting budget of $40 AUD and tried to make this work. Using the Breez app on iOS and their integration with MoonPay I managed to convert about 110k Sats. The next problem was getting them from Breez to my own Node and my attempts with Lightning failed with “no route.” (I learned later I needed channels…d’uh) Sending via BitCoin was the only option. “On-chain” they call it. This cost me a lot of Sats, but I finally had some Sats on my Node.
Satoshi’s
BitCoin has a few quirky little problems. One interesting one is that a single BitCoin is worth a LOT of money - currently 1 BTC = $62,000.00 AUD. So it’s not a practical measure and hence BitCoin is more commonly referred to in Satoshi’s which are 1/100,000,000th of a BitCoin. BitCoin is a crypto-currency which is transacted on the BitCoin blockchain, via the BitCoin network. Lightning is a Layer 2 network that also deals in BitCoin but in smaller amounts, peer to peer connected via channels and because the values are much smaller is regularly transacted in values of Satoshi’s.
Everything you do requires Satoshi’s (SATS). It costs SATS to fund a channel. It costs SATS to close a channel. I couldn’t find out how to determine the minimum amount of Sats needed to open a channel without first opening one via the command line. I only had a limited number of SATs to play with so I had to choose carefully. Most channels wanted 10,000 or 20,000 but I managed a find a few that only required 1,000. The initial thought was to open as many channels as you could then make some transactions and your inbound liquidity will improve as others in the network transact.
Services exist to help build that inbound liquidity, without which, you can’t accept payments from anyone else. Another story for a future post.
Anything On-Chain Is Slow and Expensive
For a technology that’s supposed to be reducing fees overall, Lightning seems to cost you a bit up-front to get into it, and anytime you want to shuffle things around, it costs SATS. I initially bought into it wishing to fund my own node and try for that oft-touted “self-soverignty” of BitCoin, but to achieve that you have to invest some money to get started. In the end however I hadn’t invested enough because my channels I opened didn’t allow inbound payments.
I asked some people to open some channels to me and give me some inbound liquidity however not a single one of them successfully opened. My BitCoin and Lightning experiment had ground to a halt, once again.
At first I experimented with TOR, then by publishing on an external IP address, port-forwarding to expose the Lightning external access port 9735 to allow incoming connections. Research into why highlighted that I needed to recreate my dockers but connect them to a custom Docker network and then resync the containers otherwise the open channel attempts would continue to fail.
I did that and it still didn’t work.
Then I stumbled across the next idea: you needed to modify the Synology Docker DSM implementation to allow direct mounting of the Docker images without them being forced through a Double-NAT. Doing so was likely to impact my other, otherwise perfectly happily running Dockers.
UGH
That’s it.
I’m out.
Playing with BitCoin today feels like programming COBOL for a bank in the 80s
Did you know that COBOL is behind nearly half of all financial transactions in 2017? Yes and the world is gradually ripping it out (thankfully).
IDENTIFICATION DIVISION.
   PROGRAM-ID. CONDITIONALS.
   DATA DIVISION.
     WORKING-STORAGE SECTION.
     *> I'm not joking, Lightning-cli and Bitcoin-cli make me think I'm programming for a bank
     01 NUM1 SATSJOHNHAS 0(0).
   PROCEDURE DIVISION.
     MOVE 20000 TO NUM1.
     IF NUM1 > 0 THEN
       DISPLAY 'YAY I HAZ 20000 SATS!'
     END-IF
     *> I'd like to make all of transactions using the command line, just like when I do normal banking...oh wait...
     EVALUATE TRUE
       WHEN SATS = 0
         DISPLAY 'NO MORE SATS NOW :('
     END-EVALUATE.
   STOP RUN.
There is no doubt there’s a bit geek-elitism amongst many of the people involved with BitCoin. Comments like “Don’t use a GUI, to understand it you MUST use the command line…” reminds me of those that whined about the Macintosh in 1984 having a GUI. A “real” computer used DOS. OMFG seriously?
A real financial system is as painless for the user as possible. Unbeknownst to me, I’d chosen a method that was perhaps the least advisable: the wrong hardware running the wrong software, running a less-compatible set of dockers and my conclusion was that setting up your own Node that you control is not easy.
It’s not intuitive either and it will make you think about things like inbound liquidity that you never thought you’d need to know, since you’re geek - not an investment banker. I suppose the point is that owning your own bank means you have to learn a bit about how a bank needs to work and that takes time and effort.
If you’re happy to just pay someone else to build and operate a node for you then that’s fine and that’s just what you’re doing today with any bank account. I spent weeks learning just how much I don’t want to be my own bank - thank you very much, or at least I didn’t want to using the equipment that I had laying about and living in the Terminal.
Synology as a Node Verdict
Docker was not reliable enough either. In some instances I would modify a single dockers configuration file and restart the container only get “Docker API failed”. Sometimes I could recover by picking the Docker Container I thought had caused the failure (most likely the one I modified but not always) by clearing the container and restarting it.
Other times I had to completely reboot the Synology to recover it and sometimes I had to do both for Docker to restart. Every restart of the Bitcoin Container and there would go another half an hour restarting and then the container would “go backwards” and be 250 blocks behind taking a further 24-48 hours of resynchronising with the blockchain before the Lightning Container could then resynchronise with it. All the while the node was offline.
Unless your Synology is running SSDs, has at least 8GB of RAM, is relatively new and you don’t mind hacking your DSM Docker installation, you could probably make it work, but it’s horses for courses in the end. If you have an old PC laying about then use that. If you have RAM and SSD on your NAS then build a VM rather than use Docker, maybe. Or better yet, get a Raspberry Pi and have a dedicated little PC that can do the work.
Don’t Do What I Did
Money is Gone
The truth is in an attempt to get incoming channel opens working, I flicked between Bridge and Host and back again, opening different ports with Socks failed errors and finally gave up when after many hours the LND docker just wouldn’t connect via ZMQ any more.
And with that my $100 AUD investment is now stuck between two virtual wallets.
I will keep trying and report back but at this point my intention is to invest in a Raspberry Pi to run my own Node. I’ll let you know how that goes in due course.